
Configuration Guide User Manual
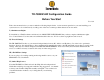


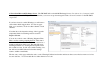

The TR-700W Settings Window
II) The Settings Process
Making settings to control the operation of the TR-700NW/AW is
a remarkably straightforward process that is all accomplished
through the Settings Window, shown here. Initially the device
must be set up via USB in order to establish the Network Settings.
Once this is done the device can be reconfigured over a network.
The window is divided vertically in two, with page selections in
the left hand pane and page contents on the right. Settings are
made by selecting a settings page from the pane on the left and
then filling in the entries in the page on the right. The process
starts with the top page (Device Settings) and then moving down
the page list, making the settings page by page, until the last page
(Settings for Sending Recorded Data) has been completed. (We
will talk about the Settings Table later.)
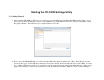
AFTER MAKING SETTINGS BE SURE TO CLICK ON
“SEND SETTINGS” BEFORE LEAVING EACH SCREEN
III) Basic Operation Settings
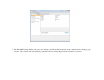
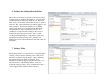
1. Device Settings
There is not much to discuss here. The Device Name and Description fields can be used to enter a logical name for the TR-700W that
may have more meaning to you than the factory assigned serial number. This can be particularly helpful if you have more than one
700W on your network. You can also customize the Channel Names, select the mode of the LCD display and whether to lock out the
unit’s front panel buttons. The LAN Password will be used to access the 700W later when it is connected to your network, rather than
via USB.