
Operating Instructions and Installation Instructions


Page.5
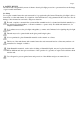
3. REMOTE CONTROL
3.1 General
* The unit is operated using a radio-controlled remote control. This consists of a manual transmitter and a re-
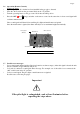
ceiver. The receiver is connected to the gas control block.
* The receiver and the gas control block are located in the operating box.
* If there is no change in flame height for a 6-houre period the transmission / communication turn down appli-
cation wil turn down the pilot flame.
* If there is no change in flame height for a 5-days period the appliance will be turn down.
* Appliance wil be turn off if there is no change in flame height for 5 days.
* Low battery receiver shut off; If power is low in receiver the systems shuts off yhe fire completely.
* When in use with 220V adapter and the power shuts off, the batteries will take over the power supply to let the
receiver automatic function normally.
* Designated low and high fire settings; double click the small flame button and the flame will be automatically
go to low flame. double click the large flame button and the flame will be automatically go to high flame.
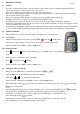
3.2 Manual transmitter
* The transmitter uses a radio-controlled signal. The signal code is set at the factory
3.3 Screen setup
* After the batteries have been inserted, press the OFF
button and (small) at the
same time to toggle between °F (and 12 hour clock) and °C (and 24 hour clock).
* Wait a moment or press OFF to return to MAN mode.
33.4 Setting the time
* Press (large) and
(small) at the same time to go to the SET mode or programming
mode.
* The time can be set while the screen is flashing.
* Press to set the hour and minutes.
* Wait a moment or press OFF to return to MAN mode.
3.5 Setting the timer: P1 and P2
* Briefly press the SET button to select the required mode
or
* Keep the SET button pressed until the screen starts flashing.
* Then press or to set the required temperature.
* Wait a moment or briefly press the OFF button to select the MAN mode.
* If the temperature setting also needs to be switched off (to reduce battery use), turn it down until
appears on the screen.
* Once the temperatures have been set, the programme can be set by pressing the SET button. Programme
will appear. Keep the SET button pressed to set the time for the first on and off programme.
Set the time you want the unit to switch on. Then press the SET button to switch the unit off.
* Press SET again for the programme.
Set the time you want the unit to switch on. Then press the SET button to switch the unit off.
* Press SET again to see the current programme on the display.
Manual transmitter
P1
P2