
Operation Manual


ab DeVELOPER
ab DeVELOPER
USER GUIDE
USER GUIDE
FIG. 15 FIG. 16
FIG. 6 FIG. 7 FIG. 8
FIG. 9 FIG. 11
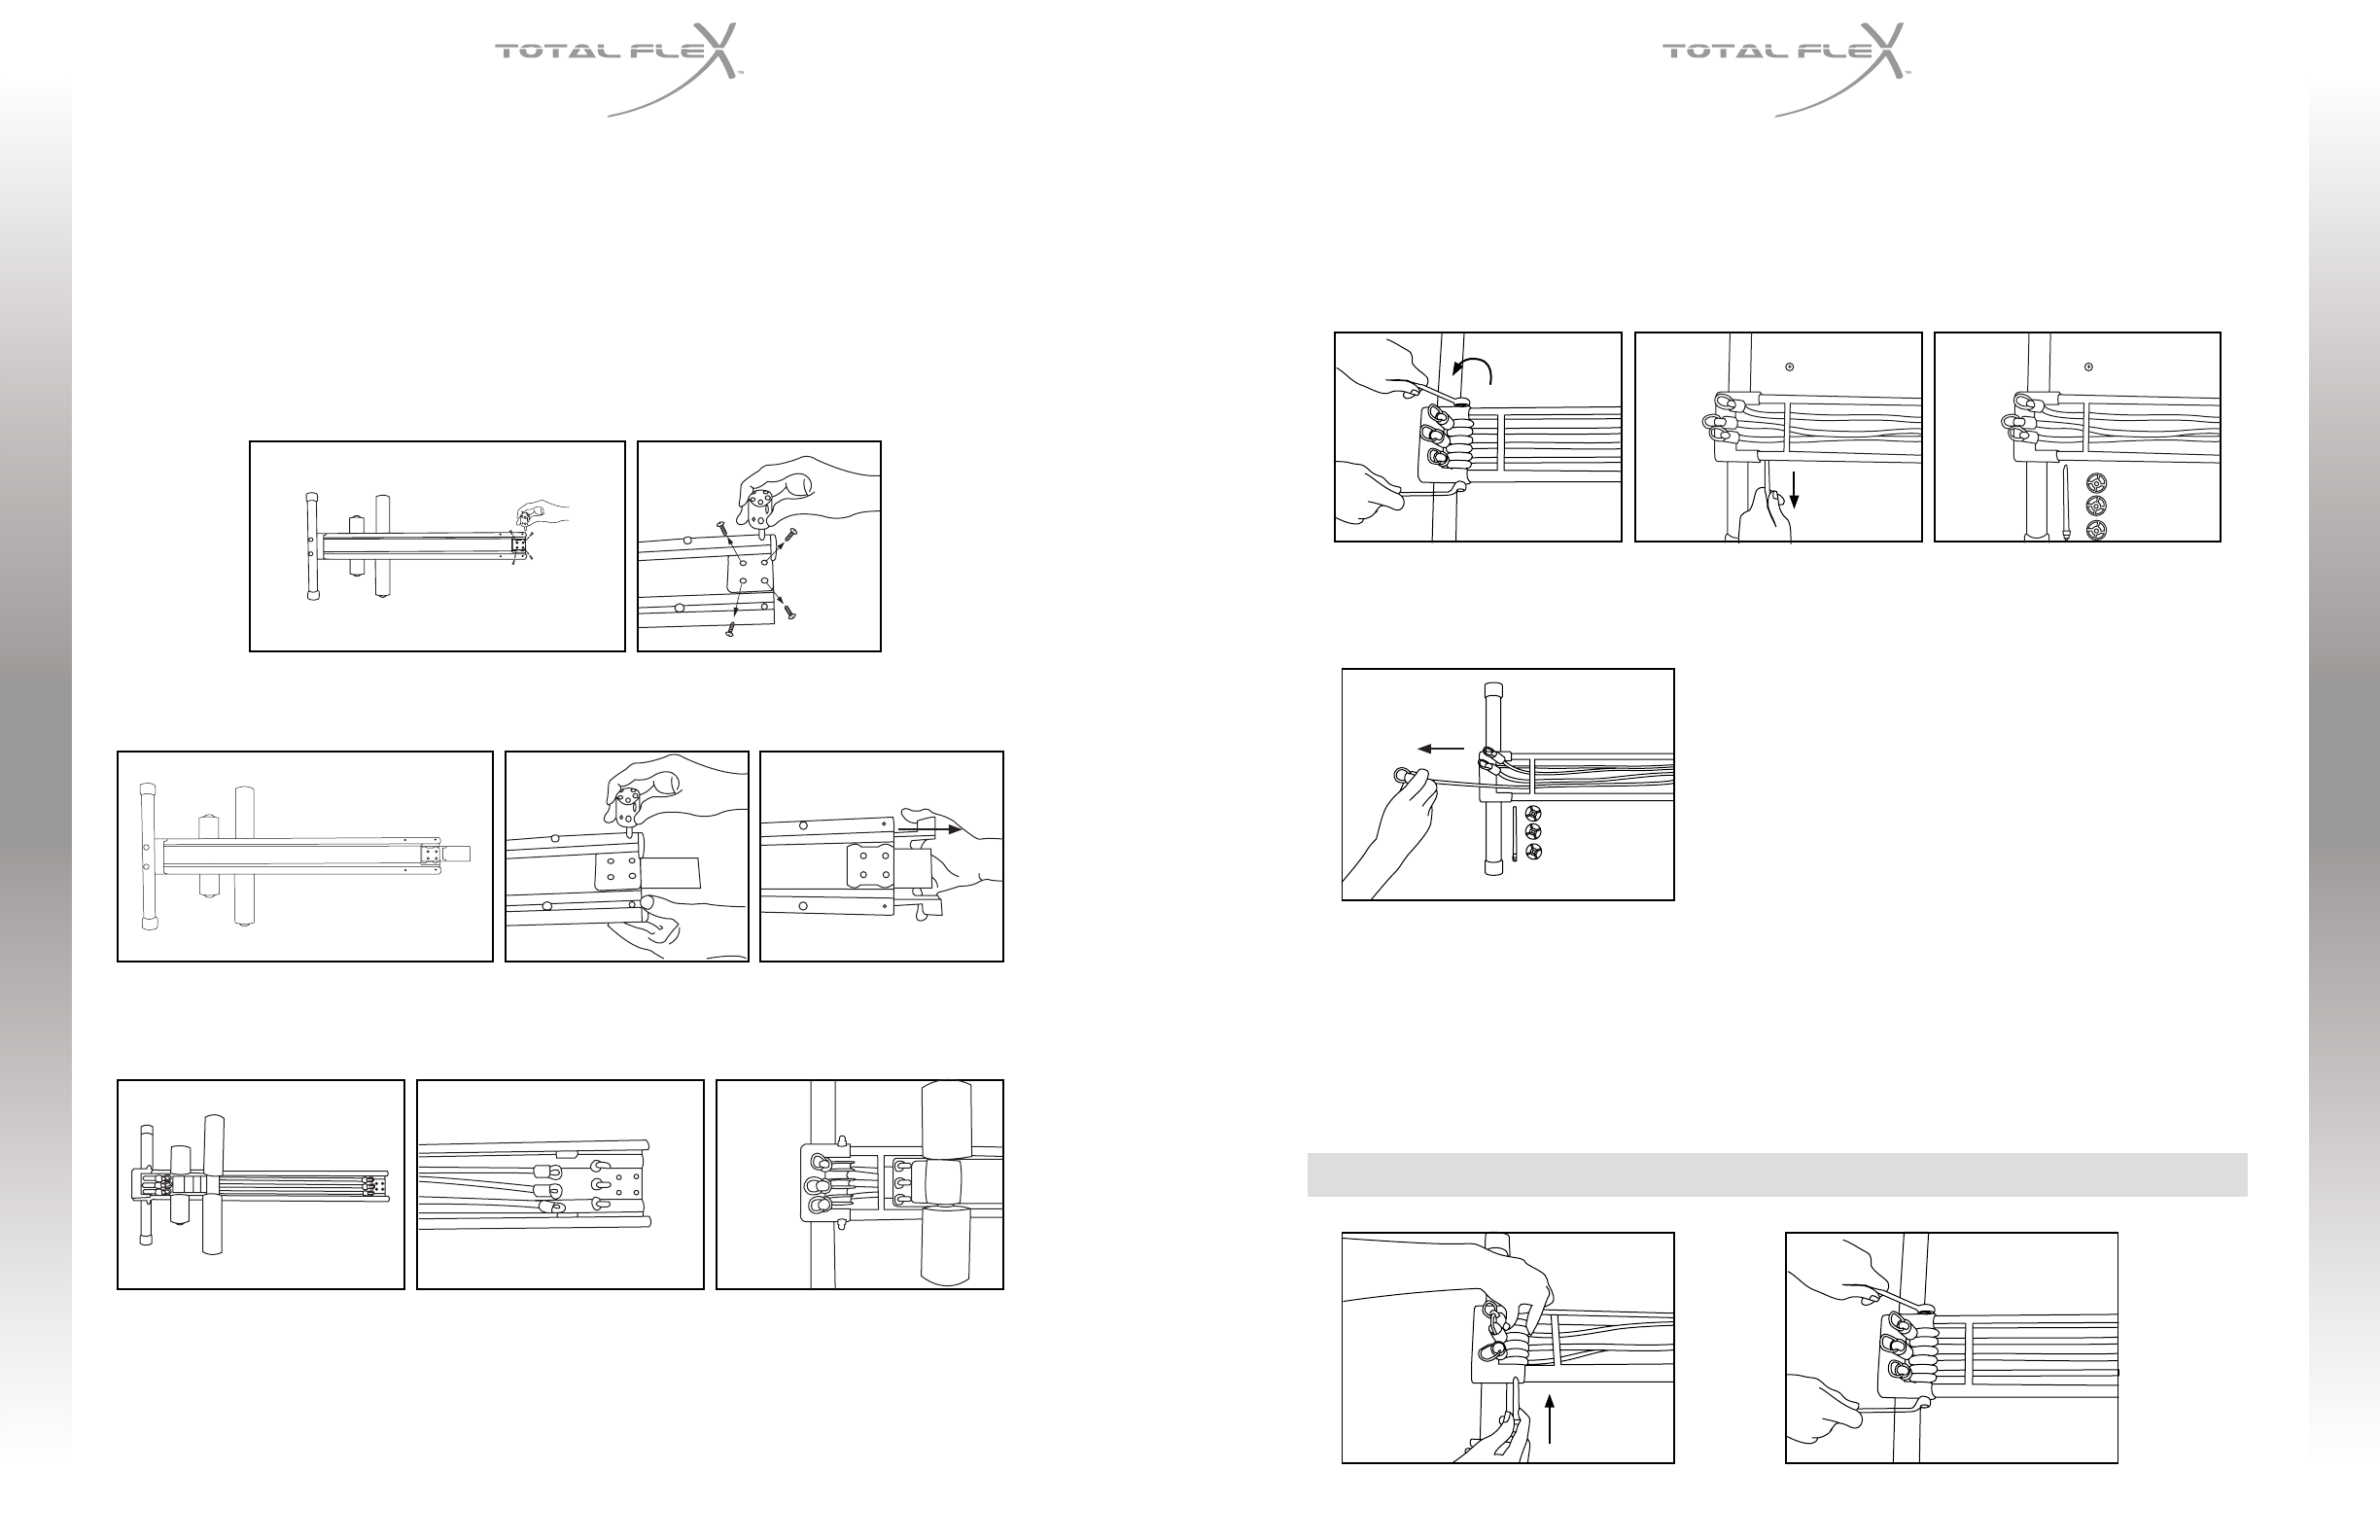
Using two no. 13 wrenches (not provided), unscrew the Acorn Nut on one side of the Pulley Axle.
(see Fig. 9). Remove the Axle by pulling it sideways [see Fig. 10 & 11].
Pull the damaged and/or worn Resistance Band(s) out from underneath the Carriage [see Fig. 12].
Fitting New Resistance Band(s)
Fit a new Resistance Band by pushing it underneath the Rail Tube, then underneath the Carriage
Assembly [see Fig. 13 & 14].
Important: Do not hook the Resistance Bands to the Rail Hooks
Removing a Damaged or Worn Resistance Band
To replace a worn or damaged Resistance Band, proceed as follows:
Fold the Legs and lay the unit on the floor with the Rail folded over the Seat [see Fig. 1]. Use the Allen
Wrench to unscrew the 4 Button Head Screws connecting the Rail Assembly to the Rail Hinge [see Fig. 2]..
Separate the Rail Assembly from the machine [see Fig. 3], unscrew the Rail Cover and slide out [see Fig. 4 & 5].
Turn the Rail Assembly over with the Foam Rollers facing up [see Fig. 6], unhook the Resistance Bands
from the Rail hooks [see Fig. 7] and unhook the Resistance Bands from the Carriage Hooks [see Fig. 8].
REPLACING RESISTANCE BANDS
FIG. 12
FIG. 10
REPLACING RESISTANCE BANDS
FIG. 3 FIG. 4 FIG. 5
15 16
FIG. 1
FIG. 2