
Data Sheet


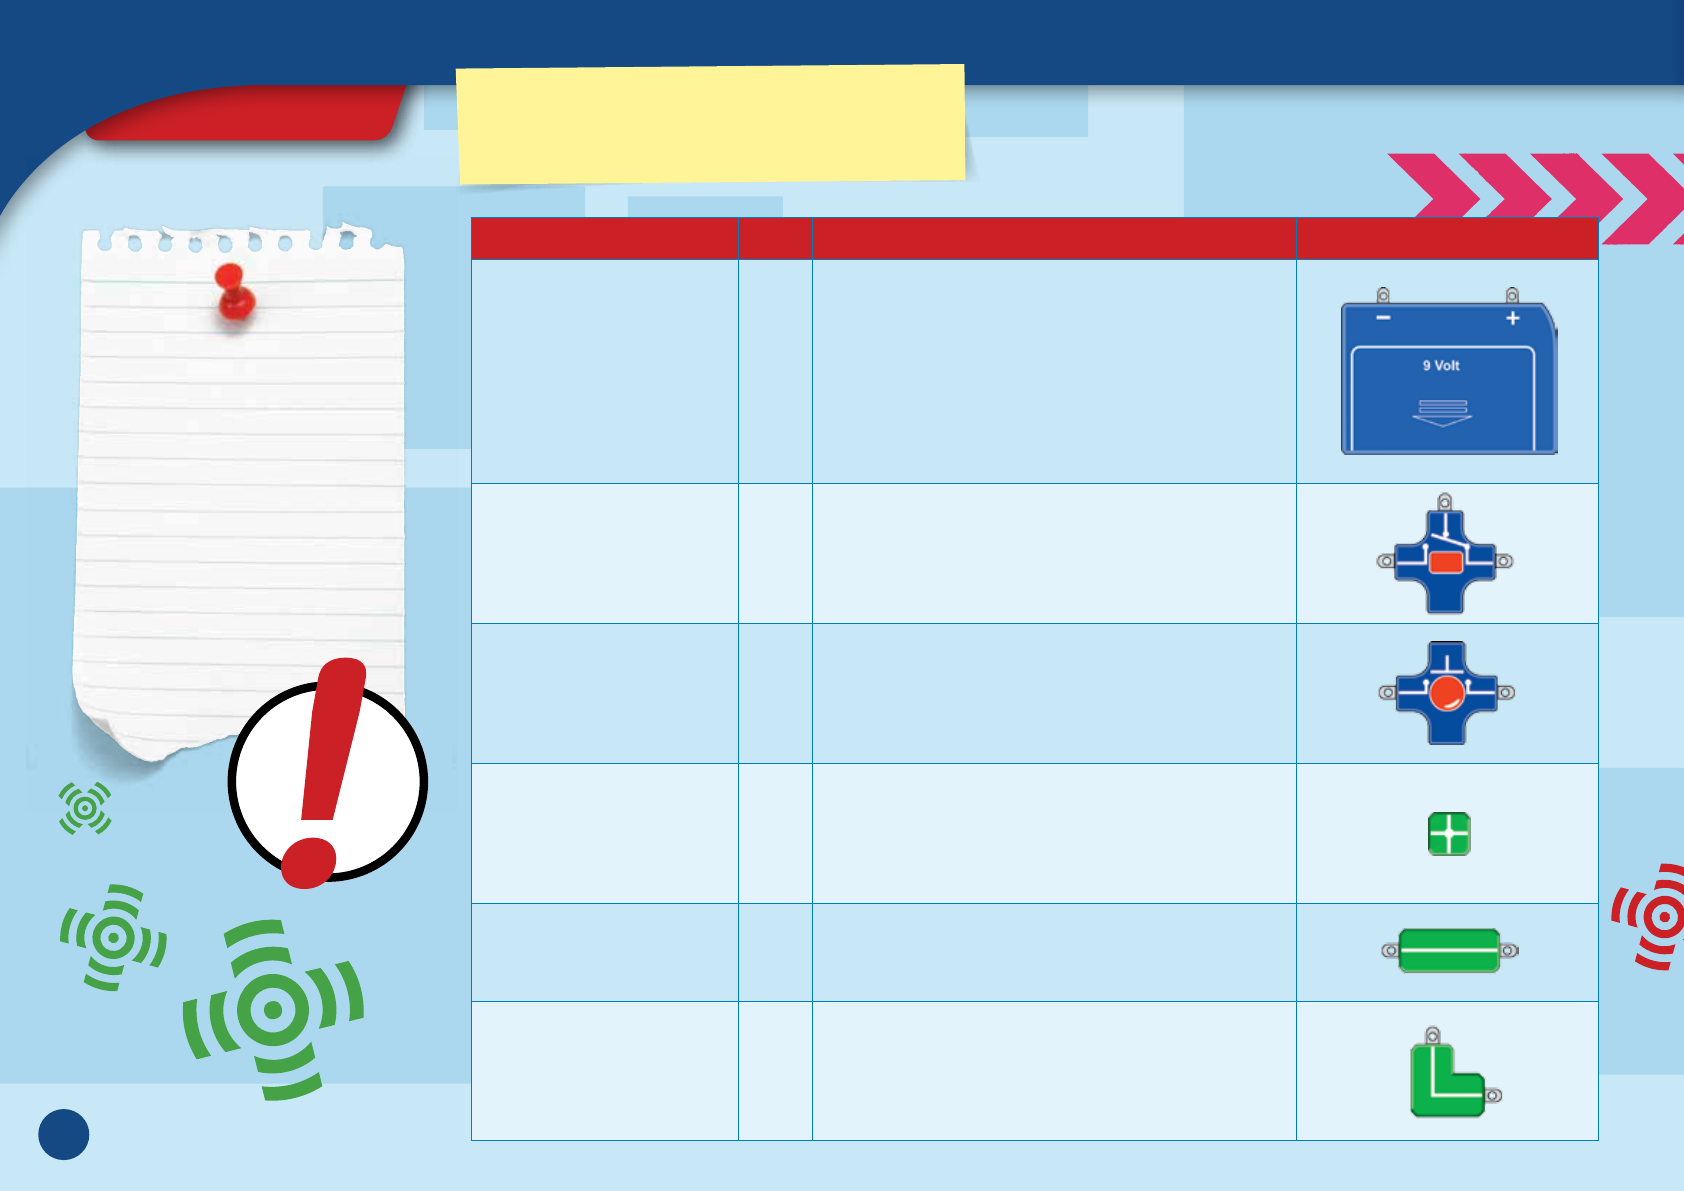
Component Name Qty. Component Description Component Illustration
Battery compartment
Item No.
Never connect the two
battery terminals directly
together! The battery and
cables could get hot and
cause a fire. Also, the battery
would drain very quickly.
This is the power pack that supplies the current you
need for the electrical experiments. Before starting the
experiments, attach a -volt square battery to the
battery clip. Then, you will be able to draw electrical
current from the two terminals (+ and -).
Selector switch
Item No.
This electrically connects two of the three contact
plugs, depending on the position of the switch knob.
Push button
Item No.
This electrically connects the two terminals when you
press the button.
Connector with terminals
(X-shaped)
Item No.
For connecting components. The metal plugs of other
components are inserted into the side slits so that they
are electrically connected to each other as indicated by
the white lines. In the instructions, they are called
“X-connectors.”
Straight connector with
prongs (I-shaped)
Item No.
For the electrical connection of components. The two
plugs are electrically connected to each other. In the
instructions, they are referred to as “I-connectors.”
Angled connector with
prongs (L-shaped)
Item No.
For the electrical connection of components, but in a
way that guides the current at a right angle. Looks like
an “L,” hence referred to as an “L-connector” in the
instructions.
The components
in your kit
This list provides brief descriptions
and illustrations of all the
components in the experiment kit.
›
›
›
KIT CONTENTS
GOOD TO KNOW!
If you are missing any
parts, please contact Thames Kosmos
customer service.