
Operation and maintenance manual


Rear Axle Group - Differential Drive Head
12
Section 160-0020
SM 2151 6-02
INSTALLATION
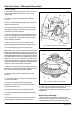
Numbers in parentheses refer to Fig. 1, unless
otherwise specified.
WARNING
To prevent personal injury and property
damage, be sure wheel blocks, blocking
materials and lifting equipment are properly
secured and of adequate capacity to do the job
safely.
Drive Head Unit into Axle Casing
1. Clean mating faces of drive head and axle casing
with Loctite 7070 cleaner or similar chlorinated solvent
then apply a continuous bead of Loctite Gasket
Eliminator 515 to one of mating faces prior to
assembly.
2. Using suitable lifting equipment, offer drive head unit
to axle casing (6) ensuring that drive head is in correct
position, with matching marks lined up.
3. Fit axle casing nuts (41) and washers (42) then tighten
nuts to a torque of 230 - 258 Nm (170 - 190 lbf ft).
Final Assembly
1. Carefully feed driveshaft assembly (1, Fig. 2) back
into axle casing to locate driveshaft splines in
wheel (8).
2. Coat hub mating face of planet carrier (8, Fig. 2) with
Loctite 275 then offer planet carrier unit to hub
(2, Fig. 2) using suitable lifting gear if required. Ensure
planet gear teeth mesh with sun gear.
3. Install bolts (4, Fig. 2) and washers (3, Fig. 2) then
tighten to a torque of 142 -149 Nm (105 - 110 lbf ft).
4. Install bolt (6, Fig. 2) and washer (5, Fig. 2) then
tighten to a torque of 237 - 244 Nm (175 - 180 lbf ft).
5. Rotate both hubs until bottom of oil filler/level plug
holes are approximately 13 mm (0.5 in) above axle
centre line (level with diff filler/level hole).
6. Add gear oil of the type specified in Section
300-0020, LUBRICATION SYSTEM, through diff filler/
level hole until the oil is level with bottom of filler/level
hole.
7. Check oil level to bottom of filler/level hole in both
hubs and top up as necessary. Leave oil to settle for
15 minutes then check oil level again in both hubs and
drive head.
8. Install then tighten filler/level plugs in drive head and
both hubs.
9. Install rear axle onto vehicle. Refer to Section 180-
0040, REAR SUSPENSION.
10. Line-up match marks and reconnect driveline to
coupling flange (33). Coat threads of driveline
capscrews at transmission with Loctite 270. Tighten
capscrews to a torque of 153 Nm (113 lbf ft). Refer to
Section 130-0020, REAR DRIVELINES.
11. Install breather tube in adaptor.
12. Clean interfaces between road wheels, hub and
wheel nuts.
13. Re-fit road wheels, securing with wheel nuts.
Remove stands or timber supports and lower vehicle to
ground. Fully tighten wheel nuts to a torque of 400 lbf ft
(540 Nm).
14. Remove wheel blocks.
MAINTENANCE
Numbers in parentheses refer to Fig. 1, unless
otherwise specified.
WARNING
To prevent personal injury and property
damage, be sure wheel blocks, blocking
materials and lifting equipment are properly
secured and of adequate capacity to do the job
safely.
General
At first service, then every 1 000 hours (6 months),
check the following and repair or replace where
necessary:
a - Coupling flange for wear/damage.
b - Pinion oil seals for leaks.
c - Breather tube for signs of leakage.
d - Leaks around joints.
e - General condition and tightness of nuts and bolts.
f - General condition of axle casing.
Oil Change Period
Note: For recommended oils, refer to Section