
Operation Manual

- 3 -
Under these operating conditions the display shows
the xed current value alternating with “LCC”.
NOTE: The user can exclude this protection (for
details see the section SAFEGUARDS).
- TRONIC automatic charging on.
This is used to charge the battery or batteries
automatically in the same way as above but with
preset voltage thresholds.
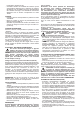
9- Display for showing the selected parameter. The
display also shows a number of abbreviations relating
to the present status/mode (FIG. D).
5. OPERATION
BEFORECHARGING
NB:Beforechargingcheckthatthe capacity of the
battery(Ah)whichistobecharged,isnotinferiorto
thatreportedonthedatatable.(Cmin).
Followtheinstructions,takinggreatcaretorespect
theordergivenbelow.
- Remove the caps of the battery charger (if foreseen) so
as to let the gas produced go out.
- Check that the level of the electrolyte covers the plates
of the battery. If these were not covered add distilled
water and cover them up to 5-10 mm.
WARNING: USE THE MAXIMUM CAUTION
DURING THIS OPERATION AS THE
ELECTROLYTE IS A HIGHLY CORROSIVE
ACID.
- Please remember that the exact charge status of the
battery can only be determined by using a densimeter
which allows measurement of the specic gravity of the
electrolyte the following indicate approximate density
values for the solute (Kg/l at 20°c):
1.28 = charged battery
1.21 = half-charged battery
1.14 = at battery
- Check the polarities of the battery terminals: positive
for the + symbol and negative for the - symbol.
NOTE: if the symbols are indistinguishable remember
that the positive terminal is the one not connected to
the vehicle chassis.
- Connect the red charge clamp to the positive terminal
of the battery ( + symbol).
- Connect the black charge clamp to the vehicle chassis,
at a safe distance from the battery and the fuel pipe.
NOTE: if the battery is not installed in the vehicle,
connect the clamp directly to the negative terminal of
the battery (- symbol).
- Power the battery charger by inserting the power cable
in the mains outlet and turning the main switch ON.
- Check the battery voltage and make sure that the
settings on the battery charger panel are compatible with
the specications of the battery being charged. These
checks should be carried out with the corresponding
key in ”Test” mode.
CHARGING
- Press the corresponding key to switch to “CHARGE”
mode
- Set an appropriate current value using the potentiometer
on the front panel (FIG.B-5).
- Monitor the battery voltage and charge current
parameters on the display using the V / I key
(FIG.B-9).
AUTOMATICCHARGING
Press the corresponding key to pass to “TRONIC” mode
During this phase the battery charger will constantly
monitor the voltage over the battery terminals,
automatically supplying or cutting off the charge current
to the battery as necessary.
Also in this case it is possible to monitor the battery
voltage and charge current on the display using the V
/ I key.
The charge current can be set as illustrated. When it is
cut off the display will show the message “END”.
WARNING:SEALEDBATTERIES
Ifitisnecessarytochargethistypeofbattery
takegreatcare.Chargeslowlykeepinganeye
on the voltage over the battery terminals.
Whenthisvoltage,availableasparameter“V”onthe
display, reaches 14.4V for 12V batteries (28.8V for
24Vbatteries)werecommendyoustopcharging.
Simultaneouschargingofseveralbatteries(FIG.E)
This operation must be performed with great caution:
WARNING; do not simultaneously charge different types
of batteries or batteries with different capacities or levels
of discharge.
If you have to charge more than one battery at the same
time you can connect them “in series” or “in parallel”. Of
the two systems, we recommend connecting the batteries
in series because in this way it is possible to monitor the
current circulating in each battery, which will be the same
as that shown by the ” I ” parameter on the display.
NOTE: If two batteries with rated voltages of 12V are
connected in series, the corresponding button must set
the battery charger to 24V.
ENDOFCHARGING
- Press the corresponding key to switch to “TEST”
mode.
- Remove the power supply from the battery charger by
turning the switch to OFF (if present) and/or removing
the power supply cable from the mains outlet.
- Disconnect the black charge clamp from the chassis of
the vehicle or from the negative terminal of the battery
(- symbol).
- Disconnect the red charge clamp from the positive
terminal of the battery (+ symbol).
- Store the battery charger in a dry place.
- Close up the battery cells with the appropriate plugs (if
present).
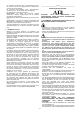
STARTING
Before starting the vehicle, make sure the battery
is connected properly to the respective (+ and
-) terminals, and that it is in good condition (not
sulphatedordud).
Never ever start vehicles with the batteries
disconnected from their respective terminals; the
presenceofthebatteryisessentialfortheelimination
ofpossibleovervoltagethatmaybegenerateddueto
energyaccumulatingintheconnectioncablesatthe
startingstage.
For starting turn the switch to the starting position
corresponding to the voltage of the vehicle. n this mode
the display will show only and exclusively “Str”.
FIG.B
Before turning the starter key, it is essential to make a
rapid charge of 5-10 minutes, which will make starting
much easier.
Rapid charging should always be done with the
batterychargerswitchedtothechargepositionand
NOTtostarting.
WARNING: Before starting, check the vehicle
manufacturer’s instructions carefully!
- Make sure the power supply line is protected with fuses
or automatic switches whose size corresponds to that
given on the data plate with the symbol (
).
- In order to prevent overheating in the battery charger,
ALWAYS carry out the starting operation according
to the duty cycle (work/pause) as indicated on the
appliance (e.g. START 3s ON 120s OFF-5 CYCLES).
Do not insist if the engine does not start: this could
cause serious damage to the battery or even to the
electrical equipment in the vehicle.