
Installation and Operation Instructions


Telrad Networks Ltd. BreezeAIR Installation Guide
Page 16 of 29
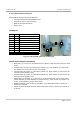
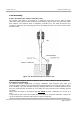
3. Take the unit to the selected location and align the antenna in the link’s direction.
Listen to the buzzer tone level. Any sound (fast, medium or slow) indicates a
reception.
4. Change and rotate the antenna to the left, right, up and down, scanning for the
maximum reception point.
5. After the scan is complete, align the antenna to the location where the buzzer beeps
at the fast rate, indicating the maximum reception.
6. Mount and secure the unit by fastening the mounting screws.
7. Set the MU back to adaptive modulation (AUTO) for both uplink and downlink.
8. Disable the RSSI buzzer.
To activate/deactivate the buzzer manually, use the Link Manager advanced window.
Note: During this procedure, do not disconnect the unit from power.
2
2
.
.
3
3
.
.
5
5
S
S
e
e
a
a
l
l
i
i
n
n
g
g
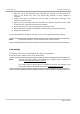
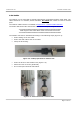
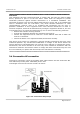
The outdoor unit must be sealed against rain with the metal glands.
RJ-45 ports of the outdoor unit must be facing down.
Note: All Units are factory sealed, seal needed only on Ethernet ports. Opening the
unit will void BreezeAIR product warranty.
RJ-45 ports must be facing down. If installed to the side, the bending of the
CAT5 cable damages BreezeAIR sealing and voids product warranty.