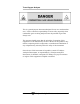
Trace Oxygen Analyzer OPERATING INSTRUCTIONS FOR MODEL 3000ZA-3X Trace Oxygen Analyzer P/N M77579 11/29/11 DANGER Toxic gases and or flammable liquids may be present in this monitoring system. Personal protective equipment may be required when servicing this instrument. Hazardous voltages exist on certain components internally which may persist for a time even after the power is turned off and disconnected. Only authorized personnel should conduct maintenance and/or servicing.
3000ZA-3X Copyright © 2011 Teledyne Analytical Instruments All Rights Reserved. No part of this manual may be reproduced, transmitted, transcribed, stored in a retrieval system, or translated into any other language or computer language in whole or in part, in any form or by any means, whether it be electronic, mechanical, magnetic, optical, manual, or otherwise, without the prior written consent of Teledyne Analytical Instruments, 16830 Chestnut Street, City of Industry, CA 91749-1580.
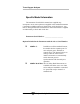
Trace Oxygen Analyzer Specific Model Information The instrument for which this manual was supplied may incorporate one or more options not supplied in the standard instrument. Commonly available options are listed below, with check boxes. Any that are incorporated in the instrument for which this manual is supplied are indicated by a check mark in the box.
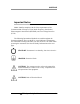
3000ZA-3X Important Notice Model 3000ZA complies with all of the requirements of the Commonwealth of Europe (CE) for Radio Frequency Interference, Electromagnetic Interference (RFI/EMI), and Low Voltage Directive (LVD). The following International Symbols are used throughout the Instruction Manual. These symbols are visual indicators of important and immediate warnings and when you must exercise CAUTION while operating the instrument. See also the Safety Information on the next page.
Trace Oxygen Analyzer Safety Messages Your safety and the safety of others is very important. We have provided many important safety messages in this manual. Please read these messages carefully. A safety message alerts you to potential hazards that could hurt you or others. Each safety message is associated with a safety alert symbol. These symbols are found in the manual and inside the instrument.
3000ZA-3X CAUTION: THE ANALYZER SHOULD ONLY BE USED FOR THE PURPOSE AND IN THE MANNER DESCRIBED IN THIS MANUAL. IF YOU USE THE ANALYZER IN A MANNER OTHER THAN THAT FOR WHICH IT WAS INTENDED, UNPREDICTABLE BEHAVIOR COULD RESULT POSSIBLY ACCOMPANIED WITH HAZARDOUS CONSEQUENCES. This manual provides information designed to guide you through the installation, calibration and operation of your new analyzer. Please read this manual and keep it available.
Trace Oxygen Analyzer This is a general purpose instrument designed for use in a non-hazardous area. It is the customer's responsibility to ensure safety especially when combustible gases are being analyzed since the potential of gas leaks always exist. The customer should ensure that the principles of operation of this equipment is well understood by the user.
3000ZA-3X Table of Contents Safety Messages............................................................. v Introduction..................................................................... 1 1.1 1.2 1.3 1.4 1.5 1.6 Overview Typical Applications Main Features of the Analyzer Model Designations Front Panel (Operator Interface) Rear Panel (Equipment Interface) 1 1 1 2 3 5 Operational Theory ......................................................... 7 2.1 Introduction 2.2 ZrO2 Sensor 2.2.
Trace Oxygen Analyzer 3.5 Testing the System 26 Operation....................................................................... 27 4.1 Introduction 4.2 Using the Data Entry and Function Buttons 4.2.1 Style Conventions 4.2.2 Keys Description 4.2.2.1 Arrow Keys 4.2.2.2 ENTER 4.2.2.3 ESCAPE 4.2.2.4 Special Function Keys 4.3 Menu/Screen Structure 4.3.1 Analyze Screen 4.3.2 System Menu 4.3.3 Password routine 4.3.4 Logout Routine 4.3.5 Model Routine 4.3.6 Self-Test Routine 4.3.7 Filter Routine 4.3.
3000ZA-3X 4.6 Alarms Menu 4.6.1 Alarm Active 4.6.2 Alarm Polarity 4.6.3 Alarm Failsafe 4.6.4 Alarm Latching 4.6.5 Alarm Setpoint 4.7 Range Menu 4.7.1 Range Select 4.7.2 Manual Range Select 4.7.3 Range Setpoints 41 41 41 42 42 42 43 43 44 44 Maintenance .................................................................. 45 5.1 Routine Maintenance 5.2 Sensor Replacement 5.2.1 Removing the Sensor 5.3 Fuse Replacement 5.4 System Self Diagnostic Test 5.5 Major Internal Components 5.6 Cleaning 5.
Trace Oxygen Analyzer List of Figures Figure 1-1: Model 3000ZA Front Panel Figure 1-2: Model 3000ZA Rear Panel Figure 2-1: Model 3000ZA Sample System Figure 2-2: Flow Diagram with Options Figure 2-3: Component Location Figure 2-4: Electronic Block Diagram Figure 3-1: Front Panel of the Model 3000TA Figure 3-2: Required Front Door Clearance Figure 3-3: Rear Panel of the Model 3000ZA Figure 3-4: Equipment Interface Connector Pin Arrangement Figure 3-5: Remote Probe Connections Figure 3-6: FET Series Resista
3000ZA-3X List of Tables Table 3-1: Analog Output Connections Table 3-2: Alarm Relay Contact Pins Table 3-3: Remote Calibration Connections Table 3-4: Range ID Relay Connections Table 3-5: Commands via RS-232 Input Table 3-6: Required RS-232 Options Table 5-1: Self-Test Result Display Table 5-2: Troubleshooting Teledyne Analytical Instruments 19 20 21 22 25 25 48 50 xii
Trace Oxygen Analyzer Introduction Introduction 1.1 Overview The Teledyne Analytical Instruments Model 3000ZA Trace Oxygen Analyzer is a versatile microprocessor-based instrument for detecting oxygen at the parts-per-million (ppm) level in a variety of gases. This manual covers the Model 3000ZA General Purpose flushpanel and/or rack-mount units with CE mark. These units are for indoor use in a non-hazardous environment. 1.
Introduction 3000ZA-3X Three Zirconium oxide sensors to provide higher range of analysis flexibility. The analyzer can cover ranges as low as 0-10 ppm or as high as 0-95%. No reference gas required Versatile analysis over a wide range of applications. Microprocessor based electronics: 8-bit CMOS microprocessor with 32 kB RAM and 128 kB ROM. Three user definable output ranges (from 0-1 ppm through 0-95%) allow best match to users process and equipment.
Trace Oxygen Analyzer Introduction switch between gases in synchronization with the analyzer’s operation. 3000ZA-M: This model has current output signals (4-20mA) for ppm range and range ID, in addition to voltage outputs. 3000ZA-V: Gas flow through the cell block in this model is driven by vacuum downstream from the cell block instead of upstream pressure. The internal restrictor is located downstream from the cell block to support this configuration.
Introduction 3000ZA-3X Function Keys: Six touch-sensitive membrane switches are used to change the specific function performed by the analyzer: Analyze Perform analysis for oxygen content of a sample gas. System Perform system-related tasks (described in detail in chapter 4, Operation.). Span Span calibrate the analyzer. Zero Zero calibrate the analyzer. Alarms Set the alarm setpoints and attributes. Range Set up the 3 user definable ranges for the instrument.
Trace Oxygen Analyzer Introduction Standby Button : The Standby turns off the display and outputs but circuitry is still operating. CAUTION: THE POWER CABLE MUST BE UNPLUGGED TO FULLY DISCONNECT POWER FROM THE INSTRUMENT. WHEN CHASSIS IS EXPOSED OR WHEN ACCESS DOOR IS OPEN AND POWER CABLE IS CONNECTED, USE EXTRA CARE TO AVOID CONTACT WITH LIVE ELECTRICAL CIRCUITS.
Introduction 3000ZA-3X Power Connection Universal AC power source. Gas Inlet and Outlet One inlet (must be externally valved) and one exhaust out. Three inlets when option “C” is ordered. 9-Pin RS-232 Port Serial digital concentration signal output and control input. 50-Pin Equipment Interface Port Analog Outputs: 0–1 VDC oxygen concentration plus 0-1 VDC range ID Alarm Connections: 2 concentration alarms and 1 system alarm.
Trace Oxygen Analyzer Operational Theory Operational Theory 2.1 Introduction The analyzer is composed of three subsystems: 1. Three Zirconium Oxide (ZrO2) Sensors. Each one has a specific range of analysis: Low range sensor of 0-200 ppm, medium range sensor of 0-2 %, and high range sensor of 0-95%. 2. Sample System 3.
Operational Theory 3000ZA-3X One of the three sensors has been modified (0-200 ppm range) to sense low levels of oxygen—less than 1 ppm and generate a current proportional to the concentration. The sensor is designed for long term stability and an operating life of 5 years. 2.3 Sample System The sample system delivers gases to the ZrO2 sensors, located on the cell block, from the analyzer rear panel inlet. Depending on the mode of operation either sample or calibration gas is delivered.
Trace Oxygen Analyzer Operational Theory Figure 2-2: Flow Diagram with Options 2.4 Zirconium Oxide Sensor Application Notes The following sample gases require conditioning prior to entering the sensors: Flammable gases such as methane, alcohol and carbon monoxide may cause a measurement error. They must be filtered from the sample gas before entering the cell. Gases containing halogen atoms (F, Cl, Br, etc.) such as Freon, must be filtered before entering the cell.
Operational Theory 3000ZA-3X System power is supplied from a universal power supply module designed to be compatible with any international power source. Figure 2-3 shows the location of the power supply and the main electronic PC boards. The signal processing electronics including the microprocessor, analog to digital, and digital to analog converters are located on the motherboard at the bottom of the case. The preamplifier board is mounted on top of the motherboard as shown in the figure.
Trace Oxygen Analyzer Operational Theory Figure 2-3: Component Location Teledyne Analytical Instruments 11
Operational Theory 3000ZA-3X Figure 2-4: Electronic Block Diagram Teledyne Analytical Instruments 12
Trace Oxygen Analyzer Installation Installation Installation of the Model 3000ZA Analyzer includes: 1. Unpacking 2. Mounting 3. Gas connections 4. Electrical connections 5. Installing the sensor 6. Testing the system. 3.1 Unpacking the Analyzer The analyzer is shipped with all the materials you need to install and prepare the system for operation. Carefully unpack the analyzer and inspect it for damage. Immediately report any damage to the shipping agent. 3.
Installation 3000ZA-3X Figure 3-1: Front Panel of the Model 3000TA (Model 3000ZA similar) All operator controls, except the flow control needle valve, are mounted on the control panel, which is hinged on the left edge and doubles as the door that provides access to the sensor and cell block inside the instrument. The door latch is spring loaded and will swing open when the button in the center of the latch (upper right corner) is pressed all the way in with a narrow gauge tool (less than 0.18 inch wide).
Trace Oxygen Analyzer Installation As a precaution, open the cell block to check that all sensors are firmly mounted or have not come loose during shipping. 3.3 Rear Panel Connections Figure 3-3 shows the Model 3000ZA rear panel. There are ports for gas, power, and equipment interface. The Zero In and Span In ports are not included on the standard model but are available as options. Figure 3-3: Rear Panel of the Model 3000ZA with Span and Zero Ports 3.3.
Installation 3000ZA-3X closed end with a small circular orifice. The restrictor without the blue sticker is for low pressure applications and vacuum service. For high pressure applications (5-50 psig) use the restrictor that has a blue sticker on the body. Pressurized service: Connect the restrictor with the blue dot to the Sample In port. The small circular orifice should face AWAY from the back of the unit (against the direction of gas flow).
Trace Oxygen Analyzer Installation pressure, (less than 2 psig) vacuum service plumbing is recommended. Exact figures will depend on your process. If greater sample flow is required for improved response time, install a bypass in the sampling system upstream of the analyzer input. EXHAUST OUT: Exhaust connections must be consistent with the hazard level of the constituent gases. Check local, state, and federal laws, and ensure that the exhaust stream vents to an appropriately controlled area, if required.
Installation CAUTION: 3000ZA-3X POWER IS APPLIED TO THE INSTRUMENT'S CIRCUITRY AS LONG AS THE INSTRUMENT IS CONNECTED TO THE POWER SOURCE. THE RED SWITCH ON THE FRONT PANEL IS FOR SWITCHING POWER ON OR OFF TO THE DISPLAYS AND OUTPUTS ONLY. The universal power supply requires an 85–250 VAC, 47-63 Hz power source. Fuse Installation: The fuse block, at the right of the power cord receptacle, accepts US or European size fuses. A jumper replaces the fuse in whichever fuse receptacle is not used.
Trace Oxygen Analyzer Installation 4–20 mA DC % Range: Current increases linearly with increasing oxygen, from 4 mA at 0 ppm to 20 mA at full scale ppm. (Full scale = 100% of programmable range) 4–20 mA DC Range ID: 7.2 mA = Low Range 12 mA = Medium Range 16.
Installation 3000ZA-3X Threshold Alarm 2: Can be configured as high (actuates when concentration is above threshold), or low (actuates when concentration is below threshold). Can be configured as failsafe or non-failsafe. Can be configured as latching or non-latching. Can be configured out (defeated). System Alarm: Actuates when DC power supplied to circuits is unacceptable in one or more parameters. Permanently configured as failsafe and latching. Cannot be defeated.
Trace Oxygen Analyzer Installation Zero: Floating input. 5 to 24 V input across the + and – pins puts the analyzer into the Zero mode. Either side may be grounded at the source of the signal. 0 to 1 volt across the terminals allows Zero mode to terminate when done. A synchronous signal must open and close the external zero valve appropriately. See Remote Probe Connector. (The –C option internal valves operate automatically.) Span: Floating input.
Installation 3000ZA-3X Once a zero or span command is sent, and acknowledged (contact closes), release it. If the command is continued until after the zero or span is complete, the calibration will repeat and the Cal Relay Contact (CRC) will close again. For example: 1. Test the CRC. When the CRC is open, send a zero command until the CRC closes (The CRC will quickly close.) 2. When the CRC closes, remove the zero command. 3. When CRC opens again, send a span command until the CRC closes.
Trace Oxygen Analyzer Installation Network I/O: Pins 13 (+) and 29 (–) are for serial digital input/output for local network protocol. At this printing, this port is not yet functional. It is to be used for future options to the instrument. Remote Valve Connections: The 3000ZA is a single-chassis instrument, which has no Remote Valve Unit. Instead, the Remote Valve connections are used as a method for directly controlling external sample/zero/span gas valves. See Figure 3-5.
Installation 3000ZA-3X Figure 3-6: FET Series Resistance 3.3.2.3 RS-232 PORT The digital signal output is a standard, full duplex RS-232 serial communications port used to connect the analyzer to a computer, terminal, or other digital device. It requires a standard 9-pin D connector. The output data is status information, in digital form, updated every two seconds.
Trace Oxygen Analyzer Installation Table 3-5: Commands via RS-232 Input Command Description as Immediately starts an autospan. az Immediately starts an autozero. st Toggling input. Stops/Starts any status message output from the RS-232, until st is sent again. The RS-232 protocol allows some flexibility in its implementation. Table 3-6 lists certain RS-232 values that are required by the 3000ZA implementation.
Installation 3000ZA-3X The data is status information, in digital form, updated every two seconds. Status is reported in the following order: The concentration in ppm or percent The range in use (HI, MED, LO) The span of the range (0-100 ppm, etc) Which alarms—if any—are disabled (AL–x DISABLED) Which alarms—if any—are tripped (AL–x ON). 3.
Trace Oxygen Analyzer Operation Operation 4.1 Introduction Once the analyzer has been installed, it can be configured for your application. To do this you will: Set system parameters. Establish a security password, if desired, requiring the operator to log in. Establish and start an automatic calibration cycle, if desired. Calibrate the instrument. Define the three user selectable analysis ranges, then choose autoranging or select a fixed range of analysis, as required.
Operation 3000ZA-3X 4.2 Using the Data Entry and Function Buttons 4.2.1 Style Conventions The following typeface conventions are used when referring to screen names, key presses and screen readout: Screens: Arial 12 pt. type in capital letters. Example: ANALYZE or MAIN screen or menu. Key presses: The particular keystroke to enter is placed between < and >. Example: or or or . Only when the keystroke is to be entered will it be placed between the brackets.
Trace Oxygen Analyzer Operation STANDBY. It is important to read and understand the MENU STRUCTURE section to fully understand navigation and data entry. 4.2.2.1 ARROW KEYS Pressing the ARROW KEYS select menus and modifies values. 1. Item Selection Menus are identified by the flashing arrow on the left. In Item Selection Menus the UP/DOWN arrow keys move to the next lower or upper item. 2. Item Modification Menus are identified by a flashing parameter/descriptor.
Operation 3000ZA-3X 4.2.2.4 SPECIAL FUNCTION KEYS Pressing any of the 7 Function keys (ANALYZE / SYSTEM / SPAN / ZERO / ALARMS /RANGE / STANDBY) Cause the display to show the top level menu for the respective function. If another menu operation was being performed, any modified parameters (that had not yet been accepted by using the ENTER key) will be discarded and replaced by the original values. 4.3 Menu/Screen Structure The 3000 screen setup consists of several classes of screens and items.
Trace Oxygen Analyzer Operation ----------------------PASSWORD LOGOUT MODEL SELF TEST FILTER ANALOG-OUT ADJUST AUTO-CALIBRATION CHANGE STREAM ----------------------- Figure 4-1: Hierarchy of Available Functions Teledyne Analytical Instruments 31
Operation 3000ZA-3X 4.3.3 Password routine ----------------------Enter Password 'T' 'A' 'I' ----------------------If the password is 'TAI' then the letters 'T' 'A' 'I' will be supplied to the user when this screen is entered. This is an 'easy guess' password. If the password is any other string, then the letters 'A' 'A' 'A' will be supplied regardless of the actual password. The user must then adjust the letters to the correct password. Pressing ENTER advances to the next letter.
Trace Oxygen Analyzer Operation 'A' 'A' 'A' ----------------------The user is prompted to re-enter the password and the letters are restored to 'A' 'A' 'A'. This prevents the user from accidentally setting the password to an unintended (and, perhaps unguessable) password. ----------------------Password Mismatch ----------------------The entered and re-entered password did not match. No change was made to the original password.
Operation 3000ZA-3X V1.0 ----------------------Entering the MODEL screen causes the above screen to be displayed for 3 seconds. There are no modifiable parameters. 4.3.6 Self-Test Routine ----------------------Begin Self-Test? ENTER-YES ESCAPE-NO ----------------------Pressing ENTER causes the analyzer to run the same diagnostic that runs on start-up. See section 5.4 for results display. 4.3.
Trace Oxygen Analyzer Operation 4-20mA Gain: 0 4-20mA Limit: FALSE Track in Cal: Yes ----------------------4-20mA Offset: Pressing ENTER causes the number after 'Offset:' to start flashing. Then pressing UP or DOWN selects a number ranging from –341 to 500. The analog output may be sampled using a DMM at this time. When the parameter is zero, the analog voltage output should be very close to 0.0 (4.00 madc if the 4-20 madc is being adjusted).
Operation 3000ZA-3X Track in Cal: Analog output tracking during calibration user preference setting. The setting is remembered after power is turned off. Select “Yes” to have analog output track during calibration (either span or zero). Select “No” to hold analog output to last reading before entering calibration mode. If analog output is not tracking during calibration, it will hold the output for a minute after the end of calibration to allow calibration gas to be purged out by sample gas. 4.3.
Trace Oxygen Analyzer Operation 4.4.1 Span Sensor ----------------------->Span Sensor: High ----------------------Pressing ENTER causes the selection after 'Sensor:' to start flashing (Low / Mid / High). Then pressing UP or DOWN selects a different sensor. Note that the span value directly below will change according to which sensor is currently selected. The high sensor covers ranges from 2 to 95% O2. Span gas that is near the top of this scale should be used to calibrate this sensor.
Operation 3000ZA-3X 4.4.4 Span Finish ----------------------->Span AUTO Finish ----------------------Pressing ENTER causes the AUTO or MANUAL after 'Span' to start flashing. Pressing UP or DOWN toggles the value. The value determines the method by which the span settling period is complete and a span calculation is automatically performed. If the value is MANUAL, then when the span begins, the user is prompted to press ENTER at the time he/she determines the sensor has settled on the span sample.
Trace Oxygen Analyzer Operation 4.5 Zero Menu The ZERO screen is as follows: ----------------------Zero 0.00 ppm Zero Timer: 7 min. Zero Auto Finish Zero Begin ----------------------4.5.1 Zero Finish ----------------------->Zero AUTO Finish ----------------------Pressing ENTER causes the AUTO or MANUAL after 'Zero' to start flashing. Pressing UP or DOWN toggles the value. The value determines the method by which the zero settling period is complete and a zero calculation is automatically performed.
Operation 3000ZA-3X any offset of the zero gas used. Pressing UP or DOWN adjusts the number. 4.5.3 Zero Begin ----------------------->Zero Begin --------------------------------------------Begin Zero? ENTER-YES ESCAPE-NO ----------------------Pressing ENTER causes the screen to prompt to begin the zero routine (as displayed above). Pressing ENTER again causes the analyzer to commence the zero routine, and begin analyzing in ZERO MODE. 4.5.4 Zero Timer ----------------------->Zero Timer: 7 min.
Trace Oxygen Analyzer Operation 4.6 Alarms Menu The ALARMS screen is as follows: ----------------------AL-1 ACTIVE AL-1 HIGH AL-1 NON-FAILSAFE AL-1 NON-LATCHING AL-1 20.00 ppm AL-2 ACTIVE AL-2 HIGH AL-2 NON-FAILSAFE AL-2 NON-LATCHING AL-2 50.00 ppm ----------------------Note that alarm functionality explanation below applies to both AL-1 and AL-2 identically. 4.6.1 Alarm Active ----------------------->AL-1 ACTIVE ----------------------Pressing ENTER causes the word ACTIVE or DEFEATED to start flashing.
Operation 3000ZA-3X Pressing ENTER causes the word HIGH or LOW to start flashing. Then pressing UP or DOWN toggles between the 2 words. When HIGH, the alarm will trip if O2 concentration is above the setpoint as discussed below. 4.6.3 Alarm Failsafe ----------------------->AL-1 FAILSAFE ----------------------Pressing ENTER causes the word FAILSAFE or NON-FAILSAFE to start flashing. Then pressing UP or DOWN toggles between the 2 words.
Trace Oxygen Analyzer Operation 4.7 Range Menu The RANGE screen is as follows: ----------------------Range Select: Auto Man Rng: R1 R1: 0-1000.00 ppm R2: 0- 1.00% R3: 0- 6.00% ----------------------4.7.1 Range Select ----------------------Range Select: Auto ----------------------Pressing ENTER causes the word Auto or Dgtl or Man to start flashing. Then pressing UP or DOWN cycles through the 3 words. When Auto is selected, the analyzer will select the range automatically.
Operation 3000ZA-3X 4.7.2 Manual Range Select ----------------------Man Rng: R1 ----------------------Pressing ENTER causes the range R1 or R2 or R3 to start flashing. Then pressing UP or DOWN cycles through the 3 ranges. The selected range is the effective range if the Range Select (above) is set to Man(ual). 4.7.3 Range Setpoints ----------------------R1: 0-1000.00 ppm ----------------------Pressing ENTER causes the value to the right of Rn: to start flashing.
Trace Oxygen Analyzer Maintenance Maintenance 5.1 Routine Maintenance Aside from normal cleaning and checking for leaks at the gas connections, routine maintenance is limited to replacing the sensors and fuses, and recalibration. For recalibration, see Section 4.4 Calibration. WARNING: SEE WARNINGS ON THE TITLE PAGE OF THIS MANUAL. 5.2 Sensor Replacement The ZrO2 sensors are sealed transducers with no electrolyte to change or electrodes to clean.
Maintenance 3000ZA-3X 2. Open the front panel door by pressing the release button on the top right corner of the door all the way in with a narrow gauge tool. 3. Remove the eight screws that hold the cover of the sensor block. As you remove the cover make sure the O-rings stay in place. If they drop, place them back carefully in the groove found on the cell block, not on the cover. See Figure 5.1. 4. You can remove the sensor that you want to replace with your fingers or using small pliers.
Trace Oxygen Analyzer Maintenance Figure 5-1: Sensor Block with Middle Sensor Installed 5.3 Fuse Replacement 1. Place small screwdriver in notch, and pry cover off, as shown in Figure 5-2.
Maintenance 3000ZA-3X 2. To change between American and European fuses, remove the single retaining screw then flip the Fuse Block over 180 degrees. Replace the screw. 3. Replace fuse as shown in Figure 5-3. 4. Reassemble housing as shown in Figure 5-2. American Fuses European Fuses Figure 5-3: Installing Fuses 5.4 System Self Diagnostic Test 1. Press the SYSTEM button to enter the system mode. 2. Use the ◄► arrow keys to move to More, and press ENTER. 3.
Trace Oxygen Analyzer Maintenance If any item above fails this test, it will be listed on the VFD display followed by the “BAD” message instead of “GOOD” 5.5 Major Internal Components The zirconium sensors block is accessed by unlatching and swinging open the front panel, as described earlier. Other internal components are accessed by removing the rear panel and sliding out the entire chassis. See Figure 5-4, below.
Maintenance 3000ZA-3X Sample system Power Supply Microprocessor Displays 5 digit LED meter 2 line, 20 character, alphanumeric, VFD display RS-232 Communications Port See the drawings in the Drawings section in back of this manual for details. 5.6 Cleaning If instrument is unmounted at time of cleaning, disconnect the instrument from the power source. Close and latch the front-panel access door. Clean outside surfaces with a soft cloth dampened slightly with plain clean water.
Trace Oxygen Analyzer Atmospheric oxygen diffusing through vent and altering the oxygen level the sensor sees Inaccurate zero operation (i.e. user has zeroed the instrument using a gas concentration much higher than normal for a zero gas). Maintenance Increase flow rate and/or length of vent tubing to dilute or minimize oxygen diffusion from vent to sensor. Turn analyzer off, then back on again. Press the UP and DOWN key simultaneously while the instrument is doing the warm up count down.
Maintenance 3000ZA-3X Teledyne Analytical Instruments 52
Trace Oxygen Analyzer Maintenance Appendix A-1 Specifications Packaging: General Purpose • Flush panel mount (Standard) • Relay rack mount. Contains either one or two instruments in one 19" relay rack mountable plate (Optional). Sensor: Three zirconium oxide sensor. Cell Block: Nylon Sample System: All wetted parts of 316 stainless steel.
Maintenance 3000ZA-3X Operating Temperature: 5-35 °C Accuracy: ±2% of full scale at constant temperature (at calibrated range). ±5% of full scale over operating temperature range, except 0-1 ppm analysis range, once thermal equilibrium is reached. ±0.2 ppm on 0-1 ppm analysis range, once thermal equilibrium is reached. Analog outputs: 0-1 VDC percent-of-range, 0-1 VDC range ID. 4-20 mA DC (isolated) percent-of-range, 4-20 mA DC (isolated) range ID. Dimensions: 19 cm high, 24.9 cm wide, 31 cm deep (6.
Trace Oxygen Analyzer Maintenance A-2 Recommended 2-Year Spare Parts List Qty.
Maintenance 3000ZA-3X A-3 Drawing List D-77579 Final Assembly D-75738 Outline Drawing A-4 19-inch Relay Rack Panel Mount Figure A-1: Single and Dual 19" Rack Mounts (dimensions in mm) Teledyne Analytical Instruments 56
Trace Oxygen Analyzer Maintenance A.5 Application Notes 3000 SERIES ANALYZERS APPLICATION NOTES ON RESTRICTORS, PRESSURES, AND FLOW RECOMMENDATIONS The 3000 series analyzers require reasonably regulated sample pressures. While the 3000 analyzers are not sensitive to variations of incoming pressure (provided they are properly vented to atmospheric pressure) the pressure must be maintained to provide a useable flow rate through the analyzer.
Maintenance 3000ZA-3X RESTRICTION DEVICES: For proper operation, all 3000 series analyzers require a flow restriction device. This device is typically a restrictor or a valve. The restriction device serves two functions in the sample path. 1. It is used to limit the flow rate of the sample through the analyzer. A restrictor is chosen to operate over a range of pressures and provide a useable flow rate over that range. 2. The restriction device provides a pressure drop.
Trace Oxygen Analyzer Maintenance (including the cell) the pressure will be at atmospheric pressure (analyzer vented to atmospheric pressure). Note, all other pressure drops in the sample path are insignificant at these flow rates. This insures that the cell operates at atmospheric pressure. At very high flow rates (off scale of flow-meter), pressure drops other than the restriction device could become significant, and result in pressurizing the cell.
Maintenance 3000ZA-3X TAI PART NUMBERS Restrictor kit: A68729 Union (SS) U11 LP Restrictor R2323 (low pressure / vac. service) Std. Restrictor R2324 Blue dot Nut N73 Ferrule F73 Ferrule F74 Both ferrules are required CONVERSIONS: 1 PSI = 1 SCFH = 2.04 inches of mercury (in. Hg.) 0.