OPERATING INSTRUCTIONS FOR Model 2240 Handheld Hydrogen Leak Detector P/N M2240 2/29/08 DANGER Toxic and explosive gases may be present in this monitoring system. Personal protective equipment may be required when servicing this instrument. Hazardous voltages exist on certain components internally when the battery charger is connected. Do not recharge battery in a hazardous environment. Only authorized personnel should conduct maintenance and/or servicing.
Model 2240 Copyright © 2007 Teledyne Analytical Instruments All Rights Reserved. No part of this manual may be reproduced, transmitted, transcribed, stored in a retrieval system, or translated into any other language or computer language in whole or in part, in any form or by any means, whether it be electronic, mechanical, magnetic, optical, manual, or otherwise, without the prior written consent of Teledyne Analytical Instruments, 16830 Chestnut Street, City of Industry, CA 91749-1580.
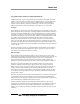
Handheld Hydrogen Leak Detector Specific Model Information This instrument is specifically designed to measure hydrogen in air. Using this instrument to analyze any other gas mixture may result in serious error. Consult the factory for additional information for gas analysis not specified at the time of purchase.
Model 2240 Safety Messages Your safety and the safety of others is very important. We have provided many important safety messages in this manual. Please read these messages carefully. A safety message alerts you to potential hazards that could hurt you or others. Each safety message is associated with a safety alert symbol. These symbols are found in the manual and inside the instrument.
Handheld Hydrogen Leak Detector IF YOU USE THE ANALYZER IN A MANNER OTHER THAN THAT FOR WHICH IT WAS INTENDED, UNPREDICTABLE BEHAVIOR COULD RESULT POSSIBLY ACCOMPANIED WITH HAZARDOUS CONSEQUENCES. This manual provides information designed to guide you through the installation, calibration operation and maintenance of your new analyzer. Please read this manual and keep it available.
Model 2240 Table of Contents List of Figures ............................................................................ viii List of Tables ................................................................................ ix Introduction ................................................................................... 1 1.1 Overview 1 1.2 Typical Applications 1 1.3 Features 2 1.4 Operator Interface 2 Startup and Operation .................................................................. 5 2.
Handheld Hydrogen Leak Detector 3.1 Gases 3.2 Gas Connection 3.3 Numerical Changes 3.4 Verify Sensor 3.5 Calibrate Sensor 3.6 Clear Field Calibration 15 15 15 15 19 22 Hydrogen Sensing Considerations............................................ 23 Maintenance................................................................................. 25 5.1 Routine Maintenance 25 5.2 Battery Charging 25 5.3 Cleaning 26 5.4 Troubleshooting 26 Appendix ...................................................................
Model 2240 List of Figures Figure 1-1: User Interface ............................................................... 3 Figure 2-1: Analyzer Components................................................... 5 Figure 2-2: Startup LED .................................................................. 6 Figure 2-3: Unit Ready LED ............................................................ 7 Figure 2-4: Lower Line LED Bar Graph...........................................
Handheld Hydrogen Leak Detector List of Tables Table 2-1: Navigation Button Functions ........................................ 12 Table 3-1: Verify Calibration Procedure ....................................... 16 Table 3-2: Field Calibrate Procedure............................................. 19 Table 3-3: Clear Function Procedure ............................................ 22 Table 5-1 Troubleshooting.............................................................
Model 2240 DANGER COMBUSTIBLE GAS USAGE WARNING The Model 2240 instrument is CE approved. This rating applies only to the equipment specified and installed in accordance with the information contained within this manual. It is the customer's responsibility to ensure safety especially when combustible gases are being analyzed since the potential of gas leaks always exist.
Handheld Hydrogen Leak Detector Introduction Introduction 1.1 Overview The Model 2240 Hydrogen Analyzer is a handheld portable leak detector for sensing hydrogen gas in air. It employs two sensing elements on the same semiconductor die and can detect hydrogen leaks as low as 15 parts per million (ppm). It will not saturate or be destroyed when detecting hydrogen concentration up to 100%. It is battery powered and will operate for over 10 hours on a single charge.
Introduction Model 2240 1.3 Features The Model 2240 Hydrogen Analyzer is sophisticated yet simple to use. The following features are standard features for this instrument: • High-impact plastic enclosure, dust-tight and protected against water spray from any direction. • CE approved • Large LCD alphanumeric display plus graphic bar graph indication.
Handheld Hydrogen Leak Detector Introduction Figure 1-1: User Interface Teledyne Analytical Instruments 3
Introduction Model 2240 Teledyne Analytical Instruments 4
Handheld Hydrogen Leak Detector Startup and Operation Startup and Operation 2.1 Unpacking the Instrument The Model 2240 is shipped with all the materials you need to install and prepare the system for operation. Carefully unpack the instrument and inspect it for damage. Immediately report any damage to the shipping agent. Figure 2-1 shows the items that are included in the package.
Startup and Operation Model 2240 2.2 Setup Insert the probe cable into the probe and the other end into the Controller. The cable has distinct connections that will only mate in the proper manner. 2.3 Startup Power-up the Model 2240 by pressing and holding the ON/OFF button until the Controller LCD display indicates an operational message. Note: Only power-up the instrument in a hydrogen-free environment.
Handheld Hydrogen Leak Detector Startup and Operation Figure 2-3: Unit Ready LED 2.4 Shutdown To power-down the unit press and hold the ON/OFF button for approximately 2 seconds until the Controller LCD display turns off. 2.
Startup and Operation Model 2240 0.001%) reading after exposure to hydrogen. If the instrument doesn’t return to an indication of less than 0.001% after 5 minutes in a hydrogen-free environment then invoke the Reset operation (See Section 2.9). 2.6.1 Hydrogen Concentration—LCD Display The upper line of the Controller LCD indicates a numerical value or range for the percent hydrogen concentration or peak hydrogen value.
Handheld Hydrogen Leak Detector Startup and Operation decreasing and the sensor has moved away from the hydrogen leak. 4. Moving the sensor back towards the potential location of the hydrogen leak will cause the Probe Tip LED to turn red. 5. Continue moving the sensor into the area that causes the Probe Tip LED to turn red until the source of the hydrogen leak is located. The color of the Probe Tip LED indicates: GREEN: Unit ready, hydrogen concentration is less than 0.
Startup and Operation Model 2240 Figure 2-6: Peak Hydrogen Detected LED 2.7 Keypad The keypad is used to alter the display or initiate special functions as follows: • Pressing ▲ (up arrow button) will display the peak hydrogen reading. • Pressing ▼ (down arrow button) will display the current percent hydrogen concentration. • Pressing ► (right arrow button) will clear the peak hydrogen value. • Pressing and holding ◄ (left arrow button) will invoke the Zero Operation (see Section 2.10).
Handheld Hydrogen Leak Detector Startup and Operation Sensor Error – Unit has detected a failure to communicate with the Probe. broken – Unit has detected a unit internal failure See Section 5.4 for troubleshooting 2.9 Reset Operation The Reset Operation is used to speed recovery from hydrogen exposure. This operation can be invoked from the keypad during Normal Operation by Pressing and holding ◄ ► (left and right arrow buttons simultaneously) or from the Configuration Menu (see Section 2.11).
Startup and Operation Model 2240 following sections. The keypad is used to navigate the menu as shown in Table 2-1.
Handheld Hydrogen Leak Detector Startup and Operation Figure 2-7: Configuration Menu Navigation 2.12 Information Display The Information Display (Information Disp.) menu allows the user to view useful information about the instrument including firmware revisions, serial number, and calibration date. Firmware Rev: Displays the sensor pod and controller firmware.
Startup and Operation Model 2240 Probe firmware revision. The right most number preceded by a ‘C’ is the Controller firmware revision. For example: S 1.23 C2.34 for Probe firmware version 1 .23 and Controller firmware version 2.34 Serial Number: Displays the product serial number. For example: 50123 Calibration Date: Displays the date of last factory calibration, MM/DD/YY. For example: 5/8/06 for 8 May 2006. 2.
Handheld Hydrogen Leak Detector Field Verify/Calibration Field Verification and Calibration 3.1 Gases Verification or calibration requires the availability of the following certified gases: • 2.00% hydrogen by volume in air (20,000 ppm) • 0.1% hydrogen by volume in air (1000 ppm) • Zero grade, hydrogen-free air, ambient air can be used instead of certified zero grade air if the user has high confidence that it is a hydrogen-free environment. 3.
Field Verify/Calibration Model 2240 verification date. If Verify fails the field calibration values are erased, restoring the last factory calibration. To perform the verify test: Table 3-1: Verify Calibration Procedure Step Display User Response 1 Hydrogen <0.001% H2 Press ENTER. 2 Information Disp.
Handheld Hydrogen Leak Detector Step Display Field Verify/Calibration User Response 16 Apply 0.100% H2 Settle Checking sensor temperature. 17 Apply 0.100% H2 Wait xxxx Wait for sensor reading to stabilize, until xxxx = 0. 18 Apply 0.100% H2 Finding Average Measuring sensor response to test gas. 19 Apply 2.000%H2 Are you sure? With the Calibration Cup, apply 2.0% hydrogen (balance air) to the Probe sensor. The Probe Tip LED will remain Red.
Field Verify/Calibration Step Model 2240 Display User Response 28 Verify Sensor Error: The Verify Test has failed. Calibration is recommended. With the Calibration Cup, apply hydrogen-free, ultra-zero air to the Probe sensor. Wait for the LED Bar Graph array in the Probe to show only one (or zero) yellow LEDs. Press ENTER 29 Field Calibrate XX/XX/XX Press ▼ 30 Exit Press ▼ 31 Information Disp.
Handheld Hydrogen Leak Detector Field Verify/Calibration 3.5 Calibrate Sensor The Calibrate function allows the user to perform a field calibration of the instrument. After Field Calibration TAI recommends running the Verify Function. To carry out a Field Calibration follow the procedure listed in Table 3-2. Table 3-2: Field Calibrate Procedure Step Display User response 1 Hydrogen <0.
Field Verify/Calibration Step Display Model 2240 User response 15 Apply 0.100%H2 Are you sure? With the Calibration Cup, apply 0.1% hydrogen (balance air) to the Probe sensor. The Probe Tip LED will change from Green to Red. One (or two) yellow LEDs in the LED Bar Graph Array will turn on. Press ENTER. 16 Apply 0.100%H2 In Progress 0.1% Calibration starts. 17 Apply 0.100%H2 Settle Checking sensor temperature. 18 Apply 0.100%H2 Wait xxxx Wait for sensor reading to stabilize until xxxx = 0.
Handheld Hydrogen Leak Detector Step Display Field Verify/Calibration User response 30 Reset Sensor Are you sure? With the Calibration Cup, apply hydrogen-free, ultrazero air to the Probe sensor. Wait for the LED Bar Graph array in the Probe to show only one (or zero) yellow LEDs. Press ENTER. 31 Reset Sensor In Progress During Reset, the Probe Tip LED will be orange.
Field Verify/Calibration Step Display Model 2240 User response 44 Reset Sensor Done Press ENTER 45 Reset Sensor Press ▼ 46 Zero Sensor Press ▼ 47 Field Calibrate XX/XX/XX Press ENTER or ► 48 Verify Sensor Press ▼ 49 Calibrate Sensor Press ENTER to repeat Field Calibration. Go back to Step 8 of Section 4.5. 3.6 Clear Field Calibration The Clear function restores the instrument to the last factory calibration.
Handheld Hydrogen Leak Detector Hydrogen Sensing Hydrogen Sensing Considerations From any given source, hydrogen gas disperses rapidly and generally upward due to the very low density of hydrogen compared to air. Understanding this behavior allows the operator to more effectively search for hydrogen leaks. If the sensor element is near (and above) the leak, the concentration will likely be higher but the leak may be difficult to locate.
Hydrogen Sensing Teledyne Analytical Instruments Model 2240 24
Handheld Hydrogen Leak Detector Maintenance Maintenance 5.1 Routine Maintenance Aside from normal cleaning and battery charging, routine maintenance is limited to calibration verification and recalibration. For verification and calibration procedures, refer to Sections 3.4 and 3.5. There are no user-serviceable items inside the instrument. 5.2 Battery Charging To recharge the unit’s battery: 1. Ensure the unit is powered OFF. Allow batteries in an extreme temperature to warm or cool to within 10-45 °C.
Maintenance Model 2240 5.3 Cleaning If the unit becomes soiled, clean the unit with a lint-free cloth. Use special care when cleaning the handheld probe assembly. Small debris or other material may collect over the sensor tip. Clean the tip with a gentle wiping using a clean lint-free cloth or paper. 5.4 Troubleshooting The following table offers guideline for diagnosing and correcting common problems associated with the Model 2240.
Handheld Hydrogen Leak Detector Appendix Appendix A.1 Specifications Range: 0.0015% (15ppm) to 100% hydrogen by volume in air. Response Time: Indication of hydrogen within seconds. Stabilization to final value depends on concentration. Temperature: Ambient Operating: -0 to +40 °C Storage: -20 to +50 °C Power: Internal rechargeable Lithium Ion battery yields over 10 hours of operation. Battery recharge time: 4 hours with included charger.
Appendix Model 2240 Figure A-1: Dimensions A-2 Recommended Spare Parts Qty. Part Number Description 1 P1529 Probe Assembly 1 CP2705 Controller Assembly 1 CP2706 Coiled Probe Cable 1 CP2707 Battery Charger 1 P1530 Detector Pouch 1 CP2708 Sensing System Case A minimum charge is applicable to spare parts orders. Note: Orders for replacement parts should include the part number (if available) and the model and serial number of the instrument for which the parts are intended.
Handheld Hydrogen Leak Detector Index Index A/C plug adapter, 25 address, 28 air current, 23 APEX CE, 2 applications, 1 approvals, 27 bar graph, 2, 8 battery, 1, 27 battery charger, 2, 25 battery charging procedure, 25 battery indicator, 2, 7 battery LED.
Index Model 2240 sensitivity, 7 Sensor Error, 11 sensor wand.