P H A S E R® 7 4 0 a n d 7 4 0 L L A S E R P R I N T E R S User Guide ® www.tek.
0 Contents Tektronix Supplies 1 Getting The Most From Your Printer 2 Printing 3 All About Media 4 Loading Media Trays 7 Using the Multi-Purpose Tray 8 Duplex Printing 16 Front Panel Messages 20 Troubleshooting Print Quality 21 Media Jams 26 Occasional Cleaning 32 Printing Help Pages from the Front Panel 33 Consumables 37 Controlling Color Density 38 Getting More Information 41 Getting Help 42 Symbols Note General information Caution Use caution or damage to the printer may
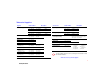
Tektronix Supplies Supplies Order number Description Accessories Order number Paper Trays Description Hi-Capacity Standard Color 436-0282-02 A/Letter (U.S.) 016-1656-00 016-1684-00 Black 436-0283-02 A4 (Metric Letter) 016-1657-00 016-1685-00 Cyan 436-0314-02 Legal 016-1658-00 016-1686-00 Magenta 436-0284-02 A/Letter (U.S.
Ordering Information 2 Getting The Most From Your Printer Supplies Startup Kit ■ Z740SS ■ Option 01 for Metric ■ Color Kit Z740LCS Automatic Duplex/ Lower Tray Assembly ZDPLX Converts a Phaser 740L color-capable printer to a full-color printer: ■ Adds three color toners. ■ Converts the Phaser 740L product warranty from a 1-year return-to-depot to a 1-year on-site for the remainder of the warranty period.
Print Quality Modes TekColor ™ Color Corrections Standard ■ General-purpose mode for full-color printing. Premium Monochrome ■ Highest-quality monochrome (gray scale) prints. Automatic ■ Automatically applies the best color correction mode to each element on the page. SWOP ■ Specification for Web Offset Publications. Used to match U.S. press standards. Euroscale ■ Used to match equivalent Imation Matchprint® proofs. Commercial ■ Used to match commercial Imation Matchprint® proofs.
Media 4 All About Media Paper Trays Transparency Tray Laser paper only Tektronix transparencies only ■ Tray sizes: A/Letter A4 Legal ■ Tray sizes: A/Letter A4 ■ 60 - 90 g/m2, 16 - 24 lb.
Multi-Purpose Tray Laser paper ■ A/Letter A4 Legal ■ 75 - 150 g/m2, 20 - 40 lb. Tektronix Fabric Transfer media ■ A/Letter A4 Envelopes Tektronix transparencies ■ A/Letter A4 Tektronix Glossy Coated paper ■ ■ #10 Other media ■ Cover stock up to 163 g/m2, 60 lb. ■ Card stock up to 163 g/m2, 40 lb. ■ Index up to 163 g/m2, 90 lb. 33100-21 A/Letter A4 Laser labels Media sizes supported in the Multi-Purpose Tray ■ A/Letter A4 ■ Recommended Avery™ labels (U.S.
6 Supported page sizes and image area 1 2 3 4 The printer supports four media sizes, which you select in the Print screen (using a supported printer driver). Margins Media Page size Print area Top / Bottom Sides 1 Letter 8.5 x 11 in. 8.2 x 10.6 in. .2 in. .15 in. 2 A4 210 x 297 mm 200 x 287 mm 5 mm 5 mm 3 Legal 8.5 x 14 in. 8.2 x 13.6 in. .2 in. .15 in. 4 #10 Envelope 4.13 x 9.5 in. (104.8 x 241.3 mm) 3.8 x 9.2 in. (96.5 x 233.7 mm) .16 in. (4.1 mm) .14 in. (3.
Loading Media Trays 1 Push down on the tray’s metal plate until it clicks, locking it in place. 2 Fan the media to release sheets that are stuck together. 3 Place the media in the tray under the hooks. 2 1 R PE PA A4 Place the side to be printed (for example, letterhead paper) face-down under the hooks. 4 Transparencies: Place the Tektronix logo strip face-up under the hooks.
Multi-Purpose Tray 8 Using the Multi-Purpose Tray 1 Adjust the guides for the width of the media. 2 Adjust the Media Thickness switch for the media you are using (see page 9). 3 Insert the media, printing side face-up (for Tektronix transparencies, the logo strip is face-down). 4 Select the media type at the front panel: Paper ■ Standard paper and letterhead 75 - 105 g/m2, 20 - 28 lb.
Setting Media Thickness Manually select a media thickness for the most reliable paper-picking from the Multi-Purpose Tray. 1 Open the left side door. The blue media thickness switch has three settings and is located on the paper feeder. Thin Medium Thick 33100-24 2 Move the switch to the desired setting: Thin Medium g/m2 Standard laser paper 75 - 105 (20 - 28 lb.) Thick Cover stock up to 163 g/m2 (60 lb.) Tektronix Glossy Coated paper Card stock up to 163 g/m2 (40 lb.
10 Loading specialty media Tektronix Transparencies Letterhead Place Stamp Here Envelopes 1234567 2 <105 g/m 28 lb. Never use envelopes with windows or metal clasps; they will damage the printer. Use envelopes that are at least #10-size. Laser Labels 2 >105 g/m 28 lb. 33100-25 Never use media for inkjet printers; inkjet media may damage the Fuser. Tektronix laser media are specially designed for this printer.
Paper 2nd Side Tektronix Fabric Transfer Tektronix Glossy Coated Paper 33100-26 For best results on double-sided printing, use 90 g/m 2 (24 lb. bond) laser paper. Feed Fabric Transfer Media one sheet at a time; otherwise the media may jam.
12 Printing Envelopes 1 Prepare each envelope: tuck in the envelope flap. 2 Adjust the printer’s media thickness switch to Thick. 3 Adjust the printer’s media guides for the width of your envelopes. 4 Insert the envelopes (maximum capacity is 10-15, depending on thickness): Short end enters first. ■ Side to be printed is face-up. ■ The edge where you place the stamp enters the printer first in some applications; make a test print before proceeding.
7 In your application: ■ ■ 8 Guidelines for envelope printing Create a document with these measurements: ■ Width: ■ Length: 9.5 in. (241.3 mm) ■ Margins: .2 in. (5 mm) Access the Page Setup menu and make these selections: ■ Paper Size: #10 Envelope ■ Orientation: Landscape In the Print screen (using a supported printer driver), make this selection and send the job to the printer. ■ Paper Source: ■ Use envelopes that are at least #10-size (4.13 x 9.5 in. / 104.1 x 241.3 mm).
14 Printing on labels Recommended Avery™ labels: A/Letter: 5160 5164 A4: L7162 L7165 1 At the printer 1 Adjust the printer’s media thickness switch to Thick. 2 Insert the label sheets (maximum capacity is 30 sheets): 3 ■ Side to be printed is face-up. ■ The top of the sheet enters the printer first. 2 At the front panel prompt, scroll to Label and press OK.
In the application 1 Guidelines for printing on labels If your application has a setting for Avery™ labels, use it as a template. Otherwise, refer to the instructions included with the labels for margin settings. ■ Recommended labels: Use Avery labels. ■ Each label is at least 25.4 x 66.7 mm (1 x 2.625 in.) in size. Smaller labels may peel off and damage printer components. ■ If any of the labels on a sheet are missing, do not use that sheet; it may damage printer components.
16 Automatic Duplex Printing 1 a Automatic duplex printing requires that the Lower Tray Assembly be installed. b plex per Du Pa 1 Make sure that the Duplex Unit is inserted in the printer’s upper (a) slot. c r tte Leper A/Pa ga Le per l Pa Never put media in the Duplex Unit; the printer will report a media jam. 3 4 5 6 7 Load 75 - 90 g/m2 (20 - 24 lb.) paper in the paper tray.
4 Decide on a binding preference (how the page turns) for Step 5: 5 In the Print screen, select the Duplex option and a binding preference: Macintosh Drivers: Landscape Portrait LaserWriter 8.5.1 Long edge Short edge LaserWriter 8.3.4 9102-50 ■ From the pull-down menu, choose Layout. ■ Select Print on Both Sides. ■ Select a binding preference. ■ Click Options. ■ Select 2-Sided Printing. ■ Select Short-Edge Binding or Long-Edge Binding. ■ Click Properties. ■ Click Paper.
Duplex Printing 18 Manual Duplex Printing: Multi-Purpose Tray Side 1 Two-sided printing on specialty media can shorten component life. For a multi-page document, print odd-numbered pages for Side 1. (This selection is application-specific). 1 Insert paper with the side to be printed face-up. This example shows letterhead paper. 2 In the printer’s front panel, select the media type at the prompt. Front panel selection Media type Paper: Standard laser paper 90 - 105 g/m2, 24 - 28 lb.
Side 2 For a multi-page document, print even-numbered pages for Side 2. (This selection is application-specific). 1 Insert the paper with the blank side face-up. 2 In the printer’s front panel, select the media type at the prompt. Front panel selection Media type Paper 2nd Side: Standard laser paper 90 - 105 g/m2, 24 - 28 lb. Coated Paper: Tektronix Glossy Coated paper 1234567 Card stock Card or Envelope: Heavy laser paper 109 - 150 g/m2, 29 - 40 lb.
20 Front Panel Messages Message Action Page :low The displayed color Toner Cartridge is running out; replace it soon. Energy Star Mode Wake Up Menu The printer is in energy conservation mode. Press the Wake Up button on the front panel or send a print job to bring the printer to Ready. Error XX 1 Press the Info button for problem information. Follow any steps listed. 2 If the failure persists, note the display’s error number.
Troubleshooting Print Quality If you notice a problem with the quality of your prints, the probable solution is replacing one of the consumables. Keep in mind this basic guideline: For detailed troubleshooting information, refer to the Advanced Features and Troubleshooting Manual on the printer’s CD-ROM or web site. 1 :replace Power Error ■ If the symptom appears in a single color: Replace the Toner Cartridge.
Troubleshooting Symptom: In one color only? 22 Solution: Replace that color Toner Cartridge. 1 color has many vertical streaks. Replace the Toner Cartridge. 1 color has a light vertical streak. 1 Adjust the color density (see page 38). 2 Replace the Toner Cartridge. 1 color is light or faded.
Symptom: In all four colors? Streak through all 4 colors. Solution: 1) Choice of media or 2) Replace Imaging Unit, or Fuser, or Fuser Roll. 1 Use Tektronix media. 2 Use the correct media tray for the media you are using. 3 When using the Multi-Purpose Tray, select the correct media in the front panel. 4 Print about 25 blank pages until the problem disappears. Spot in the same place on the page in all 4 colors. 5 Replace the Imaging Unit. Random spots appear on every page.
Symptom: In all four colors? Solution: 1) Choice of media or 2) Replace Imaging Unit, or Fuser, or Fuser Roll or Main Charge Grid. 1 Remove, then re-insert the Main Charge Grid. 2 Replace the Main Charge Grid. Prints are black (edge to edge). 33100-34 Hints All 4 colors are extremely faded. or ■ Use Tektronix media. ■ Use the correct media tray for the media you are using. ■ When using the Multi-Purpose Tray, select the correct media in the front panel.
Symptom: In all four colors? Solution: 1) Choice of media or 2) Replace Imaging Unit, or Fuser, or Fuser Roll or Main Charge Grid. If Jam at C, clear the media jam. Print 10-20 blank pages to clean the roller. ■ If you still see the problem, replace the Fuser Roll. ■ If you still see the problem, replace the Fuser. Pieces of the printed image are missing and reappear out of place, approximately 129 mm (5 in.) down the page. or Hints Media frequently wraps around the Fuser (Jam at C).
26 Media Jams Preventing media jams ■ To reduce the frequency of media jams, use Tektronix media and occasionally clean the rollers. See page 32. ■ When using the Multi-Purpose Tray, always set the media thickness switch for the media you are using. See page 9. ■ If the printer frequently reports Jam at MultiPurpose, move the media thickness switch to a thicker setting. A D C B E Locating a jam The front panel reports Jam at . The are the sensors listed as A through E.
Jam at A Jam at B Solution 1 Solution 2 Solution 1 Solution 2 Open the left side door; remove the jammed media. Remove the media tray; remove the jammed media from inside the printer. Open the lower left side door and remove the jammed media. Remove the selected media tray (middle or lower tray) and remove the jammed media from inside the printer.
Media Jams 28 Jam at C 1 Remove the Fuser: a Open the printer’s front door. b Turn the small blue thumbscrew counterclockwise to unlock the Fuser. c 2 The Fuser is hot. To avoid personal injury, use caution or wait for it to cool before touching it. 1 a Press the safety catch and slide the Fuser out of the printer. 4 5 c Remove the Fuser Roll: a Press out on the two tabs to unlock the Fuser Roll. b Lift the Fuser Roll out of the Fuser and set it aside.
Jam at D The Fuser is hot. To avoid personal injury, use caution or wait for it to cool before touching it. Solution 2 Solution 1 1 Open the front door. 1 Open the front door and the right side door. 2 Pull open the access door; the media is visible. 2 Turn the Fuser’s large blue knob counterclockwise. 3 Turn the Fuser’s large blue knob counterclockwise. 3 Remove the jammed media. 4 Remove the media.
Jam at E 30 Jam at Multi-Purpose Tray Solution 1 Solution 2 Remove the jammed media from the output tray. Pull open the access door (above the plastic output tray) and remove the media. 1 Remove all media in the Multi-Purpose Tray. 2 Remove the jammed media from the Multi-Purpose Tray. 3 Set the Media Thickness switch for the media you are using (page 9). 4 Re-insert the media in the Multi-Purpose Tray.
Jam at Duplex Unit 1 Remove the Duplex Unit (it is in the printer’s upper slot). 2 Open the Duplex Unit. 3 Remove the jammed media. 1 2 3 If paper is not in the Duplex Unit, open the right side door; paper may be jammed there. 4 Close the Duplex Unit; press down to make sure that it snaps shut. 5 Re-insert the Duplex Unit into the printer’s upper slot.
Occasional Cleaning Replacement cleaning kit 32 016-1710-00 If your printer experiences frequent media jams, clean the rollers. Instructions are included in these locations: ■ Cleaning menu in the front panel ■ Video clips on the printer’s CD-ROM 33100-49 Print the cleaning instructions 1 On the printer’s front panel, press Menu. Clean Pick Rollers 1 alcohol Press the arrow buttons; scroll to Cleaning.
Printing Help Pages from the Front Panel 1 The front panel contains pages to help you use the printer and diagnose print quality.
Consumables Information 34 Consumables Information Using the Consumables Page ■ Toner life remaining: OK Remaining: >500 @ 5% coverage average coverage/page: 7.3% More than 500 pages remaining at 5% coverage Toner Black Remaining: >500 @ 5% coverage average coverage/page: 11.5% Page Remaining: >500 @ 5% coverage Your average coverage/page: 7.3% OK Magenta Page Remaining: >500 @ 5% coverage Your average coverage/page: 11.5% OK Cyan Page Remaining: >500 @ 5% coverage Your average coverage/page: 9.
Using the Usage Profile Report Provides in-depth information on printer usage: ■ Consumables used ■ Tray and media selections ■ Printer interventions ■ Analysis of usage rates Phaser 740 Color Printer ® Usage Profile For detailed information on the Usage Profile report, refer to “Printer Management” on the printer’s CD-ROM or web site.
Using PhaserLink™ software PhaserLink software, using World Wide Web technology, provides these printer management tools: ■ Print job status ■ Printer usage ■ Routine troubleshooting ■ Configuration of printer settings PhaserLink requires a TCP/IP connection. To access PhaserLink information, enter your printer’s Internet address in a web browser. For detailed information on PhaserLink, refer to “Printer Management” on the printer’s CD-ROM or web site.
Replacing Consumables Detailed, illustrated replacement instructions are shipped with each replaceable component.
38 Controlling Color Density When colors look faded, adjust the toner color density to extend the life of the components. Print and use the Color Reference Page 1 1 2 In the printer’s front panel, scroll to Calibrate Colors, press Menu and print the Color Reference Page.
Color Density Density Samples Color Samples Phaser® 740 Color Laser Printer Phaser ® 740 Color Laser Printer
40
Getting More Information Find detailed printer information in any of these locations.
42 Getting Help Customer Support Centers Online Services World Wide Web: TekSMART™ Knowledge Base: Technical support: Current software: Anonymous ftp server: Subscribe to email update notices: www.tek.com/Color_Printers/ Australia 1-800-811-177 France 01 69 86 8137 New Zealand +61 2 9888 0100 www2.tek.