
Printer User Manual
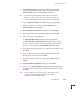
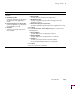
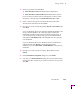
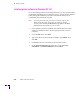
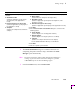
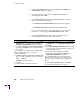

Table Of Contents
- Copyright
- Warranty
- Safety Summary
- Table of Contents
- Introduction
- Getting Set Up
- Printing Basics
- Overview
- Printing from a PC
- Using Windows printer drivers
- Using the printer’s front panel
- Using the AdobePS 4 and Microsoft drivers with Windows 95
- Using the Tektronix driver for Windows 3.1
- Using the Adobe PostScript driver for Windows 3.1
- Using the Windows NT 3.51 PostScript driver
- Using the Windows NT 4.0 PostScript driver
- Printing from DOS
- Printing from a Macintosh
- Printing from a workstation
- Printing from specific applications
- Selecting print features
- Print quality modes
- Color corrections
- All about media
- Media trays
- Printing on letterhead
- Printing transparencies
- Manual-feed printing
- Duplex printing
- Printer languages: PostScript, HP-GL, PCL5
- Fonts
- Printing: Beyond the Basics
- Caring for Your Printer
- Overview
- Adding ink
- Emptying the waste liner (A)
- Replacing the maintenance tray (B)
- Replacing the media tray separator pad
- Cleaning the printer
- Cleaning pages
- Cleaning supplies
- Using isopropyl alcohol
- Identifying cleaning procedures
- Cleaning for light stripes: printhead
- Cleaning for upper tray jams: media pick roller
- Cleaning for jams and ink smears: media-feed rollers
- Cleaning for lower tray jams: paper pick roller
- Cleaning for lower tray jams: paper-feed rollers
- Cleaning for ink smears and transfix problems: internal paper path
- Cleaning for ink smears: paper-exit path
- Cleaning the maintenance tray blade (optional)
- Moving your printer
- Troubleshooting
- If you need help
- Receiving email update notices
- Using the automated fax systems
- Front panel messages
- Problems and solutions
- All about media jams
- If your file doesn’t print
- PostScript printing errors
- Printed colors are not what you expected
- Selecting page sizes in Windows applications
- Fonts printing incorrectly from Windows
- Sharing the printer on a network
- Using the Front Panel
- Supplies, Accessories, and Expanding Your Printer
- Tektronix supplies: the mark of quality
- Customizing your printer
- Ordering printer supplies
- Extended Features upgrade
- Lower Paper Tray Assembly (recommended)
- Printer Station (recommended)
- Media tray
- Memory upgrade
- Font upgrade
- 600 x 300 dpi upgrade
- PhaserShare network cards (recommended)
- Phaser Copystation
- SCSI hard disk
- PhaserPrint for UNIX software
- PhaserSym
- Regulatory Information and Specifications
- Index

Getting Set Up
2
User Manual
2-39
6.
The Finish Installation dialog box contains instructions for
completing the printer software setup; click Next. The Print
Manager opens automatically.
Note
The setup instructions remain visible while the Print Manager is
running. If you click on the InstructionÕs dialog box, press the
<Alt><Tab> keys to see the Print Manager again.
7.
From the Printer menu, select Create Printer.
Easy Install Custom Install
The following files are copied to your
hard disk:
■ QuarkXPress PDF
(installs an application-specific printer
description file, if the application is
found)
■ PhaserPrint Plug-in for Photoshop
(installs an application-specific plug-in, if
the application is found)
■ Samplers
(installs color sampler charts and a fonts
sampler)
1. In the Driver Installation dialog box, select from the following options:
■ Drivers/PPDs
(installs driver files and printer description files)
■ QuarkXPress PDF
(installs an application-specific printer description file, if the
application is found)
■ PhaserPrint Plug-in for Photoshop
(installs an application-specific plug-in, if the application is found)
2. Click Next.
3. In the Custom Install: Select Utilities dialog box, select from the
following options:
■ Printer Utilities
(installs utility files for selecting printer features)
■ Network Utilities
(installs utility files for using the printer on a network)
■ Samplers
(installs color sampler charts and a fonts sampler)
Use the default Destination Directory or click Browse.
4. Click Next.
5. Files are copied to your hard disk.