
User Manual


Application examples
4. Go back to the In
tegrator Setup menu to configure the clock start, duration or
the trigger level.
NOTE. The Integrator Setup menu also provides an option to set up the target
power factor for the design. This feature displays the value of VArs required
to correct the average power factor to the target power factor. Refer to the
Integrator mode section of this manual for more information on each option.
(See page 43, I
ntegrator mode.)
5. After you have set the integration mode and selected the start-stop method,
press
.
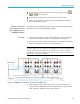
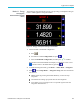
The PA3000 will display integration parameters such as : Hr, Whr, VAHr,
and AHr.
6. Power on the DUT and the results on the PA3000 should start updating.
The integration results will display zero until it is triggered either manually
using the INTEG RUN key on the front panel or b y the selected start method.
The LED under the INTEG RUN key stays on w hile integration measurements
are running.
7. To stop the integration, press the INTEG RUN key again; to reset, use t he
RESET/CLEAR k ey.
The integrator can be run simultaneously on all groups/channels on the PA3000.
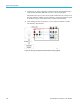
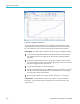
While in the integ rator mode, the integration graph can be enabled by pressing
. The graph displays all integration m easurements for a given group. Scroll
through the different groups by using the arrow keys on the front panel.
Other parameters to graph can be selected by pressing the INT soft key.
Further settings if required
Data logging. The logging feature allows you to log data over time for prolonged
efficiency testing involving load and source sweeps. Use the DATA OUT key
to log data to a ny compatible flash drive connected to the front panel USB
connector. The ac tual logging interval can be changed by pressing
and going
to Interfaces → USB Host Data O ut. The log file will be saved as a .csv file.
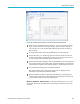
Ranging. By default the PA3000 is auto-ranging. Auto-ranging is fast and
generally unnoticeable, but might lead to loss of data while the auto-ranging
occurs. Using a fixed range while measuring energy consumption ensures that no
data is lost during the ranging process. To set a fixed range, press
and go to
Ranging → Current Range, and then choose a suitable fixed range, based on
the m easurements made during auto-ranging. If the range is too low, a warning
124 PA3000 Power Analyzer User Manual