
Install Instructions


4
Tools Required
Preparation
Materials Required
• 18 AWG LVT Solid Wire (low voltage connections)
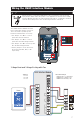
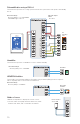
1. Remove the old thermostat
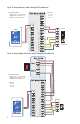
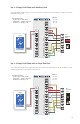
If more than 2 wires are present, identify the R & C wires for use when connecting the Thermostat.
Additional wires should be secured in a way that prevents them from touching the circuit board or
terminals on the thermostat after the R & C wires are connected.
• tekmar or jeweler screwdriver
• Phillips head screwdriver
• Wire stripper
• Drill (for wall anchor)
•
3
⁄16" drill bit (for wall anchor)
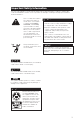
Ensure power to connecting equipment is off. To prevent the risk of personal
injury and/or death, make sure power is not applied to the thermostat or HVAC
Interface Module until they are fully installed and ready for configuration. All work
must be done with power to the circuit being worked on turned off.
NOTICE
Please be aware local codes may require this thermostat to be installed or connected by
an electrician.
NOTICE
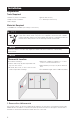
Thermostat Location
Consider the following:
• Interior wall. Keep dry. Avoid potential leak-
age onto the control.
• No draft, direct sun, or other cause for inac-
curate temperature readings.
• Away from equipment, appliances, or other
sources of electrical interference.
• Approximately 5 feet (1.5 m) off the finished
floor.
• The maximum length of wire is 500 feet (150 m).
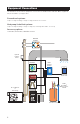
Installation