
User guide


Setting up the work environment
Choosing a printer
Before starting to create a document, you first need to set up your work environment.
The first step consists of selecting the printer on which you wish to print your labels. Not all printers share the
same characteristics and, as a result, different options are available according to the model of printer chosen.
The second step involves choosing your work environment options: for example, interface language, unit of
measurement, and so on. We will review all the available options available later in this chapter.
The final step consists of the document page setup: for example, defining the dimensions of the document,
orientation, margins, and so on.
Your label design software allows you to print to a wide range of printers. The drivers for these printers are
supplied with the software. You can also print to any Windows printer installed locally on your machine or on
your company’s network.
You must select the printer before you begin creating your document because the choice of printer will
determine page setup options, the use of different character fonts, and so on.
Selecting a printer
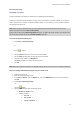
The Printer Selection can be accessed using:
Command: File > Select printer
-or-
Click the
button
- or -
Press the F5 key.
You can also access the Printer Selection window by clicking the Printer button in the Print window (F6).
Windows printers and native printers
Your label design software is capable of printing on a wide range of Windows and native printers, both direct
native and native transfer.
The term ''Windows printer'' refers to any printer installed on your operating system or network: generally
office printers, laser printers, and so on. Print jobs are sent to the Windows spooler (job queue).
The drivers for native and native transfer printers are supplied with the label design software. Printing on these
printers is managed directly by the software.
11