
User guide


Creating a document using fixed object
Creating and manipulating objects
Creating fixed objects involves inserting objects such as text, barcodes, images, lines, rectangles, and circles
into your document.
Creating objects
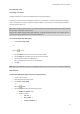
You can quickly and simply create an object in your document (bar code, image, text, drawing, etc.) using:
The Creation toolbar,
- or -
The Object menu.
Note: Each object created is automatically given a name by the application. When the object is selected, its
name appears in the Objects view and in the Object toolbar.
You can create an object using one of the following options:
Direct mode creation:
1. Click directly on the object or icon you want to insert into your document.
2. Click the location where you want to place the label.
- or -
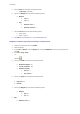
Guided mode creation (according to your requirements):
1. Click the menu button for your object. A submenu appears with the list of actions you can assign to it
(Fixed object, Wizard, New data source, Use an existing data source).
2. Select the action you need.
3. Click the location where you want to place the label.
Modifying an object
You can change an object using:
Buttons on the toolbar, formatting toolbar, alignment toolbar, etc.
Double-clicking the object
Document Explorer Objects view > Properties...
The Drag and Drop (To drag and drop, click on the item and, ho
lding the left mouse button down, drag the
item to the desired location.) function is used to perform current tasks (Current task include creating text or
imag
e objects by dragging and dropping text and graphic files supported by the application in Windows Explorer
or creating variable objects by dragging and dropping data sources in the Data Sources view.).