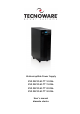
Uninterruptible Power Supply EVO DSP PLUS TT 10 KVA EVO DSP PLUS TT 15 KVA EVO DSP PLUS TT 20 KVA EVO DSP PLUS TT 30 KVA User’s manual Manuale utente
Index User’s Manual & English ........................................................................ 1 Safety Warnings ................................................................................. 1 1 Introduction ................................................................................. 2 2 General Characteristics ................................................................... 3 3 Receipt and site selection ................................................................
Indice Manuale Utente – Italiano ................................................................... 35 Avvisi di Sicurezza............................................................................ 35 1 Introduzione ............................................................................... 36 2 Caratteristiche Generali................................................................. 37 3 Ricevimento e Collocazione ............................................................
ENGLISH User’s Manual & English Safety Warnings Read this manual carefully and completely before installing and using the TECNOWARE EVO DSP PLUS TT Uninterruptible Power Supply, which, from here after, will also be referred to as UPS. The UPS must be used only by properly trained personnel. To ensure correct and safe operations, it is necessary that operators and maintenance personnel observe the general safety Standards as well as the specific instructions included in this manual.
ENGLISH 1 Introduction UPS EVO DSP PLUS TT (UPS means Uninterruptible Power Supply) is the result of constant technological research aimed at obtaining the best performance at the lowest cost. UPS EVO DSP PLUS TT is an advanced ON LINE UPS built specifically to protect your computer from any irregularities in the AC line (for example blackouts, brownouts, over voltages, micro interruptions), which often cause damage to hardware and software.
ENGLISH 2 General Characteristics UPS EVO DSP PLUS TT has all the advanced features, which guarantee maximum reliability and safety: • Double Conversion ON LINE Transformerless technology • Sinusoidal wave generated by an IGBT Inverter • Output Voltage regulation ±1% • Protection from overload and short circuits • Automatic Bypass to protect from accidental overload or Inverter fault • Start up even under Mains OFF conditions • Automatic protection when Battery is low • Automatic restart, fo
ENGLISH • In all circumstances, see the “Technical Characteristics” chapter for environmental specifications and check that the selected area meets these criteria. • During normal operation the UPS discharges a minimal amount of heat. So it is necessary to leave at least 25 cm of unobstructed space all around the UPS in order to keep it properly ventilated. • Do not obstruct ventilation holes. • Do not insert objects or pour liquids in the ventilation holes.
ENGLISH Following pages shows LCD display for operating modes and status. If the UPS is in normal operation, it will show seven screens one by one, which represents 3 Phase Input/Output voltages (AN, bN, CN), 3 Line Input/Output voltages (Ab, bC, CA) and frequency in turns (see the table below).
ENGLISH 4.2 NORMAL Mode The UPS typically works in Normal mode: Input mains power is available and its amplitude is within specifications. Please refer to figure 1.
ENGLISH The Battery mode is identified by: 1. Battery led is ON. 2. The graphic LCD panel shows the path of energy flow during Battery mode. 3. An acoustic signal every 4 seconds. 4.4 BYPASS Mode In Bypass mode, the AC Input line is directly connected with the UPS outlets by an Automatic Bypass. As indicated in figure 1, in Bypass mode the UPS recharges the batteries. If you connect the AC Input line to the UPS and the Input line breaker on the rear is “ON”, the UPS will go to Bypass mode.
ENGLISH The Bypass mode is identified by: 1. Bypass led is ON. 2. The graphic LCD panel shows the path of energy flow during Bypass mode. 3. An acoustic signal every 2 minutes. During Bypass mode, loads are fed directly from AC Input line. Therefore no protection against AC Input line disturbances or interruptions is present. 4.5 NO&OUTPUT Mode When Bypass voltage/frequency is out of acceptable range or Bypass is disabled, UPS will enter into No Output mode if powering on or turning off the UPS.
ENGLISH The No Output mode is identified by: 1. All he leds are OFF. 2. The graphic LCD panel shows the path of energy flow during No Output mode. 3. An acoustic signal every 2 minutes. 4.6 BATTERY TEST mode When UPS is in AC mode or CVCF mode, press “Test” key for more than 0.5s. Then, the UPS will beep once and start the Battery Test mode. The line between I/P and inverter icons will blink to remind users. This operation is used to check the battery status. The Battery Test mode is identified by: 1.
ENGLISH 4.7 ECO Mode It is possible to select the ECO mode to save energy and to increase the efficiency of the UPS. The ECO mode uses the Bypass to feed the loads. The UPS will operate as in Bypass mode whenever the Frequency/waveform/RMS value of AC Input line mains Voltage is within their tolerance limits. If the AC Input line Voltage goes beyond these limits, the UPS switches into normal operation.
ENGLISH 4.8 CONVERTER FREQUENCY Mode It is possible to select the Converter Frequency mode to work with the Output Frequency different from the Input Frequency. For example it is possible to work with 60 Hz Input Frequency and 50 Hz Output Frequency or 50Hz Input Frequency and 60 Hz Output Frequency.
ENGLISH 4.9 WARNING STATUS If some errors occur in the UPS (but it is still running normally), it will show one more screen to represent the warning situation. In the warning screen, the icon will be flashing, and it can show up to 3 error codes and each code indicates one error. You can find the code meaning in the warning code table (see 8.6 chapter). The Warning Status is identified by: 1. Line led is ON. 2. The graphic LCD panel shows the path of energy flow during Warning Status. 3.
ENGLISH 5 External Description 5.1 Front Panel The front panel informs the user about operating status, alarm conditions and measurements. It also provides access to controls and configuration parameters. Front panel shown below consists of three parts: 1. Graphic LCD panel provides complete information about the energy flow path and existing alarms, Load and Battery level, Input, Output and Battery measurements. 2. 4 LEDs when illuminated indicate UPS status. 3.
ENGLISH 5.1.1 Graphic LCD Panel Please refer to figure 3. Input & Battery Voltage Info Backup Time Info Fault Info Buzzer Info Battery Info Output Voltage Info Load Info Mode Operation Info Programmable Output Info Figure 3 – Graphic LCD Panel Graphic LCD Panel Function Backup time information Indicates how much time has passed in Battery mode. H: hours, M: minutes, S: seconds Fault information Indicates the warning that a fault has occurred.
ENGLISH Graphic LCD Panel Function Load information Indicates the load level by 0 25%, 26 50%, 51 75%, and 76 100%. Indicates Overload. Indicates the load or the Output is short circuited Mode operation information Indicates the UPS connects to the mains. Indicates the Battery is working. Indicates the Bypass circuit is working. Indicates the ECO mode is enabled. Indicates the Inverter circuit is working. Indicates the Output is working.
ENGLISH 5.1.2 Buttons Functions of the buttons are given below: Button Function ON Turn ON: press and hold the button more than 0.5 sec to turn the UPS ON. OFF Turn OFF: press and hold the button more than 0.5 sec to turn the UPS OFF. TEST Battery Test: press and hold the button more than 0.5 sec to test the Battery while in Normal mode. MUTE Mute the alarm: press and hold the button more than 0.5 sec to mute the buzzer. If you press it again after the buzzer is muted, the buzzer will beep again.
ENGLISH 5.
ENGLISH 1. Computer Interface (DB9 female connector): it is the communication RS 232 port. 2. Computer Interface (USB connector): it is the communication USB port. 3. EPO (Emergency Power OFF) connector 4. Share Current port (only available for Parallel model) 5. Parallel ports (only available for Parallel model) 6. Slot for SNMP Interface (optional) 7. Power stage fans 8. External Battery Box connector 9.
ENGLISH 5.2.2 EPO (Emergency Power Off) EVO DSP PLUS TT models have the EPO (Emergency Power OFF) connector on the rear side, (see figure 6). This permits to immediately switch the UPS Output OFF from a distance in case of emergency. The UPS is supplied with EPO short circuited terminals and in this case the product works normally.
ENGLISH The following table shows the recommended size for Input, Output and Battery wires.
ENGLISH The instructions below describe the operations to correctly connect the UPS to a Battery Box supplied by Tecnoware. We suggest to use ONLY Battery Box supplied by TECNOWARE. TECNOWARE declines any responsibilities if this rule is not followed. Before starting whichever operation be sure that the Battery circuit breaker of Battery Box is in “OFF” position. 4.
ENGLISH 7 First Start Up Turning the UPS ON is very easy. Nevertheless we recommend that, on First Start Up, the following procedure is observed for greater safety. 1. Check if the Input circuit breaker the rear side is in “OFF” position (see figure 4). 2. Check that no load is connected to the UPS Outputs. 3. Check that the AC Input Voltage is within Input specifications. 4. Turn “ON” the Input circuit breaker on the rear.
ENGLISH If UPS is used daily, it is recommended to leave the Input circuit breaker always “ON” and use the ON and OFF buttons on the front panel to activate/deactivate the Inverter. If the UPS has to be turn OFF for several days, it is recommended to turn “OFF” the Input circuit breaker. If the ON button is pressed when AC Input is not present, the UPS switches ON even, and works in Battery mode after about 4 seconds.
ENGLISH 8.4 Manual Bypass The Manual Bypass enables the user to isolate the electronic circuitry of the UPS from the mains and the load without interrupting the load operation by connecting the loads directly to the mains. This feature is useful while performing maintenance or service on the UPS. Maintenance and service may only be performed by authorized technical personnel. The procedure of switching into Manual Bypass shall only be executed by authorized technical service personnel.
ENGLISH 8.6 Operation in Warning Status When Fault led flashes and the buzzer beeps once every second, it means that there are some problems for UPS operation. Users can get the Warning code from graphic LCD panel. Please check the “Troubleshooting” chapter for details. Below you can see the “Warning Table”, with the correspondence between each warning and the relative signals (icons on graphic LCD and acoustic alarm) for the user. Some acoustic alarms can’t be muted unless the error is fixed.
ENGLISH 8.7 Operation in Fault Mode When Fault led illuminates and the buzzer beeps continuously, it means that there is a fatal error in the UPS. Users can get the Fault code from display panel. Please check the “Troubleshooting” chapter for details. Please check the loads, wiring, ventilation, mains supply, Battery and so on after the fault occurs. Don’t try to turn ON the UPS again before solving the problems. If the problems can’t be fixed, please contact Technical Service immediately.
ENGLISH 8.8 Operating Procedures for Parallel System EVO DSP PLUS TT are designed according to high MTBF figures with increased reliability but in case of necessity, a second (or more) EVO DSP PLUS TT can be connected in parallel for supplying the very critical load to increase reliability. Maximum of 3 pcs of identical power and specification UPS can be connected in parallel. 8.8.1 Parallel System Connection The steps for a correct Parallel System connection are explained below. 1.
ENGLISH 6. Turn OFF each UPS one by one (by pressing OFF button) and after all of them transfer to Bypass mode, turn “ON” the external Output circuit breaker of each unit. 7. Turn ON the UPS one by one (by pressing ON button). 8.8.2 Add one new unit into the Parallel System The steps for correct operation are explained below. 1. You can not add one new unit into the Parallel System when whole System is running. You must cut off the load and shutdown the System. 2.
ENGLISH 10 Technical Characteristics UPS EVO DSP PLUS TT Model Power Nominal Active Power 10 15 20 30 10 KVA 15 KVA 20 KVA 30 KVA 8 KW 12 KW 16 KW 24 KW Power Factor 0.
ENGLISH ECO Mode Voltage Range Lower Limit: 5÷10 % (selectable); upper Limit: 5÷10 % (selectable) Frequency Range (50 Hz) Lower Limit: 46÷48 Hz (selectable); upper Limit: 52÷54 Hz (selectable Frequency Range (60 Hz) Lower Limit: 56÷58 Hz (selectable); upper Limit: 62÷64 Hz (selectable BATTERIES Battery Type Number of batteries Lead acid, sealed, free maintenance 20/40 40 Nominal Battery Voltage 240 Vdc Battery Charge Time (typical) Expandable Autonomy 60 6 8 hours Available, through external B
ENGLISH 11 Maintenance 11.1 UPS Cleaning Before starting any cleaning operation, be sure that: 1. The Input circuit breaker on the UPS rear side is “OFF”. 2. The AC Input Voltage for the UPS has been removed. 3. The UPS is completely OFF (the graphic LCD panel is OFF). Use only a cloth dampened with water to clean the unit. If UPS works in an environmental unusually dusty or dirty, remove the dirty from the ventilation holes. Before restarting the UPS be sure it is completely dry.
ENGLISH 12 Troubleshooting This section gives information about the procedures which shall be performed in case of abnormal operation. If you fail to fix the problem consult authorized Technical Service with the following information: Model and serial number of the UPS, which can be found on the nameplate on the rear of the UPS. Description of abnormal operation and Fault code displayed on graphic LCD.
ENGLISH SYMPTOM Fault code is shown as 43. The icon lights on LCD display and alarm beeps continuously. Fault code is shown as 14, the icon lights on LCD display, and alarm beeps continuously. POSSIBLE CAUSE ACTION TO SOLVE UPS is overloaded too long and becomes faulty. Then UPS shuts down automatically. Remove excess loads from UPS Output and restart it. The UPS shuts down automatically because short circuit occurs on the UPS Output.
ENGLISH Conformity to the European Directives TECNOWARE S.r.l. confirms that EVO DSP PLUS TT models comply with the requirements set out in: the Low Voltage Directive (Safety) 2006/95/EC and following amendments, the EMC (Electro1Magnetic Compatibility) Directive 2004/108/EC and following amendments.
ITALIANO Manuale Utente – Italiano Avvisi di Sicurezza Leggere attentamente e completamente questo manuale prima di installare ed utilizzare il gruppo di continuità TECNOWARE della serie EVO DSP PLUS TT, che in seguito verrà chiamato anche semplicemente UPS. L'UPS deve essere utilizzato solo da personale opportunamente istruito.
ITALIANO 1 Introduzione UPS EVO DSP PLUS TT (UPS significa Uninterruptible Power Supply) è il risultato di una costante ricerca tecnologica mirata all'ottenimento delle migliori prestazioni a costi estremamente contenuti.
ITALIANO 2 Caratteristiche Generali UPS EVO DSP PLUS TT presenta tutte le moderne caratteristiche che garantiscono massima affidabilità e sicurezza: • Tecnologia ON LINE doppia conversione senza trasformatore • Onda sinusoidale generata tramite Inverter ad IGBT • Stabilizzazione in Uscita ± 1% • Protezione dal sovraccarico e dal cortocircuito • Bypass Automatico che interviene in seguito a sovraccarico accidentale o a guasto Inverter • Accensione anche in condizioni di Assenza Rete • Protezion
ITALIANO • Consultare comunque il capitolo “Caratteristiche Tecniche” per i requisiti ambientali e controllare che il luogo scelto rientri in tali specifiche. • Durante il normale funzionamento l’UPS emette una quantità minima di calore. È perciò necessario lasciare uno spazio libero di almeno 25 cm sia lateralmente che sul retro dell’UPS per permetterne una sufficiente areazione. • Non ostruire le fessure o i fori di ventilazione. • Non inserire oggetti o versare liquidi nei fori di ventilazione.
ITALIANO Le pagine seguenti illustrano le visualizzazione sul display LCD durante i vari modi di funzionamento e stati. Durante il normale funzionamento sul display LCD scorrono 7 diverse visualizzazioni; nelle prime tre sono indicate i valori Input/Output delle tensioni delle 3 Fasi rispetto al Neutro (AN, bN, CN), nelle 3 successive sono indicare i valori Input/Output delle tensioni tra le 3 Fasi (Ab, bC, CA) e nella settima è indicata la frequenza Input/Output (fare riferimento alla figura seguente).
ITALIANO 4.2 Modo NORMALE È il modo tipico di funzionamento. In questo caso la Tensione di Rete elettrica è presente in Ingresso ed ha ampiezza all'interno delle specifiche. Fare riferimento alla figura 1.
ITALIANO Il modo Batteria è caratterizzato da: 1. Il led Battery è ON. 2. Il display grafico LCD mostra il percorso del flusso di energia durante il modo Batteria. 3. Emissione di un breve segnale acustico ogni 4 secondi. 4.4 Modo BYPASS In modo Bypass la linea di alimentazione d'Ingresso viene collegata direttamente all'Uscita grazie al blocco Bypass Automatico che seleziona la via di Bypass. Come è indicato in figura 1, la funzione di ricarica delle batterie è garantita anche in questo caso.
ITALIANO Il modo Bypass è caratterizzato da: 1. Il led Bypass è ON. 2. Il display grafico LCD mostra il percorso del flusso di energia durante il modo Bypass. 3. Emissione di un breve segnale acustico ogni 2 minuti. In modo Bypass, i carichi sono alimentati direttamente dalla linea elettrica d’Ingresso tramite il Bypass. Quindi non è attiva nessuna protezione contro i disturbi e le interruzioni della linea elettrica. 4.
ITALIANO Il modo No Output è caratterizzato da: 1. I led del pannello frontale sono tutti OFF. 2. Il display grafico LCD mostra il percorso del flusso di energia durante il modo No Output. 3. Emissione di un breve segnale acustico ogni 2 minuti. 4.6 Modo BATTERY TEST Mentre l’UPS sta funzionando in modo Normale (o in modo Convertitore di Frequenza), premere il pulsante “Test” per almeno 0.5 secondi. In tal caso l’UPS emetterà un segnale acustico e comincerà a funzionare in modalità Battery Test.
ITALIANO 4.7 Modo ECO È possibile selezionare il modo ECO per risparmiare energia e aumentare l’efficienza dell’UPS. Il modo ECO utilizza il Bypass per alimentare i carichi. L’UPS funziona come in modo Bypass finché i parametri della Tensione d’Ingresso (frequenza, forma d’onda, e valore RMS) sono all’interno dei limiti accettabili. Se la Tensione d’Ingresso esce dai limiti accettabili, l’UPS abbandona la modalità ECO e torna a lavorare normalmente. Il modo ECO non è abilitato dalla fabbrica.
ITALIANO 4.8 Modo CONVERTITORE DI FREQUENZA È possibile selezionare il modo Convertitore di Frequenza quando occorre avere la Frequenza d’Uscita diversa dalla Frequenza d’Ingresso. Per esempio è possibile lavorare con la Frequenza d’Ingresso 60 Hz e la Frequenza d’Uscita 50 Hz ed anche con la Frequenza d’Ingresso 50 Hz e la Frequenza d’Uscita 60 Hz. Il modo Convertitore di Frequenza non è abilitato dalla fabbrica e la Frequenza d’Uscita è sempre sincronizzata con la Frequenza d’Ingresso.
ITALIANO 4.9 STATO DI ALLARME Se si verificano delle condizioni di Allarme, l’UPS continua a funzionare normalmente e visualizza sul display LCD lo stato di Allarme: l’icona lampeggia e sono visualizzati fino a 3 codici di Allarme. Consultare la Tabella Allarmi (capitolo 8.6) per conoscere il significato del codice di Allarme. Lo Stato di Allarme è caratterizzato da: 1. Il led Line è ON. 2. Il display grafico LCD mostra il percorso del flusso di energia durante lo Stato di Allarme. 3.
ITALIANO 5 Descrizione Esterna 5.1 Pannello Frontale Il pannello frontale informa l’utente sullo stato di funzionamento, sulle condizioni di allarme e sulle misure. Inoltre consente di controllare e configurare i parametri di funzionamento. Il pannello frontale, mostrato nella figura 2, è costituito da 3 parti: 1.
ITALIANO 5.1.1 Pannello LCD Grafico Prego riferirsi alla figura 3. Info Tensione d’Ingresso e di Batteria Voltage Info Info Tempo Backup Info Fault Info Allarme Acustico Info Tensione d’Uscita Info Batteria Info Load Info Modo di Funzionamento Info Output Programmabile Figura 3 – Pannello LCD grafico Pannello LCD Grafico Funzione Informazioni del Tempo di Backup Indica quanto tempo è trascorso in modo Batteria.
ITALIANO Pannello LCD Grafico Funzione Informazioni del Carico (Load) Indica che il livello del carico è compreso tra 0 25%, 26 50%, 51 75% e 76 100%. Indica la condizione di Sovraccarico (Overload). Indica la condizione di corto circuito della linea d’Uscita. Informazione del Modo di Funzionamento Indica che l’UPS è connesso alla linea elettrica d’Ingresso. Indica che la Batteria è attiva. Indica che il blocco Bypass è attivo. Indica che è stato attivato il modo ECO.
ITALIANO 5.1.2 Pulsanti Le funzioni dei pulsanti presenti sul pannello frontale sono riportate sotto: Pulsante Funzione ON Attivazione (ON) dell’UPS: per attivare l’UPS premere e mantenere premuto il pulsante per più di 0.5 secondi. OFF Disattivazione (OFF) dell’UPS: per disattivare l’UPS premere e mantenere premuto il pulsante per più di 0.5 secondi. TEST Test Batteria: per svolgere un Test Batteria premere e mantenere premuto il pulsante per più di 0.
ITALIANO 5.
ITALIANO 1. Interfaccia di Comunicazione (connettore femmina DB9): è la porta di comunicazione RS232. 2. Interfaccia di Comunicazione (connettore USB): è la porta di comunicazione USB. 3. Connettore EPO (Emergency Power OFF) 4. Porta per Sharing di Corrente (presente solo nei modelli predisposti per il funzionamento Parallelo) 5. Porte di collegamento Parallelo (presenti solo nei modelli predisposti per il funzionamento Parallelo) 6. Slot per Interfaccia SNMP interface (opzionale) 7.
ITALIANO 5.2.2 EPO (Emergency Power Off) I prodotti EVO DSP PLUS TT hanno sul retro il connettore per EPO (Emergency Power OFF) (vedi figura 6), che permette di disattivare immediatamente l’Uscita dell’UPS a distanza in caso di emergenza. Il prodotto viene fornito con i terminali dell’EPO cortocircuitati e in questo caso il prodotto funziona normalmente.
ITALIANO La seguente tabella indica Ie specifiche raccomandate dei cavi da utilizzare per i collegamenti per Ingresso, Uscita e Box Batterie.
ITALIANO Le istruzioni descritte sotto descrivono le operazioni da svolgere per collegare correttamente l’UPS ad un Box Batterie esterno fornito da TECNOWARE. Si consiglia di utilizzare ESCLUSIVAMENTE Box Batterie forniti da TECNOWARE. In caso contrario TECNOWARE declina ogni sua responsabilità. Prima di svolgere qualsiasi operazione accertarsi che l'interruttore Batterie del Box Batterie sia in posizione “OFF”. 4.
ITALIANO 7 Prima Accensione La procedura di prima accensione è molto semplice. Si consiglia di seguire con attenzione i punti successivi per una maggiore sicurezza. 1. Controllare che l'interruttore Ingresso Rete sul retro sia in posizione “OFF” (vedere figura 4). 2. Controllare che nessun carico sia collegato alle Uscite dell'UPS. 3. Controllare che l’ampiezza della Tensione di Rete elettrica in Ingresso sia all’interno delle specifiche. 4. Portare su “ON” l’interruttore Ingresso Rete.
ITALIANO Se si utilizza quotidianamente l’UPS, si consiglia di lasciare sempre l'interruttore Ingresso Rete in posizione “ON” e utilizzare i pulsanti ON ed OFF del pannello frontale per attivare e disattivare l’Inverter. Se invece si prevede di tenere disattivo l’UPS per alcuni giorni allora si consiglia di posizionare l'interruttore Ingresso Rete in posizione “OFF” e spegnere così totalmente l'UPS.
ITALIANO 8.4 Bypass Manuale Il Bypass Manuale permette di isolare i circuiti elettronici dell’UPS dalla Rete d’Ingresso e dal carico senza nessuna interruzione nell’erogazione di potenza sul carico. Infatti il Bypass Manuale permette di collegare direttamente la linea d’Ingresso Bypass al carico in Uscita e fornire potenza al carico per mezzo della linea di Bypass, escludendo l’UPS. Il Bypass Manuale è utile quando occorre svolgere operazioni di manutenzione o assistenza sull’UPS.
ITALIANO 8.6 Segnalazioni di Allarme La condizione di Allarme è segnalata dal lampeggio del led Fault e dall’emissione dell’allarme acustico una volta ogni secondo. i tipi di Allarme che si possono verificare durante il normale funzionamento sono elencati nella “Tabella Allarmi” sotto riportata. Per ogni allarme è indicato anche il simbolo che lampeggia sul display grafico. Per maggiori dettagli consultare il capitolo “Anomalie ed Interventi”.
ITALIANO 8.7 Segnalazioni di Guasto Se durante il funzionamento si verifica un Guasto (Fault), allora l’UPS segnala la condizione critica con l’accensione continua del led Fault e con l’emissione dell’allarme acustico continuo. Inoltre sul display grafico è visualizzato il codice di Fault. Per maggiori dettagli consultare il capitolo “Anomalie ed Interventi”. In caso di Fault, prego controllare i carichi alimentati, i collegamenti, la ventilazione, la linea elettrica d’Ingresso, le batterie.
ITALIANO 8.8 Procedure Operative per Sistemi Parallelo L’UPS EVO DSP PLUS TT è molto affidabile ed è stato progettato per garantire un elevato MTBF (Medium Time Between Failure); ma nel caso sia necessario alimentare un carico molto critico, un secondo (o più) UPS può essere collegato in Parallelo, per aumentare ulteriormente l’affidabilità del sistema di alimentazione.
ITALIANO 5. Accendere gli UPS uno alla volta (premendo il tasto ON). Assicurarsi che ogni UPS si sia acceso regolarmente e che funzioni in modo Normale. Misurare la Tensione d’Uscita di ogni UPS e controllare che le tensioni misurate non differiscano tra loro più di 2V. Se la differenza supera 2V, controllare accuratamente i collegamenti dei cavi Parallelo e di Sharing parallelo di corrente. Se i collegamenti sono corretti, c’è un problema interno ad uno degli UPS.
ITALIANO 10 Caratteristiche Tecniche Modello UPS EVO DSP PLUS TT Potenza Potenza Attiva Nominale 10 15 20 30 10 KVA 15 KVA 20 KVA 30 KVA 8 KW 12 KW 16 KW 24 KW Fattore di Potenza 0.
ITALIANO Modo ECO Range Tensione Limite inferiore: 5÷10 % (selez.); Limite superiore: 5÷10 % (selez.) Range Frequenza (50 Hz) Limite inferiore: 46÷48 Hz (selez.); Limite superiore: 52÷54 Hz (selez.) Range Frequenza (60 Hz) Limite inferiore:: 56÷58 Hz (selez.); Limite superiore: 62÷64 Hz (selez.
ITALIANO 11 Manutenzione 11.1 Pulizia dell’UPS Prima di svolgere qualsiasi operazione di pulizia: 1. L’interruttore Ingresso Rete sul retro sia “OFF”. 2. La linea elettrica d’Ingresso all’UPS sia scollegata. 3. L’UPS sia completamente spento (solo in tal caso il display LCD grafico è spento). Pulire le superfici esterne usando un panno leggermente inumidito solo con acqua. Se l’UPS opera in un ambiente insolitamente polveroso o sporco, rimuovere la polvere dalle feritoie.
ITALIANO 12 Anomalie ed Interventi Questo capitolo descrive le procedure che devono essere seguite in caso di funzionamento anomalo. Nel caso in cui le azioni consigliate per risolvere l’anomalia non avessero esito positivo, contattare il Servizio Assistenza. Fornire al Servizio Assistenza le seguenti informazioni: Modello e numero di serie dell’UPS (stampati nell’etichetta sul retro del prodotto). Descrizione del funzionamento anomalo e codice Fault visualizzato sul display grafico.
ITALIANO ANOMALIA POSSIBILE CAUSA Sul display grafico è visualizzato il codice di Fault 43, è acceso il L’UPS è stato in condizioni di Overload troppo a lungo. simbolo e l’allarme acustico suona continuamente. L’UPS si è disattivato automaticamente, segnalando una situazione di guasto. Sul display grafico è visualizzato il codice di Fault 14, è acceso il simbolo e l’allarme acustico suona continuamente.
ITALIANO Conformità alle Direttive Europee TECNOWARE S.r.l. dichiara che il prodotto EVO DSP PLUS TT è conforme ai requisiti stabiliti nella Direttiva Bassa Tensione (Sicurezza) 2006/95/CE e successive modifiche, e nella Direttiva EMC (Compatibilità Elettromagnetica) 2004/108/CE e successive modifiche.
© Copyright 2013 TECNOWARE s.r.l. All rights reserved. All trademarks are property of their respective owners. TECNOWARE s.r.l. Via Montetrini, 2E – Molino del Piano – Florence – Italy www.tecnoware.com This manual has been printed and edited by TECNOWARE s.r.l. October 2013 edition – Version 1.
TECNOWARE s.r.l. www.tecnoware.