
Operation Manual


SnagIt 9.0 Help File PDF
www.techsmith.com
59
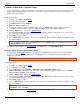
Record a Video with a Caption Effect
Use the Caption Effect to add text, formatted to your specifications, during the capture process. Include a time/date
stamp, system-related data, a title or free text. Use the custom settings to change the font, font, size and color,
position of the text, and more.
Setup Instructions
1. In SnagIt, select Video capture mode.
2. Select the Input and Output.
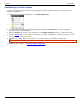
3. Select Effects down arrow > Caption.
4. Enable the Enable Caption option.
5. Create your own Effect using the available settings. Click the Options button in the Caption group box to
customize the font and caption location. Click OK. Click OK to exit the Video Caption dialog box.
6. Click the Capture button or press the capture hotkey.
7. A red rectangle appears. Use the rectangle to choose a window to capture or drag the mouse to select a region.
The Video Capture dialog box appears.
8. Click Start to begin recording.
9. Press <CTRL+Shift+P> to end recording. The video renders for a moment. After rendering, the capture is sent to
the selected Output.
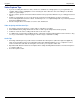
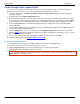
To disable the Caption effect, select Effects down arrow > Caption. Within the Caption task page, disable
the Enable Caption option. Click OK.
For additional capture options, see Video Capture. For additional tips, see Video Capture Tips.
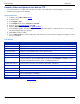
Record a Video in Time-Lapse Capture Mode
Use Time-lapse capture mode to capture at one frame rate and playback at a slower/faster rate. Set the timing to
slow or very slow frame rates for setting up a monitoring application or capturing program activities that requires
lengthy processing times.
If the Time-lapse capture mode is on, the audio recording and camera recording features are disabled.
Setup Instructions
1. In SnagIt, select Video capture mode.
2. Select the Input and Output.
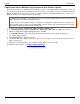
3. Select Input down arrow > Properties > Video tab > Enable Time-lapse capture option.
4. Click the Time-lapse Setup button. The Time-lapse capture Setup dialog appears. Enter the desired Capture
rate. Click OK. Click OK to exit the Video tab.
5. Click the Capture button or press the capture hotkey.
6. A red rectangle appears. Use the rectangle to choose a window to capture or drag the mouse to select a region.
The Video Capture dialog box appears.
7. Click Start to begin recording.
8. Press <CTRL+Shift+P> to end recording. The video renders for a moment. After rendering, the capture is sent to
the selected Output.
To disable the Time-lapse Effect, select Input down arrow > Properties > Video tab > Enable Auto
configuration option. Click OK.
For additional capture options, see Video Capture. See also Video Capture Tips.