
Operation Manual

Help File PDF SnagIt 9.0
18
www.techsmith.com
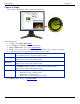
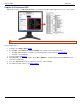
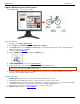
Capture a Shape
Take a capture using different shapes to define the capture area.
Setup Instructions
1. In SnagIt, select Image capture mode.
2. For the Input, select Shape > then the desired shape.
3. Click the Capture button or press the capture hotkey.
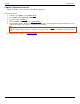
4. Drag the cursor over the area to capture. A red border defines the area to capture as you drag.
5. Use the tips below to correctly define the shape and close the capture.
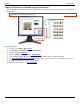
Free Hand
Capture a closed loop. The loop automatically closes when you release the
mouse. When mouse is released, the capture is taken.
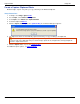
Ellipse
Hold <SHIFT> during the capture to create a perfect circle.
When mouse is released, the capture is taken.
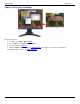
Rounded
Rectangle
Hold <SHIFT> during the capture to create a perfect square.
When mouse is released, the capture is taken.
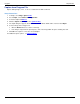
Triangle
The height and width are determined by the mouse movement.
Hold <SHIFT> during the capture to create a perfect equilateral triangle.
When mouse is released, the capture is taken.
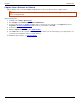
Polygon
The area must be a closed shape with straight lines.
Each time you click, a new line starts.
Double-click to close the shape.
When mouse is released, the capture is taken.
For additional capture options, see Image Capture.