
Installation Instructions


Snagit on Windows Snagit Enterprise Installation
www.techsmith.com - 2 -
Preparing for an Enterprise Installation
Before starting the enterprise installation of Snagit across your organization, you first need to do the following:
1. Create a central installation directory.
2. Create the custom installation using basic customizations and, if needed, advanced customizations.
Step 1: Creating a Central Installation Directory
A central installation directory on a network share (e.g., \\machine\share\Snagit) is required for most software
deployment schemes, including SMS, group policy, and manual deployment.
Create a central installation directory on a public network share and set the appropriate permissions.
Some deployment tools, such as Windows 2000 Server Group Policy, require that the client’s
machine account have read access to the file share, because the software may be installed
before any user logs on to the system.
Step 2: Creating the Custom Installation
There are two different levels of installation customization: basic and advanced.
Basic Custom Installation
Snagit is a standard Windows Installer-based package. These packages can be customized using transforms
(MST files). Many commercial and free tools are available to generate these transforms. The procedure
described below uses Orca, a free tool available in the Windows SDK from Microsoft.
For more information and to download this tool, see http://msdn2.microsoft.com/en-us/li-
brary/aa370557.aspx
Orca is a powerful, general-use tool for editing tables in an MSI file and generating a transform (MST file) from
those changes. You can choose to register Snagit during the installation with a specific key you provide or to
change which features are installed. The resulting transform can then be applied to the Snagit installer to dis-
tribute any site-specific customizations.
The following procedure describes how to use Orca to customize the installation of Snagit:
1. Start Orca.
2. From the File menu, choose Open.
3. Browse to the Snagit MSI file. Click Open. The table editor is displayed.
4. From the Transform menu, choose New Transform to start creating a transform.
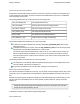
5. Properties affecting the installer’s behavior are in the Property table.
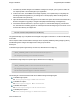
6. When all customizations are complete, generate the transform. To do this, from the Transform menu,
choose Generate Transform. Choose an appropriate name for the transform and save it on the same
file share in the same directory as the Snagit MSI file.
7. Exit Orca.