
Installation Instructions


Snagit 10 Enterprise Installation Guide
www.techsmith.com 4
To disable video capture:
Set NoVideoCaptureSupport to dword:00000001
To disable web capture:
Set NoWebCaptureSupport to dword:00000001
To disable printer capture:
Set NoPrinterCaptureSupport to dword:00000001
To disable prompting for Snagit Printer installation:
Set NoPrinterInstallationSupport to dword:00000001
To disable automatic update prompting and checking for new versions:
Set NoAutoUpdateSupport to dword:00000001
To disable “Register Snagit” online dialog:
Set NoRegistrationDialogSupport to dword:00000001
Installation
You can complete enterprise installation of Snagit across your organization using one of the following
procedures:
A managed installation across the organization (recommended method).
Manual installations on each machine in the organization.
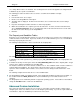
When upgrading from 9.0.0 to 9.x.x or higher, a dialog prompts users to keep or delete their existing
Library files. If the user is not available to make the choice, the installation fails.
As a work-around, do a deployment-wide uninstall of 9.0.0 before installing 9.x.x or higher. During the
silent uninstall, an admin can specify via a command line flag whether to keep or delete existing Library
files.
Use TSC_DATA_STORE=1 to bypass the prompt and remove the user’s Library.
Use TSC_DATA_STORE=0 to bypass the prompt and keep the user’s Library.
Managed Installation Using Group Policy in Windows
2000 Server
Using the Windows 2000 (or 2003) Server’s Group Policy manager, it is easy to deploy Snagit to everyone in
your organization. You should feel free to use whatever deployment method you are used to for MSI installs,
but this is one method we know works well and have tested.
1. Run the Active Directory Users and Computers snap-in. Right-click on the domain and select Properties.
2. Select the Group Policy tab. Select the default domain policy and click Edit.
3. Expand Software Settings under Computer Configuration. Right-click Software Installation and select
New > Package.
4. Type in the UNC path to the share. Not that this must be the full UNC path to the share, not a local drive.
Or, browser to the location through My Network Places.
5. Choose Advanced published or assigned.
6. Under the Modifications tab, click Add.
7. Choose the appropriate MST files to transform the package.
8. Click OK. Ensure that the machine accounts for the client machines have at least read access to the
share.