
Operation Manual


1
2
OPERATION
GETTING STARTED
Turn your receiver power on and proceed with system setup as follows:
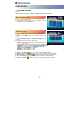
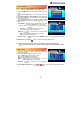
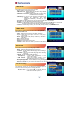
Menu Language Setting
1. Turn on your TV and receiver.
2. The language selection menu will be displayed, select a
language and press the OK button on.
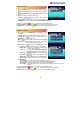
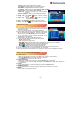
Installation Setup
1. Press the MENU button on the remote to display the main
menu.
2. Use ◀/▶ and
▲/▼ button on the remote to move in the
menu.
3. Select Installation Setup, the Installation Setup menu will
appear.
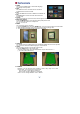
4. Select each menu you want to edit /change.
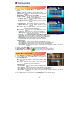
- Satellite : Select any satellite by pressing ◀/▶ buttons on
the remote.
- Transponder : Select any transponder by pressing ◀/▶ buttons on the remote.
- LNB Type : Select your LNB Type Single/Universal/Wide/OCS
- LNB Power : Select LNB power ON/OFF/13V/18V/Auto
- 22KHz : Select OFF/ON/Auto of 0/22 KHz
- DiSEqC 1.0 : Select DiSEqC 1.0 Port
- DiSEqC 1.1 : Select DiSEqC 1.1 Port
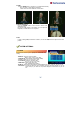
5. Search : Press Red ( ) button on the remote to begin satellite search.
6. Rename : Press Green ( ) button on the remote to rename the selected satellite.
7. Auto Navigation : Press Green ( ) button on the remote to begin auto navigation.
8. Save : Press Yellow ( ) button on the remote to save the selected satellite.
9. Delete : Press Blue ( ) button on the remote to de-select the selected satellite.