
User's Manual


APPENDIX A 11RE439 Rev N/C
A-8
SAMPLE UPLOAD AND DOWNLOAD
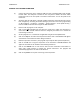
(1) Connect the transceiver to the computer USB port using a standard USB-A male to USB-
B male cable. The USB port is located on the rear panel of mobile and base station
transceivers and on the front panel of rack mount transceivers. Turn on the power to the
transceiver.
(2) Assuming that the USB driver is already installed, determine which Virtual Com Port has
been assigned by accessing the Device Manager (accessed in Win XP by right-clicking
on “My Computer – Properties – Hardware – Device Manager – Ports (COM & LPT) ).
Note the COM number that was assigned to USB Serial Port.
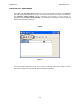
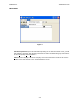
(3) Run the TDP-90 program on the computer.
(4) Click on the Data pull-down list and select the serial port to which the transceiver is
connected. Select Custom COM and enter the assigned port number if it is outside the
normal range of Com1-4.
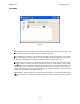
(5) Set the program for 1 or 6 channels as applicable using the channel pulldown list.
(6) Click on the Up icon to retrieve the frequencies from the radio. “UPLOADING” will appear
at the bottom of the window as data is being transferred.
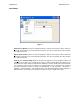
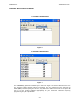
(7) Edit the frequencies as desired. (The program only accepts 25 kHz spaced frequencies.)
(8) Click on the Dn icon to copy the frequencies to the transceiver. “DOWNLOADING” will
appear at the bottom of the window as data is being transferred.
(9) Click on the diskette icon to save the file. Hint: Use the transceiver serial number or
some other unique filename to identify the specific transceiver. The program will
automatically append the .90 suffix to the filename.
(10) Click on the printer icon to print a hard-copy of the frequencies.