THOMSON TG185n Ethernet-to-WiFi Convertor/Wireless-n Repeater Setup and User Guide
THOMSON TG185n Setup and User Guide
Copyright Copyright ©1999-2008 THOMSON. All rights reserved. Distribution and copying of this document, use and communication of its contents is not permitted without written authorization from THOMSON. The content of this document is furnished for informational use only, may be subject to change without notice, and should not be construed as a commitment by THOMSON. THOMSON assumes no responsibility or liability for any errors or inaccuracies that may appear in this document.
Contents About this Setup and User Guide ............................................. 1 1 Introduction.................................................................................. 3 2 Installation.................................................................................... 5 3 The THOMSON TG185n as Wireless Access Point ................... 7 3.1 Configuring The THOMSON TG185n As Access Point.................................... 8 3.2 Connecting a Wireless Client via WPS ...............
Contents ii 6.2 THOMSON TG185n Web Interface ................................................................ 40 6.3 Saving/Restoring Your Configuration ........................................................... 41 7 Support....................................................................................... 43 7.1 Assigning a Static IP to Your Computer ....................................................... 44 7.1.1 Assigning a Static IP Address On Windows Vista ..............................
About this Setup and User Guide About this Setup and User Guide Used Symbols A note provides additional information about a topic. A caution warns you about potential problems or specific precautions that need to be taken. Typographical Conventions Following typographical convention is used throughout this manual: Sample text indicates a hyperlink to a Web site. Example: For more information, visit us at www.thomson-broadband.com. Sample text indicates an internal cross-reference.
About this Setup and User Guide 2 E-DOC-CTC-20080624-0009 v0.
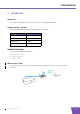
1 Introduction 1 Introduction Introduction This Setup and User Guide will show you how to set up your THOMSON TG185n. Supported wireless standards The THOMSON TG185n supports the following wireless standards: Standard Maximum Data Rate IEEE 802.11n 300 Mbps IEEE 802.11g 54 Mbps IEEE 802.11b 11 Mbps IEEE 802.
1 Introduction Wireless Repeater Use this mode to extend the coverage of an existing wireless network: Wireless Client Use this mode to connect a wired Ethernet device (for example: a laptop, a gaming console with Ethernet connectivity,...): 4 E-DOC-CTC-20080624-0009 v0.
2 Installation 2 Installation Introduction In this chapter we will help you to: 1 Connect the cables. 2 Configure the THOMSON TG185n. Connect the cables Proceed as follows: 1 Plug the connector of the electric power supply adapter into the power inlet port on the back panel of your THOMSON TG185n. 2 Plug the adapter into a nearby mains socket. 3 Plug one end of the Ethernet cable into the Ethernet port of your THOMSON TG185n.
2 Installation 6 E-DOC-CTC-20080624-0009 v0.
3 The THOMSON TG185n as Wireless Access Point 3 The THOMSON TG185n as Wireless Access Point Usage Use this mode if you are using a wired network and you now want to be able to access your network wirelessly. In this chapter Topic Page Configuring The THOMSON TG185n As Access Point 8 Connecting a Wireless Client via WPS 11 Manually Configuring a Wireless Client 15 Securing Your Wireless Network 16 E-DOC-CTC-20080624-0009 v0.
3 The THOMSON TG185n as Wireless Access Point 3.1 Configuring The THOMSON TG185n As Access Point Procedure Before you can use your THOMSON TG185n as wireless access point you have to complete following steps: 1 Switch the THOMSON TG185n to access point mode. 2 Assign a static IP address to your computer. 3 Configure the wireless settings of your THOMSON TG185n. 4 Configure the IP settings of your THOMSON TG185n (optional). 5 Connect your THOMSON TG185n to your Internet gateway.
3 The THOMSON TG185n as Wireless Access Point 5 In the Select Security Policy list, select the security policy of your choice and enter a passphrase/ encryption key. For more information, see “3.4 Securing Your Wireless Network” on page 16. If the Enable WPS (Wi-Fi Protected Setup) check box is enabled you can only select the following policies: None WPA-PSK WPA2-PSK WPA-PSK-AUTO If you want to select another policy (not recommended), clear the Enable WPS (Wi-Fi Protected Setup) check box.
3 The THOMSON TG185n as Wireless Access Point Configure your wireless clients In order to connect your wireless clients to the THOMSON TG185n you must configure them with the same Network ID (SSID) and security as your wireless access point. You can do this: Automatically via WPS. For more information, see “3.2 Connecting a Wireless Client via WPS” on page 11 Manually entering these settings on the configuration utility of your wireless clients.either using Wi-Fi Protected Setup (WPS) or manually.
3 The THOMSON TG185n as Wireless Access Point 3.2 Connecting a Wireless Client via WPS WPS Wi-Fi Protected Setup (WPS) allows you to add new wireless clients to your network in a swift and easy way, without the need to enter all of your wireless settings (SSID, encryption,...). Requirements Your wireless clients must supports WPS. Check the documentation of your wireless client for this. WPS must be enabled on your THOMSON TG185n.
3 The THOMSON TG185n as Wireless Access Point 3.2.1 Push Button Configuration Procedure Proceed as follows: 1 Shortly press the WPS button on the THOMSON TG185n: 2 The WPS button LED starts blinking green. This indicates that the THOMSON TG185n is now searching for wireless clients that are in registration mode. You now have two minutes to start WPS on your wireless client. If the LED does not start to blink, WPS is not enabled on your THOMSON TG185n.
3 The THOMSON TG185n as Wireless Access Point 3.2.2 PIN Code Entry On The Wireless Client Get the THOMSON TG185n’s PIN code You can find the WIRELESS PIN: On the label on the bottom of your THOMSON TG185n. On the THOMSON TG185n Web Interface: 1 Open your web browser and browse to http://192.168.1.11. 2 On the Basic Setting menu, click Wireless Setting. 3 You can find the PIN code in the WPS Pin box.
3 The THOMSON TG185n as Wireless Access Point 3.2.3 PIN Code Entry On the THOMSON TG185n Get your wireless client’s PIN code Proceed as follows: 1 Open the configuration utility of your wireless client. 2 Start WPS and choose to generate a PIN code or enter a PIN code into your access point. For example on the TG121n Wireless Client Utility you will see the following screen: 3 Write down the PIN code generated by the configuration utility.
3 The THOMSON TG185n as Wireless Access Point 3.3 Manually Configuring a Wireless Client Before you start Before you can connect a computer to your wireless network you need to know which Network ID (SSID) and encryption your THOMSON TG185n is using. Default values If you did not yet change the wireless settings, you must use the default settings that are printed on the label on the bottom of your THOMSON TG185n.
3 The THOMSON TG185n as Wireless Access Point 3.4 Securing Your Wireless Network Introduction By using encryption, communication between the wireless clients and your THOMSON TG185n is protected by a passphrase. Only clients which use the correct network name (SSID) and passphrase can connect to your network. Encryption methods During the years a number of encryption types have been developed.
3 The THOMSON TG185n as Wireless Access Point 3.4.1 Configuring WPA(2)-PSK Encryption Procedure Continuing from “ Configuring the wireless encryption”: 1 In the Select Security list, select: WPA2-PSK: WPA2-PSK is the most secure version, but not all wireless clients already support it. Before you select this version, make sure that all of your wireless clients support it.
3 The THOMSON TG185n as Wireless Access Point 3.4.2 Configuring WPA Encryption Configure the RADIUS server Continuing from “ Configuring the wireless encryption”: Proceed as follows: 1 On the Advanced Setting menu, click RADIUS setting. 2 Under Primary Server, select Enable Primary Server. 3 In the Server IP address box, type the IP address of your RADIUS server. 4 In the Port Number box, type the RADIUS Port. 5 In the Shared Secret box, type the RADIUS Key.
3 The THOMSON TG185n as Wireless Access Point 3.4.3 Configuring WEP Encryption Warning WEP has been proven to have some security issues. We strongly recommend you to use WPA-PSK instead. Procedure Continuing from “ Configuring the wireless encryption”: 1 Clear the Enable WPS (Wi-Fi Protected Setup) check box. 2 In the Select Security Policy list, select WEP. 3 In the WEP Key Length list, click the desired key length (a higher key length offers higher security).
3 The THOMSON TG185n as Wireless Access Point 20 E-DOC-CTC-20080624-0009 v0.
4 The THOMSON TG185n as Wireless Repeater 4 The THOMSON TG185n as Wireless Repeater Usage Use this mode if you want to extend the coverage of an existing wireless network: Terminology The wireless access point to which we will try to connect can both be a stand-alone wireless access point or a built-in wireless access point (for example, your Internet Gateway may be equipped with a wireless access point). In the following pages we will just refer to it as your access point.
4 The THOMSON TG185n as Wireless Repeater 4.1 Automatic Configuration (Via WPS) WPS Wi-Fi Protected Setup (WPS) allows you to connect new wireless devices to your network in a swift and easy way, without the need to enter all of your wireless settings (SSID, encryption,...). Requirements Your access point must supports WPS. Check the documentation of your access point for this.
4 The THOMSON TG185n as Wireless Repeater 4.1.1 Push Button Configuration Procedure Proceed as follows: 1 Start Push Button Configuration on your access point. For more information, consult the documentation of your access point. 2 Shortly press the WPS button on your THOMSON TG185n: 3 The WPS button LED starts blinking green. If the LED does not start to blink, WPS is not enabled on your THOMSON TG185n. For more information on how to enable WPS, see “ WPS does not work” on page 51.
4 The THOMSON TG185n as Wireless Repeater 4.1.2 PIN Code Entry On The Access Point Get the THOMSON TG185n’s PIN code You can find the WIRELESS PIN: On the label on the bottom of your THOMSON TG185n. On the THOMSON TG185n Web Interface: 1 Open your web browser and browse to http://192.168.1.11. 2 On the Basic Setting menu, click Wireless Setting. 3 You can find the PIN code in the WPS Pin box.
4 The THOMSON TG185n as Wireless Repeater 4.1.3 PIN Code Entry On the THOMSON TG185n Get your access point’s PIN code Check the documentation of your THOMSON TG185n to know where to find the PIN code of your access point. You may find this PIN code: On a label on the housing On the configuration utility or web interface Enter your access point’s PIN code in the THOMSON TG185n web interface Proceed as follows: 1 On the Advanced Setting menu, click WPS Setting.
4 The THOMSON TG185n as Wireless Repeater 4.2 Manual Configuration (Without WPS) What you need Before you start make sure you have the following information at hand: The Network ID (SSID) of your access point. The encryption key/passphrase used by your access point (if security is enabled). For more information on how to find these items, consult the documentation of your access point.
4 The THOMSON TG185n as Wireless Repeater 7 Click Apply. 8 The THOMSON TG185n prompts you that the configuration was successful. Configure the IP settings of your THOMSON TG185n (optional) If you still want to be able to access your THOMSON TG185n after connecting it to your access point, you have to make sure that they are both using the same IP range. If your access point is also a THOMSON product, this will automatically be the case and no extra configuration is needed.
4 The THOMSON TG185n as Wireless Repeater 28 E-DOC-CTC-20080624-0009 v0.
5 Your THOMSON TG185n as Wireless Client 5 Your THOMSON TG185n as Wireless Client Usage Use this mode if you want to add wireless connectivity to an Ethernet device (for example: a laptop, a gaming console with Ethernet connectivity,...): Terminology The wireless access point to which we will try to connect can both be a stand-alone wireless access point or a built-in wireless access point (for example, your Internet Gateway may be equipped with a wireless access point).
5 Your THOMSON TG185n as Wireless Client 5.1 Automatic Configuration (Via WPS) WPS Wi-Fi Protected Setup (WPS) allows you to connect the THOMSON TG185n to your access point in a swift and easy way, without the need to enter all of your wireless settings (SSID, encryption,...). Requirements Your access point must support WPS. Check the documentation of your access point for this. WPS must be enabled on your THOMSON TG185n.
5 Your THOMSON TG185n as Wireless Client 5.1.1 Push Button Configuration Procedure Proceed as follows: 1 Shortly press the WPS button on the THOMSON TG185n: 2 The WPS button LED starts blinking green. This indicates that the THOMSON TG185n is now searching for wireless clients that are in registration mode. You now have two minutes to start WPS on your wireless client. If the LED does not start to blink, WPS is not enabled on your THOMSON TG185n.
5 Your THOMSON TG185n as Wireless Client 5.1.2 PIN Code From Your Access Point Get the PIN code from your access point Proceed as follows: 1 Open the configuration utility or web interface of your access point. 2 Start WPS and choose generate a PIN code or enter a PIN code into your wireless client. 3 Write down the PIN code. Enter the PIN code in the THOMSON TG185n web interface Proceed as follows: 32 1 On the Advanced Setting menu, click WPS Setting.
5 Your THOMSON TG185n as Wireless Client 5.2 Manual Configuration (Without WPS) Procedure Before you can use your THOMSON TG185n as a repeater you have to complete following steps: 1 Switch the THOMSON TG185n to wireless client mode. 2 Assign a static IP address to your computer. 3 Connect the THOMSON TG185n to your access point. 4 Configure the IP settings of your THOMSON TG185n. 5 Configure your computer to obtain an IP address automatically.
5 Your THOMSON TG185n as Wireless Client Configure the IP settings of your THOMSON TG185n To change the IP settings of your THOMSON TG185n: 1 On the Basic Setting menu, click Device IP Setting. 2 The Device IP Setting page appears. On this page you can configure the IP address of your THOMSON TG185n. Select: Assign static IP address to this device if you want to choose the IP address for your THOMSON TG185n yourself.
6 THOMSON TG185n Basics 6 THOMSON TG185n Basics In this chapter Topic Page THOMSON TG185n LED Behaviour 36 THOMSON TG185n Web Interface 40 Saving/Restoring Your Configuration 41 E-DOC-CTC-20080624-0009 v0.
6 THOMSON TG185n Basics 6.1 THOMSON TG185n LED Behaviour Content This chapter describes the behaviour of: 36 Status LEDs WPS Button LED Ethernet LEDs E-DOC-CTC-20080624-0009 v0.
6 THOMSON TG185n Basics 6.1.1 Status LEDs Introduction On the top panel of your THOMSON TG185n, you can find a number of status LEDs, indicating the state of the device during normal operation.
6 THOMSON TG185n Basics 6.1.2 WPS Button LED Introduction The WPS button allows you to connect the THOMSON TG185n with other wireless devices. WPS LED Colour State Description green Solid On Client successfully registered via WPS Blinking WPS registration ongoing Off 38 No WPS registration ongoing. E-DOC-CTC-20080624-0009 v0.
6 THOMSON TG185n Basics 6.1.3 Ethernet LEDs Ethernet LED On the right of the Ethernet port, you can find a LED indicating the link integrity (or activity). LED Status Description Off No connection on this port Solid on Ethernet link up Blinking Data is flowing from/to this port E-DOC-CTC-20080624-0009 v0.
6 THOMSON TG185n Basics 6.2 THOMSON TG185n Web Interface Introduction The THOMSON TG185n Web Interface allows you to configure your THOMSON TG185n using your web browser. Requirements Javascript must be enabled on your browser. For more information, consult the help of your Internet browser. Accessing the THOMSON TG185n Web Interface Proceed as follows: 1 Open your web browser. 2 If your THOMSON TG185n is switched to: Access Point mode, browse to http://192.168.1.11.
6 THOMSON TG185n Basics 6.3 Saving/Restoring Your Configuration Introduction Once you have configured your THOMSON TG185n to your needs, it may be a good idea to save your configuration for later use. This way you can always return to your working configuration in case of problems. Backing up your configuration Proceed as follows: 1 Browse to the THOMSON TG185n Web Interface. 2 On the System Tools menu, click Configuration Save and Restore. 3 Under Save Configuration, click Save to file.
6 THOMSON TG185n Basics 42 E-DOC-CTC-20080624-0009 v0.
7 Support 7 Support Introduction This chapter suggests solutions for problems you may encounter while installing or configuring your THOMSON TG185n. If the suggestions do not resolve the problem, look at the support pages on http://www.thomsonbroadband.com or contact your service provider.
7 Support 7.1 Assigning a Static IP to Your Computer IP addresses In a network, each device carries a unique address, the IP address. If a network device wants to communicate with another network he will send his message to this IP address. Why a static IP address? These IP addresses are normally assigned to your computer by a dedicated server, the Dynamic Host Configuration Protocol (DHCP) server. This server can be integrated in your (Internet) gateway or located on the Internet.
7 Support 7.1.1 Assigning a Static IP Address On Windows Vista Procedure Proceed as follows: 1 On the Windows Start menu, click Network. 2 In the top bar, click Networking and Sharing Center. 3 In the Tasks list, click Manage network connections. 4 Right-click Local Area Connection and click Properties. If Windows prompts you for your permission, click Continue.
7 Support 7.1.2 Assigning a Static IP Address On Windows XP Procedure Proceed as follows: 1 On the Windows Start menu, click Control Panel. 2 Double-click Network Connections (if needed, switch to Classic View first). 3 Right-click Local Area Connection and click Properties. 4 The Local Area Connection Properties window appears: In the This connection uses following items list, select Internet Protocol (TCP/IP) and click Properties.
7 Support 7.1.3 Assigning a Static IP Address On Mac OS X Procedure Proceed as follows: 1 In the apple menu, click System Preferences. 2 Under Internet & Network, click Network. 3 Select Built-in Ethernet and click Configure. 4 In the Configure IPv4 list, select Manually. 5 In the IP Address box, type an IP address between 192.168.1.14 and 192.168.1.63 (for example 192.168.1.20). 6 In the Subnet Mask box, type 255.255.255.0. 7 Click Apply Now. E-DOC-CTC-20080624-0009 v0.
7 Support 7.2 Restoring the IP Settings of Your Computer MS Windows Use the same procedure as described in “7.2 Restoring the IP Settings of Your Computer” on page 48, but select Obtain an IP address automatically instead of Use the following IP address. Mac OS X Use the same procedure as described in “7.2 Restoring the IP Settings of Your Computer” on page 48, but select Using DHCP instead of Manually in the Configure IPv4 list: 48 E-DOC-CTC-20080624-0009 v0.
7 Support 7.3 General THOMSON TG185n Troubleshooting THOMSON TG185n does not work If none of the LEDs light up, make sure that: The THOMSON TG185n is plugged into a power socket outlet. You are using the correct power supply for your THOMSON TG185n device. The power requirements for your THOMSON TG185n are clearly indicated on the identification label on the bottom of the THOMSON TG185n. Only use the power adaptor supplied with your THOMSON TG185n.
7 Support 7.3.1 Wired Connection Troubleshooting Ethernet LED does not light up Make sure that: 50 The Ethernet cable is securely connected to the Ethernet port on your THOMSON TG185n and your computer. You are using the correct cable type for your Ethernet equipment that is at least UTP CAT5 with RJ-45 connectors. E-DOC-CTC-20080624-0009 v0.
7 Support 7.3.2 Wireless Connection Troubleshooting WPS does not work Make sure that WPS is enabled on your THOMSON TG185n: 1 Browse to the THOMSON TG185n Web Interface. 2 On the Basic Setting menu, click Wireless Setting. 3 The Wireless Setting page appears. 4 Select the Enable WPS check box. 5 Click Apply. 6 The THOMSON TG185n prompts you that the configuration was successful.
7 Support 7.4 Reset to Factory Defaults Resetting your THOMSON TG185n If at some point you can no longer connect to the THOMSON TG185n or you want to make a fresh install, it may be useful to perform a reset to factory defaults. Warning A reset to factory default settings deletes all configuration changes you made. Therefore, after the reset, a reconfiguration of your THOMSON TG185n will be needed.
THOMSON Telecom Belgium Prins Boudewijnlaan 47 2650 Edegem www.thomson-broadband.com © THOMSON 2008. All rights reserved. E-DOC-CTC-20080624-0009 v0.2.
EN Safety Instructions and Regulatory Notices FR Consignes de sécurité et informations réglementaires DE Sicherheitshinweise und Zulassungsbestimmungen ES Instrucciones de seguridad y avisos sobre regulaciones PT Regras de segurança e avisos de regulamentação IT Precauzioni di sicurezza e informazioni sulla normativa SV Säkerhetsföreskrifter och -Information NL Veiligheidsvoorschriften en regelgevingsinformatie 2 Read this document prior to installation! 7 Lisez ce document avant d’effect
SAFETY INSTRUCTIONS AND REGULATORY NOTICES BEFORE YOU START INSTALLATION OR USE OF THIS PRODUCT, CAREFULLY READ THESE INSTRUCTIONS When using this product, always follow the basic safety precautions to reduce the risk of fire, electric shock and injury to persons, including the following: > Always install the product as described in the documentation that is included with your product. > Avoid using this product during an electrical storm. There may be a remote risk of electric shock from lightning.
Environmental information - WEEE directive This symbol means that your inoperative electronic appliance must be collected separately and not mixed with the household waste.The European Union has implemented a specific collection and recycling system for which poducers' are responsible. This appliance has been designed and manufactured with high quality materials and components that can be recycled and reused.
The power supply must be Class II and a Limited Power Source in accordance with the requirements of IEC60950-1/ EN60950-1, Clause 2.5 and rated or as indicated on the label on the bottom side of your product. It must be tested and approved to national or local standards. For US and Canada: This product is intended to be supplied by a Listed Direct Plug-in, or Desktop Power Unit marked "Class 2" and rated or as indicated on the label on the bottom side of your product.
If you are uncertain of the policy that applies on the use of wireless equipment in a specific organization or environment (e.g. airports), you are encouraged to ask for authorization to use this device prior to turning on the equipment. THOMSON is not responsible for any radio or television interference caused by unauthorized modification of the device, or the substitution or attachment of connecting cables and equipment other than specified by THOMSON.
television reception, which can be determined by turning the equipment off and on, the user is encouraged to try to correct the interference by one or more of the following measures: > Reorient or relocate the receiving antenna. > Increase the separation between the equipment and receiver. > Connect the equipment into an outlet on a circuit different from that to which the receiver is connected. > Consult the dealer or an experienced radio/TV technician for help.
CONSIGNES DE SÉCURITÉ ET INFORMATIONS RÉGLEMENTAIRES AVANT D’INSTALLER OU D’UTILISER CE PRODUIT, LISEZ ATTENTIVEMENT CES INSTRUCTIONS Lorsque vous utilisez ce produit, respectez toujours les précautions de sécurité de base suivantes afin de réduire le risque d’incendie, de décharge électrique et de blessure : > Installez toujours le produit tel que décrit dans la documentation jointe à votre produit. > Évitez d’utiliser ce produit pendant un orage. La foudre peut provoquer un risque d'électrocution.
Environnement - Directive WEEE Ce symbole signifie que lorsque votre appareil électronique ne fonctionne plus, vous ne pouvez pas le jeter avec les déchets ménagers, mais dans un endroit de collecte approprié. L’Union européenne a instauré un système de collecte et de recyclage spécifique dont sont responsables les producteurs. Cet appareil a été conçu et fabriqué avec des matériaux et des composants de haute qualité qui peuvent être recyclés et réutilisés.
Alimentation électrique L'alimentation du produit doit respecter les spécifications en matière d'alimentation figurant sur les étiquettes. L’alimentation doit être de Classe II et de source limitée conformément aux exigences de la norme IEC60950-1/ EN60950-1, Clause 2.5 et avoir une puissance de ou telle qu’indiquée sur l’étiquette sous le produit. Elle doit être testée et répondre aux normes nationales ou locales.
Avant d’installer ou d’utiliser ce produit, lisez attentivement ce document afin de prendre connaissance des contraintes ou règles spécifiques d’application dans le pays dans lequel vous allez utiliser ce produit. Dans certains cas ou environnements, l’utilisation de périphériques sans fil peut être interdite par le propriétaire du bâtiment ou les responsables de l’entreprise.
SICHERHEITSHINWEISE UND ZULASSUNGSBESTIMMUNGEN BEVOR SIE DIESES PRODUKT INSTALLIEREN ODER VERWENDEN, LESEN SIE DIE FOLGENDEN HINWEISE Um einen elektrischen Schlag, einen Brand und/oder eine gesundheitliche Gefährdung bei der Verwendung des Produkts zu vermeiden, sollten Sie folgende grundlegende Sicherheitshinweise beachten: > Installieren Sie das Produkt ausschließlich wie in der mitgelieferten Dokumentation beschrieben. > Verwenden Sie das Produkt nicht bei Gewitter.
Umweltschutzinformationen – WEEE-Richtlinie Dieses Symbol bedeutet, dass dieses elektronische Gerät bei seiner Außerbetriebnahme separat entsorgt werden muss und nicht in den Hausmüll gehört. Die Europäische Union stellt ein spezielles Sammel- und Recycling-System bereit, für dessen Nutzung die Hersteller verantwortlich sind. Für dieses Gerät wurden ausschließlich qualitativ hochwertige Materialien und Komponenten verwendet, die recycelt und wiederverwendet werden können.
Stromversorgung Die auf dem Typenschild des Produkts angegebene Netzspannung muss mit der Ihres Stromnetzes übereinstimmen. Die Stromversorgung muss gemäß IEC60950-1/EN60950-1, Abschnitt 2.5, der Klasse II entsprechen und aus einer begrenzten Stromquelle stammen. Die Gerät benötigt eine Versorgungsspannung von oder wie auf der Unterseite des Geräts angegeben. Das Gerät muss den nationalen und vor Ort geltenden Standards entsprechen. Die Verwendung anderer Arten von Stromversorgungen ist nicht gestattet.
Bevor Sie mit der Installation beginnen oder das Gerät verwenden, sollten Sie die Dokumentation sorgfältig durchlesen, um sich mit möglichen Beschränkungen und Richtlinien, die für das Produkt in Ihrem Land gelten, vertraut zu machen. In bestimmten Situationen und Umgebungen kann die Nutzung von WLAN- oder Mobilfunkgeräten vom Gebäudeinhaber oder von einer weisungsberechtigten Person vor Ort untersagt bzw. eingeschränkt werden.
INSTRUCCIONES DE SEGURIDAD Y AVISOS SOBRE REGULACIONES ANTES DE INICIAR LA INSTALACIÓN O UTILIZAR ESTE PRODUCTO, LEA ESTAS INSTRUCCIONES CON ATENCIÓN Cuando utilice este producto, siga siempre las instrucciones de seguridad básicas para reducir el riesgo de incendio, descargas eléctricas y lesiones personales, incluidas las siguientes: > Instale siempre el producto tal y como se describe en la documentación que se incluye con el producto. > Evite el uso de este producto durante una tormenta eléctrica.
Información medioambiental - directiva RAEE Este símbolo indica que su aparato electrónico no operativo debe recogerse por separado y no mezclado con los residuos domésticos. La Unión Europea ha implementado un sistema de recogida y reciclado específico del que los productores son responsables. Este aparato se ha diseñado y fabricado con materiales y componentes de alta calidad que se pueden reciclar y reutilizar.
La fuente de alimentación debe ser de Clase II y una fuente de alimentación limitada de acuerdo con los requisitos de IEC60950-1/ EN60950-1, Cláusula 2.5 y debe estar clasificada como o como se indica en la etiqueta de la parte inferior del producto. Debe ser probada y aprobada para los estándares nacionales o locales. para EE.UU.
Antes de iniciar la instalación o el uso de este producto, lea con atención el contenido de este documento para conocer las reglas o las restricciones específicas del dispositivo que se pueden aplicar en el país en que desea usar este producto. En algunas situaciones o entornos, el uso de dispositivos inalámbricos puede estar restringido por el propietario del edificio o los representantes responsables de la organización.
REGRAS DE SEGURANÇA E AVISOS DE REGULAMENTAÇÃO ANTES DE INICIAR A INSTALAÇÃO OU A UTILIZAÇÃO DESTE PRODUTO, LEIA CUIDADOSAMENTE AS INSTRUÇÕES Ao utilizar este produto, siga sempre as medidas de segurança básicas para reduzir os riscos de incêndio, choques e ferimentos em pessoas, tal como se segue: > Instale sempre o produto de acordo com as instruções constantes da documentação do mesmo. > Evite a utilização do produto durante uma tempestade eléctrica.
Informação ambiental – Directiva REEE Este símbolo significa que os seus aparelhos electrónicos que já não utiliza têm de ser recolhidos à parte e não misturados com os resíduos domésticos. A União Europeia implementou um sistema de recolha selectiva e reciclagem pelo qual os produtores são responsáveis. Este aparelho foi concebido e fabricado com materiais e componentes de elevada qualidade, que podem ser reciclados e reutilizados.
A fonte de alimentação tem de ser de classe II e fonte de energia limitada, de acordo com os requisitos da norma IEC60950-1/ EN60950-1, cláusula 2.5 e de ou como indicado no rótulo, na base do produto. Tem de ser testado e aprovado em normas nacionais ou locais. É proibida a utilização de outro tipo de fontes. Se não tiver a certeza do tipo de fonte de alimentação necessário, consulte a documentação do utilizador relativa ao produto ou contacte o seu fornecedor local.
Se não tiver a certeza da política relativa à utilização de equipamento sem fios num determinado ambiente ou organização (aeroportos, por exemplo), é aconselhável pedir autorização para utilizar este dispositivo antes de ligar o equipamento. A THOMSON não é responsável por qualquer interferência na rádio ou na televisão causada por alterações não autorizadas do dispositivo ou pelas substituição ou junção de equipamento e cabos de ligação não especificados pela THOMSON.
PRECAUZIONI DI SICUREZZA E INFORMAZIONI SULLA NORMATIVA PRIMA DI INSTALLARE O UTILIZZARE QUESTO PRODOTTO, LEGGERE ATTENTAMENTE LE SEGUENTI ISTRUZIONI Quando si utilizza questo prodotto, seguire sempre le seguenti precauzioni di sicurezza di base per ridurre il rischio di incendi, scosse elettriche e danni alle persone: > Installare sempre il prodotto seguendo le istruzioni fornite nella documentazione allegata. > Evitare di utilizzare il prodotto durante un temporale.
Informazioni sulla protezione ambientale - Direttiva WEEE Questo simbolo indica che l'apparecchio elettronico non funzionante non deve essere gettato nei comuni rifiuti domestici. L'Unione Europea ha implementato uno specifico sistema di raccolta e riciclaggio del quale i produttori sono responsabili. Questo apparecchio è stato progettato e realizzato con materiali e componenti di alta qualità che possono essere riciclati e riutilizzati.
sull'etichetta nella parte inferiore del prodotto. L'alimentazione deve essere collaudata e approvata in conformità con gli standard nazionali o locali. È vietato l'utilizzo di altri tipi di alimentazione elettrica. Se non si è sicuri del giusto tipo di alimentazione elettrica, consultare la documentazione per l'utente del prodotto oppure contattare il rivenditore locale. Accessibilità L'alimentatore a presa diretta funziona da dispositivo di scollegamento.
THOMSON non è responsabile delle interferenze radio o televisive causate dalla modifica non autorizzata del dispositivo oppure dalla sostituzione o dal collegamento di apparecchiature o cavi di connessione diversi da quelli indicati da THOMSON. La responsabilità della correzione di tali interferenze è dell'utente.
SÄKERHETSFÖRESKRIFTER OCH -INFORMATION INNAN DU BÖRJAR INSTALLERA ELLER ANVÄNDA DENNA PRODUKT, SKA DU NOGGRANT LÄSA DESSA FÖRESKRIFTER Följ alltid de grundläggande säkerhetsåtgärderna när du använder den här produkten för att förebygga risken för brand, elstöt och personskador, inklusive följande: > Installera alltid produkten enligt beskrivningen i dokumentationen som medföljer produkten. > Undvik att använda den här produkten under åskoväder. Det kan finnas en liten risk för elstötar från blixtar.
Miljöinformation (WEEE-direktiv) Denna symbol anger att din obrukbara elektroniska apparat ska kasseras separat och inte kastas i hushållsavfallet. Därför har Europeiska unionen inrättat ett särskilt i uppsamlingssystem för vilket tillverkarna är ansvariga. Denna apparat har utformats och tillverkats av material och komponenter av hög kvalitet som kan återvinnas och komma till användning på nytt.
Elförsörjningen måste vara av klass II och en begränsad strömkälla i enlighet med kraven i IEC60950-1-1/ EN60950-1-1, paragraf 2.5 och märkt som etiketten av produkten. Den måste vara testad och godkänd enligt nationell eller lokal standard. Användning av någon annan sorts strömtillförsel är förbjuden. Om du är osäker på vilken elförsörjning som behövs läser du användarhandboken eller kontaktar din lokala återförsäljare. Åtkomst Strömadaptern fungerar som frånkopplingsenhet.
THOMSON är inte ansvarig för radio- eller televisionsstörning som orsakas av obehörig ändring av enheten, eller av att du bytt ut eller kopplat in anslutningskablar och utrustning, annat än vad som specificerats av THOMSON. Korrigering av störningen som orsakats av obehörig ändring, obehörigt utbyte eller tillägg är användarens ansvar.
VEILIGHEIDSVOORSCHRIFTEN EN REGELGEVINGSINFORMATIE LEES DEZE AANWIJZINGEN ZORGVULDIG DOOR VOORDAT U DIT PRODUCT GAAT INSTALLEREN OF GEBRUIKEN Om het risico van brand, elektrische schokken en lichamelijk letsel tot een minimum te beperken, dient u bij het installeren van dit product altijd de elementaire voorzorgsmaatregelen te treffen, waaronder: > Installeer het product altijd zoals beschreven in de documentatie die bij het product wordt geleverd.
Informatie inzake milieuzorg – AEEA-richtlijn Dit symbool betekent dat uw niet-functionerende elektronische apparaat gescheiden van het huishoudelijk afval moet worden aangeboden. De Europese Unie heeft een specifiek systeem voor inzamelen en hergebruik opgezet waarvoor producenten verantwoordelijk zijn. Dit apparaat is ontworpen en gefabriceerd met hoogwaardige materialen en onderdelen die kunnen worden gerecycled voor hergebruik.
Stroomvoorziening De stroomvoorziening van het product moet overeenkomen met de specificaties op de labels. De netvoeding moet beantwoorden aan Klasse II en de Limited Power Source-normen, conform de voorschriften van IEC60950-1/ EN60950-1, Artikel 2.5, met een nominale voeding van of zoals vermeld op het label aan de onderkant van het product. De voeding moet zijn getest en goedgekeurd conform nationale of lokale normen. Het gebruik van andere typen voedingen is niet toegestaan.
Als u niet volledig bekend bent met het beleid dat van toepassing is op het gebruik van draadloze apparatuur in een specifieke organisatie of omgeving (zoals luchthavens), wordt u sterk aangeraden om toestemming voor gebruik van dit apparaat te vragen voordat u het apparaat inschakelt.
THOMSON Telecom Belgium Prins Boudewijnlaan 47 www.thomson-broadband.com © 2008 Thomson. All rights reserved. E-DOC-SAF-20080707-0003 v1.0. Printed in PRC.