
User's Manual
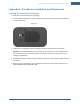
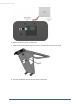
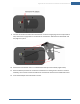
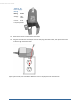
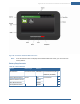
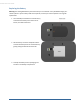

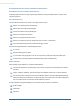
Table Of Contents
- Welcome to the TouchScreen
- Using the TouchScreen
- Managing Your System Security
- Understanding Arming Modes
- Understanding Your Protection Against Smash & Grab Attacks
- Arming and Disarming the System
- Sending an Emergency Alarm
- Testing Your Alarms
- Managing Connectivity Between the TouchScreen and the Central Monitoring Stat...
- Managing the Passcodes in your Security System
- Managing Connectivity between Your Home Devices and the Internet
- View Your Security Account Information
- Managing Sensors
- Managing Cameras
- Adding Cameras to the Security System
- Adding Key Fobs to the Security System
- Editing Key Fobs
- Managing Environmental Devices
- Managing Wi-Fi Repeaters
- Maintaining & Configuring the TouchScreen Device
- Appendix A: TouchScreen Installation and Maintenance
- Appendix B: Using the Key Pad
- Appendix C: Wi-Fi Repeater Placement
- Appendix D: Quick Reference Tables

Appendix A: TouchScreen Installation and Maintenance
81
Appendix A: TouchScreen Installation and Maintenance
Installing the Technicolor TouchScreen
1. Remove the TouchScreen from its packaging.
2. Use a P1 Phillips screwdriver to remove the (1) screw from the battery cover of the TouchScreen,
and detach the cover.
3. Unwrap the 4.0 volt battery from its packaging and install it in the battery compartment.
Warning: The rechargeable battery that came with your TouchScreen is only available through
your service operator. If your battery needs to be replaced, contact your service operator to
arrange for replacement.
4. Position the battery and cables inside the battery compartment so the cables lie along the top of
the battery.
5. Align and connect the battery’s pins to the battery connector so that the wire order is (top-to-
bottom) BLACK, BLACK, WHITE, RED, RED.