
User's Manual
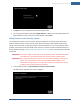
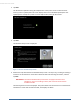
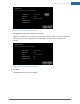
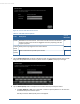
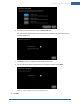
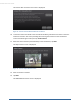
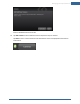
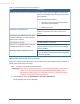
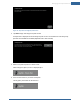
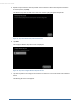
Table Of Contents
- Welcome to the TouchScreen
- Using the TouchScreen
- Managing Your System Security
- Understanding Arming Modes
- Understanding Your Protection Against Smash & Grab Attacks
- Arming and Disarming the System
- Sending an Emergency Alarm
- Testing Your Alarms
- Managing Connectivity Between the TouchScreen and the Central Monitoring Stat...
- Managing the Passcodes in your Security System
- Managing Connectivity between Your Home Devices and the Internet
- View Your Security Account Information
- Managing Sensors
- Managing Cameras
- Adding Cameras to the Security System
- Adding Key Fobs to the Security System
- Editing Key Fobs
- Managing Environmental Devices
- Managing Wi-Fi Repeaters
- Maintaining & Configuring the TouchScreen Device
- Appendix A: TouchScreen Installation and Maintenance
- Appendix B: Using the Key Pad
- Appendix C: Wi-Fi Repeater Placement
- Appendix D: Quick Reference Tables

54
Figure 10: Camera: Edit New Camera Screen
Table 8: Edit New Camera Options
Field Description
Can Be
Modified?
Model Model ID for the new camera. The camera manufacturer and model infor-
mation are sent to the server and logged for inventory reporting and tech
support purposes.
No
Camera
Name
Name previously assigned to the camera device. Yes
Video
Quality
Level of video detail captured by the camera. Yes
7. Tap the Camera Name fields to display a keyboard screen and rename the Camera zone to some-
thing that clearly differentiates it from any other camera. Tap Done to accept your changes.
8. Tap the Video Quality field to modify the level of video detail captured by the device.
a. Tap High, Medium or Low. Use a value with a network upload speed that is less than the
recommended upload network speed.
The Adjust Camera Video Quality screen is displayed.
TouchScreen User Guide