
User's Manual
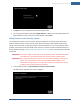
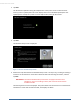
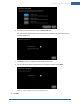
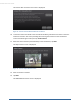
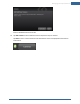
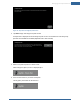
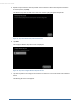
Table Of Contents
- Welcome to the TouchScreen
- Using the TouchScreen
- Managing Your System Security
- Understanding Arming Modes
- Understanding Your Protection Against Smash & Grab Attacks
- Arming and Disarming the System
- Sending an Emergency Alarm
- Testing Your Alarms
- Managing Connectivity Between the TouchScreen and the Central Monitoring Stat...
- Managing the Passcodes in your Security System
- Managing Connectivity between Your Home Devices and the Internet
- View Your Security Account Information
- Managing Sensors
- Managing Cameras
- Adding Cameras to the Security System
- Adding Key Fobs to the Security System
- Editing Key Fobs
- Managing Environmental Devices
- Managing Wi-Fi Repeaters
- Maintaining & Configuring the TouchScreen Device
- Appendix A: TouchScreen Installation and Maintenance
- Appendix B: Using the Key Pad
- Appendix C: Wi-Fi Repeater Placement
- Appendix D: Quick Reference Tables

Managing Your System Security
53
Figure 8: Camera: Locating Camera Screen
5. Tap Accept to pair the camera with the TouchScreen.
After the system finishes, the Configuring Camera field is marked “Done”. During the Configuring
Camera step, the system upgrades the camera firmware if needed. This can take up to 15
minutes.
Figure 9: Camera: Configuring Camera Screen
6. Tap Next.
The Edit New Camera screen is displayed.