
User's Manual
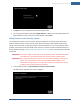
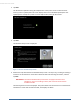
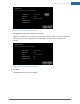
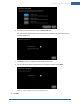
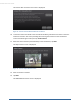
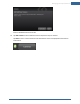
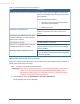
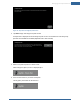
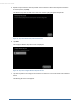
Table Of Contents
- Welcome to the TouchScreen
- Using the TouchScreen
- Managing Your System Security
- Understanding Arming Modes
- Understanding Your Protection Against Smash & Grab Attacks
- Arming and Disarming the System
- Sending an Emergency Alarm
- Testing Your Alarms
- Managing Connectivity Between the TouchScreen and the Central Monitoring Stat...
- Managing the Passcodes in your Security System
- Managing Connectivity between Your Home Devices and the Internet
- View Your Security Account Information
- Managing Sensors
- Managing Cameras
- Adding Cameras to the Security System
- Adding Key Fobs to the Security System
- Editing Key Fobs
- Managing Environmental Devices
- Managing Wi-Fi Repeaters
- Maintaining & Configuring the TouchScreen Device
- Appendix A: TouchScreen Installation and Maintenance
- Appendix B: Using the Key Pad
- Appendix C: Wi-Fi Repeater Placement
- Appendix D: Quick Reference Tables

52
2. Tap Next.
The TouchScreen uploads a binary file multiple times to the system servers to determine the
security system’s upload speed. The screen displays the current calculated upload speed. The
Upload Speed is used by the system to set the default video quality for the camera.
3. Tap Next.
The Hardware Setup screen is displayed.
Figure 7: Camera: Hardware Setup Screen
4. Perform the steps described on the Hardware Setup screen. The steps vary, including connecting a
camera to the TouchScreen’s router with an Ethernet cable and rebooting the camera, and then
tap Next.
IMPORTANT: The Camera Hardware Setup screen does not apply to Sercomm iCam
installations. If you are installing an iCam, refer to the Sercomm iCamera
Installation Guide.
The Locating Camera screen is displayed. The system locates the camera that is connected to the
TouchScreen’s router with an Ethernet cable, and displays its details.
TouchScreen User Guide