
User's Manual
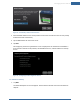
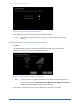

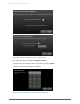
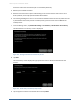
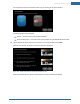
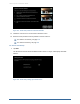
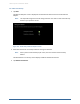
Table Of Contents
- Managing Sensors & Zones
- Maintaining Sensors
- Resetting Sensors to Factory Default
- Managing Cross-Zone Associations
- Managing Sirens
- Managing Cameras
- Managing Thermostats
- Managing Lights
- Managing Key Fobs
- Managing Key Pads
- Managing Panel Interfaces
- Managing Wi-Fi Repeaters
- Replacing a TouchScreen
- Replacing the Security Network Router
- Troubleshooting Router Swapping
- Appendix A: General Concepts of the Security System
- Appendix B: General Info for Sensor Placement
- Appendix C: Replacing the TouchScreen Battery
- Appendix D: Using the Key Pad
- Appendix E: Installer Quick Reference (SIA)

156
disconnect it from the TouchScreen (if it is connected by Ethernet).
4. Reboot your broadband modem.
5. Reconnect the new router in place of the existing router. Ensure that the new router is set to
factory defaults, and is fully operational with Wi-Fi enabled.
6. For installing the Netgear router in a non-standard installation where the security network router
is placed behind the service provider’s modem/router, place the router into the DMZ of the
modem/router.
7. From the Settings menu, tap Advanced Settings > Connectivity > Reset Router from Factory.
The Reset Router From Factory screen is displayed.
Figure 102: Settings:Reset Router From Factory Screen
8. Tap Next.
The Connectivity screen displays the type of Internet router to which the TouchScreen will
connect.
Figure 103: Connectivity: Connectivity Setup Screen
9. Tap the type of router the TouchScreen will use and tap Next.
Home System Installation Guide