
User's Manual
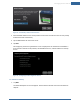
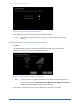

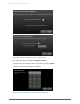
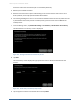
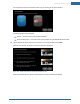
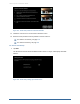
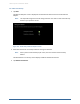
Table Of Contents
- Managing Sensors & Zones
- Maintaining Sensors
- Resetting Sensors to Factory Default
- Managing Cross-Zone Associations
- Managing Sirens
- Managing Cameras
- Managing Thermostats
- Managing Lights
- Managing Key Fobs
- Managing Key Pads
- Managing Panel Interfaces
- Managing Wi-Fi Repeaters
- Replacing a TouchScreen
- Replacing the Security Network Router
- Troubleshooting Router Swapping
- Appendix A: General Concepts of the Security System
- Appendix B: General Info for Sensor Placement
- Appendix C: Replacing the TouchScreen Battery
- Appendix D: Using the Key Pad
- Appendix E: Installer Quick Reference (SIA)

152
Figure 97: Connectivity: Ethernet Adapters Screen
2. Wait a few minutes for the router/modem to reassign IP addresses.
Note: If the system cannot find the proper router, ensure it has been reset to factory
default.
After the TouchScreen successfully establishes its connections:
1. Tap Next.
The Wi-Fi & Cellular Strength screen displays the relative strength of the TouchScreen’s
connection to the router/modem and a GPRS/EDGE receiver.
Figure 98: Connectivity: Wi-Fi & Cellular Strength Screen
Note: To test the security connectivity the Internet and cellular servers (after activation):
From the Settings app, tap Advanced Settings ® Connectivity ® Test Connectivity.
The Wi-Fi and Cellular Signal Strength screen is displayed.
If the router is connected to the TouchScreen by Ethernet, then Wi-Fi is not tested.
Home System Installation Guide