
User's Manual
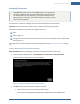
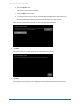
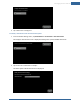
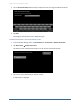
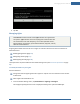
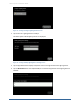
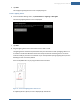
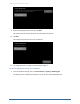
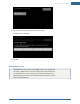
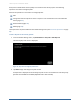
Table Of Contents
- Managing Sensors & Zones
- Maintaining Sensors
- Resetting Sensors to Factory Default
- Managing Cross-Zone Associations
- Managing Sirens
- Managing Cameras
- Managing Thermostats
- Managing Lights
- Managing Key Fobs
- Managing Key Pads
- Managing Panel Interfaces
- Managing Wi-Fi Repeaters
- Replacing a TouchScreen
- Replacing the Security Network Router
- Troubleshooting Router Swapping
- Appendix A: General Concepts of the Security System
- Appendix B: General Info for Sensor Placement
- Appendix C: Replacing the TouchScreen Battery
- Appendix D: Using the Key Pad
- Appendix E: Installer Quick Reference (SIA)

Managing Sensors & Zones
127
5. Tap Next.
The Configure Lighting Devices screen is displayed again.
To add a lighting device:
6. From the Installer Settings menu, tap Home Devices >Lighting > Add Lights.
The Locating Lighting Devices screen is displayed.
7. Tap Next.
8. Plug the lighting device into a wall socket. Secure it with a screw.
The lighting devices should be unpaired when they are removed from their packaging. When one
is installed in socket the LED flashes three times every five seconds indicating that it is in Search
mode and ready to pair with a TouchScreen. If you have problems pairing a lighting device, do the
following to reset it to factory default:
Press the On/Off button as you plug the device into the socket.
Figure 77: Secure the lighting device with a screw.
As a lighting device is found, an icon is displayed for that device.