
User's Manual

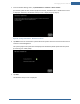
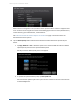
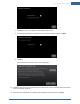
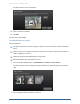
Table Of Contents
- Managing Sensors & Zones
- Maintaining Sensors
- Resetting Sensors to Factory Default
- Managing Cross-Zone Associations
- Managing Sirens
- Managing Cameras
- Managing Thermostats
- Managing Lights
- Managing Key Fobs
- Managing Key Pads
- Managing Panel Interfaces
- Managing Wi-Fi Repeaters
- Replacing a TouchScreen
- Replacing the Security Network Router
- Troubleshooting Router Swapping
- Appendix A: General Concepts of the Security System
- Appendix B: General Info for Sensor Placement
- Appendix C: Replacing the TouchScreen Battery
- Appendix D: Using the Key Pad
- Appendix E: Installer Quick Reference (SIA)

120
Figure 73: Settings: Delete a Camera Screen
2. Tap the image for the installed camera.
A confirmation message is displayed:
Are you sure you want to delete <Camera zone name>?
3. Tap Yes.
The camera image is removed from the Delete a Camera screen.
4. Reset the new camera to factory defaults as described below and connect an Ethernet cable to it.
To reset a camera to factory default:
Use a screwdriver, pen, or paper clip to depress the default button on the lower side of the camera for 30
seconds.
To replace the camera currently installed in the security system with another camera:
1. Perform the Delete a Camera operation on page 119 for the old camera.
2. Reset the new camera to factory defaults as described in the previous operation.
3. Perform the Add a Camera operation on page 112 for the new camera.
Home System Installation Guide