
User's Manual

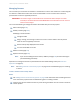
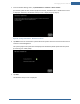
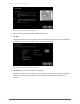
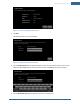
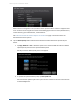
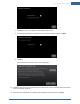
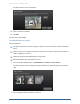
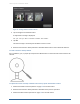
Table Of Contents
- Managing Sensors & Zones
- Maintaining Sensors
- Resetting Sensors to Factory Default
- Managing Cross-Zone Associations
- Managing Sirens
- Managing Cameras
- Managing Thermostats
- Managing Lights
- Managing Key Fobs
- Managing Key Pads
- Managing Panel Interfaces
- Managing Wi-Fi Repeaters
- Replacing a TouchScreen
- Replacing the Security Network Router
- Troubleshooting Router Swapping
- Appendix A: General Concepts of the Security System
- Appendix B: General Info for Sensor Placement
- Appendix C: Replacing the TouchScreen Battery
- Appendix D: Using the Key Pad
- Appendix E: Installer Quick Reference (SIA)

Managing Sensors & Zones
119
The details of the selected camera are displayed.
3. Tap the Camera Name fields to display a keyboard screen and rename the Camera zone. Tap Done
to accept your changes.
Tap the Associated Zone field to display menu of options for assigning the camera to a security
zone. See Associated Zone Menu Options for Cameras on page 43 information about the
Associated Zone menu options.
Tap the Video Quality field to test the upload network speed and determine the best video quality
level for the current camera.
4. Tap Next.
The Edit a Camera screen is displayed showing a label and the camera views updated every five
seconds.
To delete a camera attached to the security system:
1. From the Installer Settings menu, tap Home Devices > Cameras > Delete a Camera.
The Delete a Camera screen is displayed with an image representing the cameras currently
installed to the SECURITY system.