
User's Manual

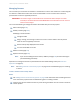
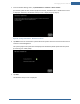
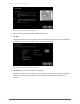
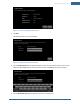
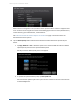
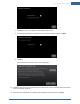
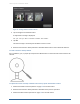
Table Of Contents
- Managing Sensors & Zones
- Maintaining Sensors
- Resetting Sensors to Factory Default
- Managing Cross-Zone Associations
- Managing Sirens
- Managing Cameras
- Managing Thermostats
- Managing Lights
- Managing Key Fobs
- Managing Key Pads
- Managing Panel Interfaces
- Managing Wi-Fi Repeaters
- Replacing a TouchScreen
- Replacing the Security Network Router
- Troubleshooting Router Swapping
- Appendix A: General Concepts of the Security System
- Appendix B: General Info for Sensor Placement
- Appendix C: Replacing the TouchScreen Battery
- Appendix D: Using the Key Pad
- Appendix E: Installer Quick Reference (SIA)

118
The Adjust Camera screen is displayed.
13. Point the camera as needed.
14. Tap Next.
The camera has been added.
To modify the details of a camera:
Use this method to:
Change the name of a camera as it appears in reports on the TouchScreen and in the Subscriber
Portal.
Assign, reassign, and unassign a camera to a sensor so that it takes a series of pictures when an
alarm is tripped by the sensor
Modify the image quality displayed by the TouchScreen
Determine whether the camera LED is lit or not
1. From the Installer Settings menu, tap Home Devices > Cameras > Edit a Camera.
The Edit a Camera screen is displayed showing a label and a captured image for each camera
view.
2. Tap the image or label of the camera to select it.
Home System Installation Guide