
User's Manual
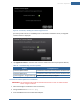
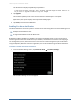


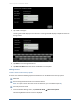

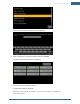
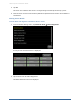
Table Of Contents
- Managing Sensors & Zones
- Maintaining Sensors
- Resetting Sensors to Factory Default
- Managing Cross-Zone Associations
- Managing Sirens
- Managing Cameras
- Managing Thermostats
- Managing Lights
- Managing Key Fobs
- Managing Key Pads
- Managing Panel Interfaces
- Managing Wi-Fi Repeaters
- Replacing a TouchScreen
- Replacing the Security Network Router
- Troubleshooting Router Swapping
- Appendix A: General Concepts of the Security System
- Appendix B: General Info for Sensor Placement
- Appendix C: Replacing the TouchScreen Battery
- Appendix D: Using the Key Pad
- Appendix E: Installer Quick Reference (SIA)

92
The TouchScreen displays the following confirmation:
A USB drive has been inserted, and a firmware upgrade image has been found on it.
Do you wish to upgrade firmware using this image?
4. Tap Upgrade.
The Firmware Update process starts. The TouchScreen reboots after it is complete.
After reboot, the system displays the confirmation dialog again.
5. Tap Cancel, and remove the USB drive.
Enabling Fire Alarm Verification
Fire Alarm Verification causes the system to contact central monitoring when one of the following is true:
Multiple smoke detectors fault
A single smoke detector faults for 60 seconds
By default Fire Alarm Verification is disabled. The system immediately sends an alarm to the central
monitoring station when the smoke alarm trips. However, smoke alarms are notorious for tripping in
non-emergencies (such as, when food burns on the stove or someone forgets to open the flu before
using the fireplace). With the customer’s agreement, this can be avoided using Fire Alarm Verification.
To enable or disable Fire Alarm Verification:
1.
From the Installer Settings menu, tap Sensors & Zones ® Fire Alarm Settings.
The Fire Alarm Settings screen is displayed.
Home System Installation Guide