
User's Manual
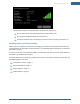
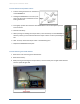
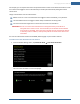
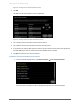
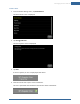
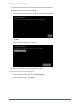
Table Of Contents
- Managing Sensors & Zones
- Maintaining Sensors
- Resetting Sensors to Factory Default
- Managing Cross-Zone Associations
- Managing Sirens
- Managing Cameras
- Managing Thermostats
- Managing Lights
- Managing Key Fobs
- Managing Key Pads
- Managing Panel Interfaces
- Managing Wi-Fi Repeaters
- Replacing a TouchScreen
- Replacing the Security Network Router
- Troubleshooting Router Swapping
- Appendix A: General Concepts of the Security System
- Appendix B: General Info for Sensor Placement
- Appendix C: Replacing the TouchScreen Battery
- Appendix D: Using the Key Pad
- Appendix E: Installer Quick Reference (SIA)

Managing Sensors & Zones
107
2. Tap Delete next to a cross-zone association.
The cross-zone association is removed.
Managing Sirens
A MAXIMUM of six IP cameras and 47 ZigBee devices are supported for
the system. ZigBee devices consist of anything that communicates with
the TouchScreen over radio frequency, such as door/window sensors,
lighting devices, thermostats, panel interface devices, key pads, and key
fobs and smoke detectors.
You can perform the following tasks to manage sirens:
Modify sirens (page 107)
Add sirens (page 109)
Delete sirens (page 110)
These operations are performed from the Installer Settings menu (see Technician Operations on page
80).
To modify the details of a siren:
Use this method to change the name of a siren as it is displayed on the TouchScreen and other locations:
1. From the Installer Settings menu, tap Home Devices.
The Home Devices menu is displayed.
2.
Tap Sirens® Edit Siren.
The Settings screen is displayed showing icons of each installed siren.