
User's Manual
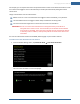
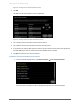
Table Of Contents
- Managing Sensors & Zones
- Maintaining Sensors
- Resetting Sensors to Factory Default
- Managing Cross-Zone Associations
- Managing Sirens
- Managing Cameras
- Managing Thermostats
- Managing Lights
- Managing Key Fobs
- Managing Key Pads
- Managing Panel Interfaces
- Managing Wi-Fi Repeaters
- Replacing a TouchScreen
- Replacing the Security Network Router
- Troubleshooting Router Swapping
- Appendix A: General Concepts of the Security System
- Appendix B: General Info for Sensor Placement
- Appendix C: Replacing the TouchScreen Battery
- Appendix D: Using the Key Pad
- Appendix E: Installer Quick Reference (SIA)

Managing Sensors & Zones
101
The following information is displayed about the sensor and security zone:
Sensor serial number and type (door/window, smoke detector, etc.)
Sensor signal strength detected by the TouchScreen
Security zone details such as its Display Icon and its function (entry/exit, perimeter, etc.)
Resetting Sensors to Factory Default
When a sensor is originally removed from its packaging, it is already in factory default mode. When you
install the battery as described in the documentation, it immediately begins searching for a TouchScreen
with which it can pair.
To reset a sensor that has already been added to a TouchScreen and place it in Search mode, delete it as
described in its included documentation.
In the rare event that you need to force default a sensor that is not paired to a nearby TouchScreen, see
the following pages in each case:
Door/window sensors—page 102
Glass break detector—page 102
Motion detector—page 103
Smoke detector—page 103