DB-2D, DB-3D and DB-2TC Dri-Block® OPERATOR’S MANUAL Issue 2 8/08
8888 8888
DB-2D, DB-3D AND DB-2TC OPERATOR’S MANUAL CONTENTS PAGE SAFETY and INSTALLATION 2 English 2 Français 5 Deutsch 8 Español 11 Italia 14 THE DRI-BLOCK® 17 SPECIFICATION 18 DB-2D 18 DB-3D 19 DB-TC 20 Working environment 21 Unpacking 21 OPERATION 22 Preparation 22 The overtemperature cutout 23 Power up screen 23 The front panel controls 24 Setting the operating temperature 26 After use 27 ADDITIONAL INFORMATION 28 Accessories 28 Operator maintenance 28 Calibration
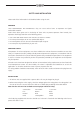
SAFETY AND INSTALLATION Please read all the information in this booklet before using the unit. WARNING HIGH TEMPERATURES ARE DANGEROUS: they can cause serious burns to operators and ignite combustible material. Techne have taken great care in the design of these units to protect operators from hazards, but operators should pay attention to the following points: • • • • USE CARE AND WEAR PROTECTIVE GLOVES TO PROTECT HANDS. DO NOT put hot objects on or near combustible objects.
The fuse in the unit protects the unit and the operator Note that units marked 230V on the rating plate work at 220V; units marked 120V work at 110V. In both cases, however, the heating rate will degrade by approximately 8%. 3. Plug the mains cable into the socket on the rear of the unit. 4. Place the unit on a suitable bench or flat workspace, or in a fume cupboard if required, ensuring that the air inlet vents on the underside are free from obstruction. 5.
observed and remember to return the unit in its original packing. Techne accept no responsibility for damage to units which are not properly packed for shipping: if in doubt, contact your supplier. See the decontamination certificate supplied with your unit. 1. Cleaning Before cleaning your unit ALWAYS disconnect it from the power supply and allow it to cool below 50°C. Your unit can be cleaned by wiping with a damp soapy cloth. Care should be exercised to prevent water from running inside the unit.
INTRODUCTION Veuillez lire attentivement toutes les instructions de ce document avant d’utiliser l’appareil. AVERTISSEMENT DANGER DE TEMPERATURES ELEVEES : les opérateurs peuvent subir de graves brûlures et les matériaux combustibles risquent de prendre feu.
Remarque : les appareils dont la plaque indique 230 V peuvent fonctionner sur 220 V, et ceux dont la plaque indique 120 V peuvent fonctionner sur 110 V. Dans les deux cas cependant, la capacité de chauffage diminuera d’environ 8 %. La plaque d’identification se trouve à l’arrière de l’appareil. 3. Raccordez le câble d’alimentation à la prise située à l’arrière de l’appareil. 4.
ENTRETIEN UTILISATEUR IMPORTANT : CET APPAREIL NE PEUT ETRE DEMONTE QUE PAR DU PERSONNEL QUALIFIE. LORSQUE LES PANNEAUX AVANT, ARRIERE ET LATERAUX SONT DEMONTES, L’OPERATEUR EST EXPOSE A DES TENSIONS QUI PEUVENT ETRE MORTELLES. CET APPAREIL NE CONTIENT AUCUN ELEMENT QUI DEMANDE UN ENTRETIEN DE LA PART DE L’UTILISATEUR.
EINLEITUNG Bitte lesen Sie diese Bedienungsanleitung komplett bevor Sie dieses Gerät benutzen. WARNUNG HOHE TEMPERATUREN SIND GEFÄHRLICH: sie können dem Bediener ernsthafte Verletzungen zufügen und brennbare Materialien können sich leicht entzünden. Techne hat bei der Konstruktion dieses Gerätes sehr darauf geachtet, daß der Bediener vor Gefahren geschützt ist. Dennoch sollten Sie auf die folgenden Punkte achten: • SEIEN SIE VORSICHTIG UND TRAGEN SIE SCHUTZHANDSCHUHE.
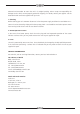
3. Stecken Sie das Stromkabel in die vorgesehene Buchse hinten am Gerät. 4. Stellen Sie das Gerät auf eine ebene Arbeitsfläche bzw. (falls erforderlich) unter einen Laborabzug. Beachten Sie, daß die Entlüftungsrippen an der Geräteunterseite immer frei zugänglich sind. 5. Wenn die Anzeigenlämpchen an der Vorderseite leuchten, hat dies folgende Bedeutung: Gerät ist eingeschaltet Gerät heizt Übertemperaturschutz ist ausgelöst 6.
Gerät wenn nötig zurück. Fügen Sie eine genaue Beschreibung des Defektes bei. Verpacken Sie das Gerät möglichst im Originalkarton. Bitte beachten Sie, daß Techne und thermo-DUX keine Haftung bei Transportschäden aufgrund unzureichender Verpackung übernehmen. Setzen Sie sich im Zweifelsfall mit Ihrem Lieferanten in Verbindung. Bitte beachten Sie die Entgiftungsbescheinigung, die Sie mit dem Gerät erhalten haben. 1. Reinigen Bevor Sie Ihr Gerät reinigen, sollten Sie • zuerst den Netzstecker ziehen.
INTRODUCCIÓN Le rogamos lea cuidadosamente la información contenida en este folleto antes de manipular el aparato. AVISO LAS TEMPERATURAS ELEVADAS SON PELIGROSAS: pueden causarle graves quemaduras y provocar fuego en materiales combustibles. Techne ha puesto gran cuidado en el diseño de estos aparatos para proteger al usuario de cualquier peligro; aún así se deberá prestar atención a los siguientes puntos: • • • • • EXTREME LAS PRECAUCIONES Y UTILICE GUANTES PARA PROTEGERSE LAS MANOS.
3. Conecte el cable a la toma de tensión en la parte posterior del equipo. 4. Sitúe el aparato en un lugar apropiado tal como una superficie de trabajo plana, o si fuera necesario incluso en una campana con extractor de humos, asegurándose de que las entradas de aire en la parte inferior no queden obstruidas. 5.
En el caso improbable de que experimentara algún problema con su aparato que no pudiera resolver con facilidad, debería ponerse en contacto con su proveedor y devolverlo si fuera necesario. Indique de forma detallada todos los defectos que haya notado y devuelva el equipo en su embalaje original. Techne no aceptará responsabilidad alguna por daños causados en equipos que no estuvieran debidamente embalados para su envío; si tuviera alguna duda, póngase en contacto con su proveedor.
INTRODUZIONE Prima di utilizzare l’apparecchio, leggere tutte le informazioni contenute in questo manuale. ATTENZIONE Le alte temperature sono pericolose: possono causare ustioni gravi all’utilizzatore e possono causare la combustione di materiale infiammabile.
Il fusibile all’interno dell’apparecchio protegge l’apparecchiatura e l’utilizzatore. Tenere presente che gli apparecchi riportanti sulla targhetta 230 V funzionano a 220V. Gli apparecchi riportanti 120V funzionano a 110V. Comunque, in entrambi i casi la velocità di riscaldamento diminuirà approssimativamente dell’8%. 3. Collegare il cavo elettrico alla presa di corrente sul retro dell’unità. 4.
dovrà contattare il proprio fornitore e restituire, se necessario, l’apparecchio. Si prega di specificare nel dettaglio i difetti riscontrati e di ricordare di restituire l’apparecchio nel suo involucro originale. La Techne non si fa carico di alcuna responsabilità per danni subiti dall’apparecchio che non sia stato propriamente imballato per il trasporto; in caso di dubbio, rivolgersi al fornitore. Vedere il Certificato di Decontaminazione fornito con il vostro apparecchio. 1.
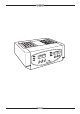
THE DRI-BLOCK® Please read all the information in this manual before using the unit. Techne's Dri-Block® heaters provide a safe, dry, constant temperature source in the laboratory. The unit can be used for incubation, boiling, inactivation, wet ashing, sample concentration, enzyme analysis and many other clinical and industrial purposes.
SPECIFICATION THE DB-2D DRI-BLOCK® This unit has a recessed chamber which can hold one or two inter-changeable insert blocks which accept test tubes or other sample containers. The temperature is set by 3 front panel buttons under the digital display. The DB-2D is supplied with an extraction tool for removing the blocks from the unit and two plastic half blocks for reducing heat losses when only one aluminium block is used.
THE DB-3D DRI-BLOCK® This unit has a recessed chamber which can hold up to three inter-changeable insert blocks which accept test tubes or other sample containers. The temperature is set by 3 front panel buttons with digital display. The DB-3D is supplied with an extraction tool for removing the blocks from the unit.
THE DB-2TC DRI-BLOCK® The unit has a recessed chamber which can hold up to two interchangeable insert blocks which accept test tubes or other sample containers. The temperature is set by 3 front panel buttons with digital display. The DB-TC is supplied with an extraction tool for removing the insert blocks from the unit.
WORKING ENVIRONMENT (ALL UNITS) The Dri-Block® units are designed to work safely under the following conditions: Ambient temperature range 5°C to 40°C Humidity Up to 95% relative humidity, non-condensing Note: The control specifications are quoted for an ambient temperature of 20°C for units fitted with 2 or 3 insert blocks type F3506. The specification will be closely held if the ambient temperature is in the range 10°C to 30°C.
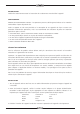
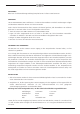
OPERATION INSTALLATION 1. Select the insert aluminium alloy block(s) appropriate for the application. A list of available blocks is given on page 28 of this manual. Ensure that both the underside of the block(s) and the top of the hotplate are clean; efficient heat conduction between these two surfaces is essential. Top view showing three insert blocks in place 2. Place the insert blocks onto the hotplate in the well of the unit and place the tubes containing the sample liquid in the blocks. 3.
SETTING THE OVERTEMPERATURE CUT-OUT DB-2D Since there is no user-adjustable cut-out, in the event of a fault occurring which could cause the heater to remain on, power is removed from the heater when the block temperature reaches approximately 110°C. DB-3D An adjustable overtemperature cut-out is fitted to these units. As supplied it is set to remove power from the heater should the block temperature exceed approximately 210°C.
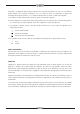
It will display this for 1 second, then the actual temperature of the plate will be indicated. THE FRONT PANEL CONTROLS The front panel controls consist of three buttons for controlling the display, a four digit LED display and three indicators. The “set” temperature Button 37.0 set The “set” temperature button displays the set temperature when pressed. The UP ARROW Button 91.8 set When the “set” temperature button is held down and the UP ARROW button is pressed, the set temperature is increased.
Power Indicator 20.0 set The top indicator shows that there is power to the unit. Heater Indicator 75.3 set The next indicator shows when the heater is heating the unit. When the temperature is being set, and the new set temperature is higher than the temperature already in the unit, the heater indicator will be lit up as the unit tries to follow the set temperature. If the light is on continuously the heater is getting constant power. The only exception is described under over-temperature indicator.
SETTING THE OPERATING TEMPERATURE 1. To display the set temperature on the digital display, press and hold the set temperature button. To adjust the set temperature, press the set temperature button and hold it while pressing the up or down buttons. When the set temperature button is released, the measured temperature is displayed (in degrees Celsius). 2. The heater (and heater indicator) comes on if the set temperature is higher than the current block temperature. 3.
AFTER USE 1. When you have finished heating samples, remember that parts of the unit – the tubes, blocks and associated accessories – may be very hot. Take the precautions listed earlier. We recommend that the blocks should be allowed to cool to 70°C before being removed from the heating unit. They will still have to be handled with care. 2. If you need to remove an insert block while it is hot, screw the extractor tool into the thermometer hole and lift the block out vertically.
ADDITIONAL INFORMATION ACCESSORIES Insert blocks are made of aluminium alloy and must be ordered separately from the heater units. The following blocks are available from Techne: Part Tube Size Number of Holes Size F3501 F3502 F3503 F3504 F3505 F3506 F3507 F3508 F3509 F3510 F4460 F4461 F4462 F4463 F4464 F4465 F4466 F4470 F4471 Plain block 6mm 10mm 12mm 13mm 15mm 16mm 19mm 25mm 10mm cuvettes Plain block 9mm/7mm 24mm 26mm 1.5ml Eppendorf 0.5ml Plastic half block 2 ml Eppendorf 0.
CALIBRATION Remember that if you change the calibration from that set at the factory you may change the calibration at all temperatures. You may get different calibration with different blocks. Make sure that you have good thermal contact between the blocks and the heater plate in the DriBlock®. In order to ensure that the calibration you are setting is correct, you will need to use an independently calibrated probe or thermometer.
1. Begin with items that are cool. 2. The blocks should be pushed firmly to the right hand side of the recess with no air gap between blocks. The right hand block will be used as the calibration block. 3. Switch on the unit and set the temperature display to 30°C. 4. Press all three buttons together and hold for 5 seconds until the amber “heat” light stops flashing and remains permanently on. 5. Self-calibration will now begin and the unit will begin to heat. 6.
INSERT BLOCKS AND REPLACEMENT PARTS The following parts may be obtained from your Techne® dealer if replacements or alternatives are required: Part Number Description 6101308 FCABLEUK FCABLEEU FCABLEUS FMW11 FMW12 F4466 Extraction tool Mains cable with 13amp UK plug (5 amp fuse) Mains cable with R/A Schuko plug Mains cable with 3 pin US plug Techne HI-TEMP 96 TM well plate, pack of 25 HI-TEMP 96 TM well cover, pack of 50 Plastic half block 31
Bibby Scientific Ltd Bibby Scientific France SAS Beacon Road Stone Staffordshire ST15 0SA United Kingdom Tel: +44 (0)8449 360234 Fax: +44 (0)8449 360235 email: techne@bibby-scientific.com www.bibby-scientific.com ZI du Rocher Vert - BP 79 77793 Nemours Cedex France Tel: +33 1 64 45 13 13 Fax: +33 1 64 45 13 00 e-mail: bsf@bibby-scientific.fr www.bibby-scientific.com Techne Inc.