
TBS Vendetta Manual
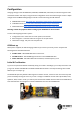

Configuration
Changing settings on the TBS VENDETTA (CORE PRO, POWERCUBE, UNIFY PRO) is all done through the video
transmitter and R/C radio inputs, using the sticks to navigate the menus and make changes. Further in-depth
changes of the COLIBRI/CleanFlight flight controller can be made using the USB-interface.
● POWERCUBE manual: http://www.team-blacksheep.com/tbs-powercube-manual.pdf
● CORE PRO manual: http://www.team-blacksheep.com/tbs-core-pro-manual.pdf
● UNIFY PRO manual: http://www.team-blacksheep.com/tbs-unify-pro-5g8-manual.pdf
Warning: remove the propellers before setting up the VENDETTA for the first time!
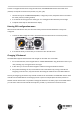
To enter and navigating the menu system:
● Configuration menu - both sticks on center position, also throttle
● Menu navigation - scroll back and forth using the roll- and pitch-stick
● Select/enter change - left press roll- and pitch-stick
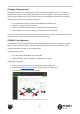
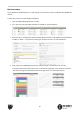
OSD Boot up
When power is applied, the OSD will engage and show you a boot up summary screen. Verify that the
following devices have been detected:
● PCUBE C.SENS - TBS POWERCUBE with current sensor
● COLIBRI FC VX.X - TBS COLIBRI Flight Controller on the POWERCUBE stack
● UNIFY PRO XXXX - TBS UNIFY PRO Video Transmitter, and the frequency it’s on
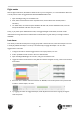
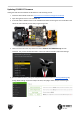
Initial R/C calibration
If you are an experienced builder and already setup your model in CleanFlight, you can skip this section and
just go into “FLIGHT CONTROLLER” and “READ CLEANFLIGHT RC DATA”. This maps the settings to the CORE
PRO and you are ready to go.
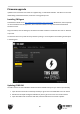
The VENDETTA expects by default a SBUS signal from the R/C receiver, since this is the most commonly used
protocol nowadays among FPV racers. If you use or change to a different receiver that outputs CPPM, S-Bus,
Spektrum, XBus, SumH or SumD, you need to press and hold the “ENTER”-button located on the CORE PRO to
enter the OSD menu and navigate to “FLIGHT CONTROLLER” and start “RC CALIBRATION”.
21