
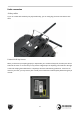
TBS Tracer Manual

Failsafe setup
The TBS Tracer supports two failsafe behaviors: cut and failsafe position. Setting them up correctly is
crucial for the safety of your model.
General setup
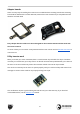
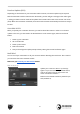
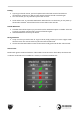
The failsafe setting is located in the receivers menu. To change the behavior:
1. Navigate in the receiver menu by your radio/ Lua script/ Agent X
2. Open the General menu
3. Change the FS. Mode setting to what you need it to be
Cut
This is the setting that you need to use if you have a flight controller that is capable of handling failsafe
behavior in your aircraft. When the link breaks up, the receiver will output no signal, which will be detected
by your flight controller (e.g. Betaflight, KiSS, Flight One, iNav, Ardupilot, etc).
Failsafe position
If you use a model without fc or with a fc that requires a special stick position (e.g. DJI NAZA) ,
failsafe-position is what you need.
With this setting, the receiver will output a previously taught position for all channels.
Important:
If you have set failsafe to “Position” and did not teach a position afterwards, the receiver will output the
last known position. This may lead to unwanted behavior!
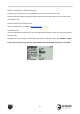
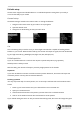
Teaching a position
This may require the help of a second person, as it can be tricky to hold the sticks and activate the teach
button.
1. Power up your bound receiver and your radio with the Tracer transmitter in it
2. Open your
transmitter
menu
3. Hold the sticks and switches in the position you want them to be in a failsafe situation
4. Click on
Set fs. Mode and wait for the confirmation for the set position
If your failsafe setting was set to cut and you entered the teaching mode, the Tracer will change the type to
20