
Installation Guide
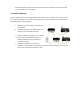


4. The setup wizard guides you through specifying a name light, assigning a room for the light, and
selecting an icon (or taking a picture of the light) to help identify the light.
5. Repeat these steps for each flashing light bulb.
Note: If you skip setting up light bulbs during installation, the light bulbs automatically get grouped under the black room color.
You can update the light bulb settings any time using the information in the Smart Device Application chapter.
6. Prepare the Remote Control (Optional)
If you will be using the remote control with your lighting network, then you must also prepare it for use. Refer to
the steps in the Remote Control chapter. Also, if you are upgrading from a remote control lighting kit, then you
must manually connect the old remote control to your Gateway. These steps are also provided in the Remote
Control chapter.
Installation Tips
Review the safety information. Be sure to review the information contained in the “Safety Information” chapter
for important safety information you should follow.
Keep radio signals clear. The hardware in your lighting kit has antennas built-in for radio communication. Just
as you might experience reception problems on your mobile phone inside a building, the hardware in your
lighting kit can have trouble communicating if their radio signals are blocked by obstacles such as large metal
panels or walls containing wire mesh. When placing these devices in your home, imagine invisible lines