
Manual
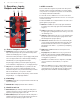


Table Of Contents

4.5 TonePrint resources
• • TonePrint: tcelectronic.com/toneprint/
• • TonePrint products: tcelectronic.com/toneprint/ toneprint-products/
• • TonePrint app: tcelectronic.com/toneprint-app/
• • TonePrint Editor: tcelectronic.com/toneprint-editor/
• • TonePrint Editor manual: tcelectronic.com/toneprint-editor/support/
5. Operation – Bypass Mode
5.1 True Bypass and Buered Bypass explained
True Bypass mode is a hard-wire bypass that gives absolutely no coloration of
tone when the pedal is bypassed. This is the default mode for your eect pedal.
Using True Bypass on all pedals is a perfect choice in setups with a few pedals and
relatively short cables before and after the pedals.
If...
• • you use a long cable between your guitar and the rst pedal or
• • if you use many pedals on your board or
• • if you use a long cable from your board to the amp,
... then the best solution will most likely be to set the rst and the last pedal in
the signal chain to Buered Bypass mode.
Can you hear the dierence between a pedal in True
Bypass or Buered Bypass mode?
Maybe, maybe not – many factors apply: active vs. passive pick-ups, single-coil
vs. humbucker, cable quality, amp impedance and more. We cannot give a single
ultimate answer. Use your ears and nd the best solution for your setup!
5.2 Switching between True Bypass and
Buered Bypass
To set the bypass mode, proceed as follows:
• • Disconnect the pedal and turn it on its back.
• • Unscrew the back plate of the pedal and look for the two small dip-switches
in the upper left corner.
• • The upper DIP switch (the one closer to the power in jack), switches between
True Bypass mode (default) and Buered Bypass mode.
• • Set the DIP switch to the desired position.
• • Remount the back-plate.
6. Maintenance
6.1 Updating the rmware
TC may provide updates for the built-in software of your pedal, the rmware.
Updating your TC pedal’s rmware requires...
• • a computer running Microsoft Windows or OS X with a standard
USB interface
• • the specied DC power supply for your pedal.
Preparing the rmware update
• • Download the newest rmware from the “Support” page for your TC pedal.
There are updaters for Microsoft Windows (these are ZIP archives containing
the rmware installer) and for OS X (these are disk image les containing the
rmware installer).
• • Unplug all cables (including the power supply) from your TC pedal.
• • Connect the pedal to your computer using a USB cable.
• • Press and hold the footswitch on your TC pedal. If your TC pedal has more
than one footswitch, press and hold the leftmost footswitch.
• • Insert the DC power supply plug.
• • The LED on your pedal should turn green. If your TC pedal has more than
one LED, the leftmost LED should turn green. This indicates that the pedal is
ready to receive the software update.
• • Release the footswitch.
• • Your TC pedal will now be recognized as an updatable device.
Applying the rmware update
• • Quit all MIDI-related applications (e.g. your DAW) on your computer and
launch the rmware updater you have downloaded in step 1.
• • In the rmware updater app, select your TC pedal from the drop-down list
under the “STEP 1” heading.
• • When the “Update” button under the “STEP 2” heading turns green, click it.
• • The updated rmware will now be transferred to your TC pedal. Wait for the
progress bar to reach 100%. When the update procedure is complete, the
pedal will automatically restart.
6.2 Changing the battery
If you need to change the battery of your TC Electronic eect pedal,
proceed as follows:
• • Unscrew the thumb-screw on the back of the pedal and detach
the backplate.
• • Unmount the old battery and attach the new battery to the battery clip
making sure the polarity is correct.
• • Remount the back-plate.
Notes regarding batteries
• • Batteries must never be heated, taken apart or thrown into re or water.
• • Only rechargeable batteries can be recharged.
• • Remove the battery when the pedal is not being used for a longer period of
time to save battery life.
• • Always dispose batteries according to local laws and regulations.
7 SUB ’N’ UP OCTAVER User Manual