
User Manual


28
TASCAM DR-100MKIII
4 – Recording
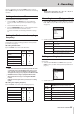
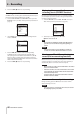
3. Select the FORMAT item and set the dual recording MP3
format.
Options: MP3 320 kbps (default), MP3 256 kbps, MP3 192
kbps, MP3 128 kbps
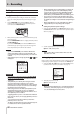
4. Press the REC [0] button to enter recording standby.
On the Home Screen, FORMAT will appear next to DUAL in the
recording function information area.
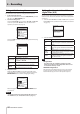
Names of backup files when using dual
recording
A backup file created by dual recording has "_D" added to its file
name.
A backup file created by dual format recording has "_D" added
to its file name, and change to “.mp3”extension.
TASCAM_0002.WAV
TA
SCAM_0002_D.WA
V
TA
SCAM_0002_D.mp3
1 Recording file number
2 "D" indicates dual recording
3 ".mp3" dual format recording backup file extension
Using the auto tone function
The auto tone function can be used to automatically insert a
tone signal (1kHz sine wave) whenever recording starts and
stops.
By connecting the LINE OUT jack to the audio input jack of a
DSLR camera, both units can record the same tone signals to
their files. These tones can be used as guides to synchronize the
files in video editing software.
For details about how to connect the unit with a DSLR camera,
see “Connecting cameras” on page 19.
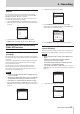
1. Select the REC SETTING screen AUTO TONE item to open the
AUTO TONE screen. (See “Basic menu operation procedures”
on page 10.)
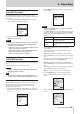
2. Select the MODE item and set where tone signals are inserted.
Options: OFF (default), HEAD (recording start only),
HEAD+TAIL (recording start and stop)
3. Select the LEVEL item and set the tone volume.
Options: -12 dB, -18 dB(default), -24 dB, -30 dB, -36 dB
NOTE
•
Tone signals are not output to headphones.
•
Even if you select HEAD+TAIL, no tone signal will be added at
the end when recording is paused.
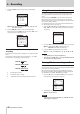
Turning XRI data recording on/off
When recording with WAV file formats, the XRI data recording
function can be turned on to save recording setting information
at the time of recording as XRI data.
When shipped new from the factory, the XRI data recording
function is set to ON. To turn the XRI data recording setting off,
set the XRI item on the REC SETTING screen to OFF.
1. Select the XRI item on the REC SETTING screen. (See “Basic
menu operation procedures” on page 10.)
2. Turn XRI data recording ON/OFF.
Options: OFF, ON (default)
NOTE
You can check and delete XRI data. (See “XRI date the infor-
mation page” on page 42.)