
User Manual


TASCAM DR-100MKIII
25
4 – Recording
Improving recording signal-to-noise
(Dual ADC function)
The dual ADC function realizes even better signal-to-noise
performance and can suppress noise even when recording quiet
input sounds.
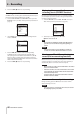
1. Select the I/O SETTING screen DUAL ADC item. (See “Basic
menu operation procedures” on page 10.)
2. Turn the dual ADC function ON or OFF.
Options: OFF (default), ON
NOTE
•
This function is disabled if the input source is set to DIGITAL.
•
When this function is being used, the following functions
cannot be used at the same time.
• Dual level recording (See “Recording at two different levels
(dual level recording)” on page 27.)
• Dual format recording (See “Recording with two different
formats (dual format recording)” on page 27.)
• Limiter (See “Using the limiter” on page 23.)
Starting recording automatically
(AUTO REC function)
The AUTO REC function can be used to start recording automat-
ically
How it works depends on the operation mode.
NOTE
When in recording standby, the REC indicator blinks faster
than during ordinary recording.
TIP
By using this in combination with the PRE REC function, you
can record events without losing the beginnings of sounds.
Recording in LEVEL mode
In LEVEL mode, recording starts automatically when the input
signal exceeds the set level. You can also set whether the
recording pauses or the file is incremented when the input
signal goes below the set level.
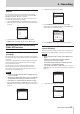
1. Select the REC SETTING screen AUTO REC item to open the
AUTO REC screen. (See “Basic menu operation procedures” on
page 10.)
2. Use the MODE item to set the automatic recording function
mode to LEVEL.
NOTE
Operation using LEVEL mode is possible even if the input
source is set to DIGITAL.
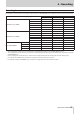
3. Use the END MODE item to set what happens after automatic
recording ends. After the input signal goes below the END
LEVEL setting and the END DELAY time passes, operation is
as follows.
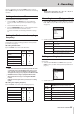
Option Meaning
PAUSE
Pause, but record to the same file when
recording starts again
FILE INC
(default)
Pause, and create a new file when
recording starts again (file incremen-
tation)
4. Use the START LEVEL item to set the level at which
recording starts.
Recording starts automatically when the input signal
exceeds the set level.
Options: OFF, -6 dB, -12 dB (default), -24 dB, -48 dB
5. Use the END LEVEL item to set the level at which recording
stops.
Recording stops automatically when the input signal stays
below the set level for the set END DELAY time.
Options: OFF, -6 dB, -12 dB, -24 dB, -48 dB (default)
6. Use the END DELAY item to set the time until the recording
stops.
Recording will continue if the input signal becomes higher
than the END LEVEL before this time elapses.
Options: 1 sec, 2 sec, 3 sec, 4 sec, 5 sec (default)
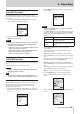
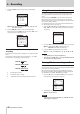
7. Press the REC [0] button to enter recording standby.
When in standby, a START LEVEL guide appears on the
meters.
After recording starts, an END LEVEL guide appears on the
meters.