
Quick Start Guide
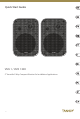


(1) (2) (3) (4) (5)
Operation
Amplier Considerations
The VMS 1 should be driven by high quality
power ampliers designed for professional
use. Power ampliers should be capable
of delivering long term broadband power
equal to half the loudspeaker’s peak power
rating at its stated nominal impedance.
The use of underpowered ampliers
must be avoided as heavily clipped
signals can cause permanent loudspeaker
damage. Correct amplier power will
ensure the optimum sound quality and
long-term reliability as well as protection
from damage.
(1) SPRING CLIPS – Connect bare
speaker wire to these connections.
(2) BRACKET INSERT – Use this
threaded insert for use with
mounting brackets.
(3) SAFETY BAR – Connect an
additional safety cable for
mounting.
(4) WOOFER
(5) HIGH FREQUENCY DRIVER
Connections
VMS 1 connects to the amplier by using spring clips that connect bare speaker wire.
Speaker and amplier terminals have corresponding (+) and (-) terminals. Terminals on
the speaker and amplier should both be connected identically, i.e., the (+) terminal on
the speaker corresponds to the (+) on the amplier, and the (-) terminal on the speaker
corresponds to the (-) terminal on the amplier. If the terminals are not connected
properly the resulting “out of phase” sound will be thin, with weak bass response and
poor stereo imaging.
Wires
Connections
Front or Rear Channel Amplier/Receiver Outputs
RIGHT
RIGHT LEFT
LEFT
Connecting speaker wire to spring clips
To connect bare speaker wire directly to the spring clips, follow
this procedure:
1. Cut your speaker wire to the desired length, with a
little extra.
2. If your speaker wire consists of two wires inside a
conjoined jacket, rst separate the two wires so you have
approximately two inches to work with for each wire.
3. Use a wire stripper to remove about ½ inch of jacket and
insulation from the end of each separated wire segment.
4. Twist the bare wire strands between thumb and forenger
so the individual strands wrap tightly and compactly around
each other.
5. Press downward on the spring clips’ plastic tabs so the
spring clips open to accept the speaker wire.
6. Insert each wire directly into the opened holes in the spring
clips. Make sure to observe correct polarity.
7. Release the plastic tabs so that the wires are held tightly and
securely in the spring clips.
Positioning your speakers
These monitors are designed as near-eld monitors, positioned
typically 0.75 to 3 meters from the listener. They will typically be
placed on the mixer metering bridge or on a table either side of a
smaller mixing desk or control surface. They may also be mounted
on appropriate loudspeaker stands or brackets, which will yield
the best results in terms of stability and vibration. In all cases,
these speakers should be angled towards the listener, with the
tweeter approximately at ear height.
Cabinet care
The cabinet may be cleaned with a soft lint free cloth. The use of
solvents or abrasive cleaners should be avoided.
Positioning your speakers for optimal results
The furthest
you lean
forward to the
furthest your
sit back
OFF-AXIS
ON-AXIS
18 19Quick Start GuideVMS 1 / VMS 1-WH