EXEO CDP
CONTENTS SAFETY INFORMATION 1 IMPORTANT SAFETY INSTRUCTIONS 2 ACCESSORIES 4 CONNECTIONS 5 REMOTE CONTROL INFORMATION 6 FRONT PANEL INFORMATION 8 REAR PANEL INFORMATION 9 OPERATION AND FUNCTIONS 10 TROUBLESHOOTING GUIDE 11 SPECIFICATIONS 12
SAFETY INFORMATION Caution: - To reduce the risk of electric shock, do not remove Cover (or back) - No user-serviceable parts inside. - Refer servicing to qualified service personnel. This lightning flash with arrowhead symbol, within an equilateral triangle is intended to alert the user to the presence of uninstalled “dangerous voltage” within the product’s enclosure that may be of sufficient magnitude to constitute a risk of electric shock to persons.
IMPORTANT SAFETY INSTRUCTIONS CAUTION: READ THIS BEFORE OPERATING YOUR UNIT. 1. 2. 3. 4. 5. 6. 7. 8. 9. READ AND FOLLOW INSTRUCTIONS: All the safety and operation instructions should be read before the product is operated. Follow all operation instructions within this manual. RETAIN INSTRUCTIONS: The safety and operation instructions should be retained for future reference. HEED WARNINGS: Comply with all warnings on the product and in the operation instructions.
IMPORTANT SAFETY INSTRUCTIONS 13. SERVICING: Do not attempt to service this product yourself as opening or removing covers may expose you to dangerous voltage and may damage precision components. Refer all servicing to qualified service personnel. 14. LIGHTNING: For added protection during a lightning storm, or when it is left unattended and unused for long period of time, unplug it from the wall outlet and disconnect the antenna or cable system.
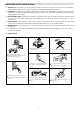
ACCESSORIES You should find the following accessories included: 1. Mains cord 2. RCA cord 3. Remote control + batteries AAA x 2 4. Operator’s Manual.
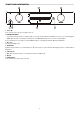
CONNECTIONS Amplifier systems How to connect the EXEO CDP to e.g. an EXEO AMP.
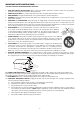
REMOTE CONTROL INFORMATION By using the provided remote control unit, the receiver can be REMOTE CONTROL OPERATION RANGE controlled from your listening position. To use the remote control unit, point it at the REMOTE SENSOR window of the Use the remote control unit within a range of about 7 receiver. meters (23 feet) and the angles of up to 30 degrees aiming Notes: at the remote sensor.
REMOTE CONTROL INFORMATION 1 2 3 4 6 5 Does not apply. 6. Memory Under stop mode, press memory and “MEM01 = 01” appears on the display, use the numerical keys to select your tracks, e.g. press 2, then “MEM01 = 02” appears on the display, press enter to select. Nextly “MEM02” will be displayed and same procedure applies. Press key to start to play your custom list according to your programming. 7. Number Keys Select numbers by pressing these buttons. 8.
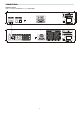
FRONT PANEL INFORMATION 1. Power On Press it to turn on the unit, press it again to turn off. 2. REWIND-FORWARD a. Rotate the knob clockwise or counterclockwise to scan the tracks forward or backwards. Press it once to stop the playback. (Note: when the unit is scanning fast forward, press the PREV-NEXT button once to resume normal playback. b. Press this button for 2 seconds to enter the MENU. Rotate to select Repeat, Random, Display and Firmware. 3. Disc Tray The tray for loading a disc 4.
REAR PANEL INFORMATION 1 1. 2 3 ANALOG For connection to an amplifier e.g. EXEO AMP 2. COAX Coaxial (75Ω) SPDIF output. 3. OPTICAL Optical (Toslink) SPDIF output 4. AC MAINS INPUT For connection of mains voltage. Make sure that the plug is correctly inserted, and that the voltage corresponds to the text printed on the rear panel of the cabinet.
OPERATION AND FUNCTIONS ON, OFF and standby 1. Turn on the unit by pressing the Standby/ON button on the front panel or the CDP button on the remote control. 2. If you wish to turn off the unit to avoid any power consumption, you must remove the power cord. Load a disc To load a disc press the eject button on the remote control or on the front panel. When the disc has been read, the display will show the number of tracks on the disc and the total playback time.
TROUBLESHOOTING PROBLEM CAUSE/REMEDY No power when the unit is turn on - Switch on the current at the mains outlet socket. - Check that the plug has been correctly inserted into the socket.
SPECIFICATIONS Power Parameter Standby Consumption Idle Consumption Play Consumption Value 0.73W 4.75W 5.6W Note Audio Parameter Line Level Outputs Connectors Coaxial Output Connector Optical Output Connector Amplitude Frequency Response L/R Signal-to-Noise Ratio (SNR) Dynamic Range Distortion THD+N Crosstalk Value RCA (Phono), gold plated RCA (Phono), gold plated Toslink (JIS F05) 2Vrms +/- 0.1dB 111dBA 91dBA -86dB (0.