
User Manual

Graupner
GmbH & Co. KG * Henriettenstraße 94-96 * D- 73230 Kirchheim/Teck * www.graupner.de
7
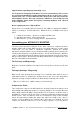
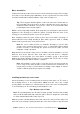
roughen up the inside of the canopy with abrasive paper before bonding the spring in
place.
Tip. Work carefully and accurately. Your patience will be rewarded by a tight fitting
canopy!
Fig 2. Canopy Catch
Installing the all-flying tail plane.
The elevator bell-crank has been loosely installed at the factory but remains to be
permanently bonded into the fin. This system has proved entirely effective in many of
our models over a long period of time and ensures a secure connection with no
unwanted slop in the control system.
Proceed as follows:
• Open the holes in the fin using a twist drill.
• Prepare the steel wires for the elevator joiner. These should be cut to length
(if necessary) and rounded off at the ends.
• Prepare a means to hold the fuselage with the fin at right angles to the work
surface. Also prepare something on which to support the two tail-plane halves
at right-angles to the fin and at the correct height. (A few carefully selected
books might well serve as an adequate jig for this purpose!)
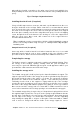
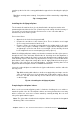
Attach the all-flying tail-plane making sure that the rearward steel wire joiner passes
through the hole in the bell-crank installed the fin. Carefully check the alignment of
the tail-plane halves with the fin. Now loosen the two Aluminium nuts holding the bell-
crank bearing in place and make any adjustment necessary to ensure that that tail-
plane halves can be aligned at exactly 90° to the fin. Apply a little thickened epoxy to
the inside of the two nuts and carefully tighten, constantly checking that correct
alignment between tail-plane and fin is maintained at all times.
Leave the entire tail-plane assembled in the jig described above until the adhesive
has fully cured.
Tip: While working with adhesives in this area apply thin parcel tape over the
sides of the fin in the area of the bearing and cut through the tape to expose
the holes. This will ensure that any excess adhesive does not spoil the finish
on the fuselage.
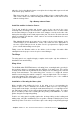
Fig 3 & 4. Installing the all-flying tail plane
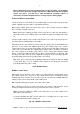
Completing the tail-plane halves.
Work on the uncovered tail-plane panels is limited to finishing the root outline to
match the profile of the fin. The tail-plane halves are factory finished, but some may
wish to achieve an even more accurate match by carefully working the root area
using a fine grade abrasive paper.
Note: The joiner tubes installed in the tail-plane halves incorporate the integrated
All Moving Tail-Lock mechanism.