
Manual


58
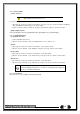
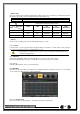
(3) Instruction when adding the local storage device
① Open the system body and install a new disk (connect the data cable and the power cable)
② Connect power to the system and boot the system.
③ Select {Menu} {Setup} {Storage} by using the arrow keys and the Select button.
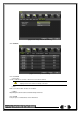
④ A newly displayed disk will then be displayed as {New}.
⑤ Select a newly installed disk by using the arrow keys and the Select button and initialize the disk
as a {Recording} or a {Backup} disk. The following describes the method of setting the recording st
orage.
⑥ {Recording} shows the status of the newly installed disk online.
※ Selecting {Recording-Format} or {Backup-Format} causes all data in the device to be
erased. Therefore, caution is required.
※ While {Recording-Format} or {Backup-Format} is being set up, do not remove the
device (may cause an error when detecting the device).
※ To use the external or portable storage device for system upgrade, set to {Backup-
Init} in the {New} item for {Main Setup} {Storage Device} {Local Storage Device
Management}.
※When used in DVR equipment for the first time, a backup USB device will always be
detected in the {New} category. Therefore, a USB device in the {New} category must be
set up as {Backup-Format} prior to use for backup. A USB device that has gone
through this procedure will be detected in the {Backup} category when used again in
the DVR equipment.
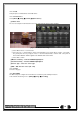
(1)How to changed FAULT HDD
① Check Faulty HDD number
② Turn OFF unit by power button.
③ Detach cover of DVR
④ Find the faulty HDD by number printed on mainboard
⑤ Detach the faulty HDD
⑥ Attach new HDD.
⑦ Attach cover of DVR
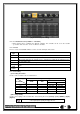
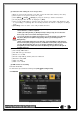
(2) HDD Format for Recording
Select the model first.
As shown below, proceed with the following order {New} {Recording-Format}.
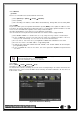
6-6Network
[Figure 6-49. Setup Network Window]