User Guide Manual (ver2.
www.looket.com Thank you for choosing and purchasing the Looket T5 model as your GPS navigation and w elcome to User Guide Manual. The device is very easy to use and it takes you just few steps to understand how it w orks.
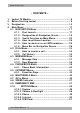
www.looket.com - CONTENTS – 1. 2. 3. 4. Looket T5 Models .......................................................... 9 Before Starting Looket .................................................. 9 Designation ............................................................... 14 Main Menu ................................................................... 17 4.1. NAVI GATI ON Menu ............................................... 17 4.1.1. First Launch ................................................. 17 4.1.2.
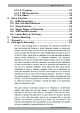
www.looket.com 5. 6. 7. 8. 4.10.6. Tracking ....................................................... 52 4.10.7. FM Transmitter ............................................ 53 4.10.8. About ........................................................... 54 Extra Function ............................................................. 55 5.1. USB Connection ..................................................... 55 5.2. Not I nstalled Softw are .......................................... 55 5.3. Sleep Function .....
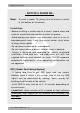
www.looket.com - NOTI CE & WARNI NG Reset - To reset a Looket T5, please turn off and on a switch at the bottom of the device. I nstallation - Before installing a suction cup of a mount, please clean and inside of windshield and remove any dust or grease. - Avoid placing your device and accessories near or in an air bag deployment area. I f not, may cause serious injury when air bags inflate rapidly. - Do not place unsecured on a dashboard. - Do not mount where a driver's f ield of vision is blocked.
www.looket.com - Fix initial GPS with a full charged battery. I t will take longer than before with a low battery. - The Looket device is supporting a SiRFI nstantFixI I technology, so it is able to receive signal more quickly from GPS satellites and indicate a current location on the map without waiting for long time. - I f there is no saved GPS satellites information or the saved information is not enough, the SiRFI nstantFixI I function would not be working normally.
www.looket.com Battery and Chargers - Use only batteries and chargers included in the package provided or off icially approved by the manufacturer. - Rick of explosion if batteries are replaced by an incorrect type. - Unauthorized batteries or chargers may harm the device and any accidents or damages. This will not responsible for the manufacturer. - Dispose of used batteries according to the instructions. - Never dispose of batteries or devices in a f ire or heating devices such as ovens or stoves.
www.looket.com Safety Warnings - Looket T5 has the microphone on the front side and the speaker on the back side. So if talking with the speaker to the ear, the other cannot hear your conversation because the microphone is on the opposite. - Looket T5 is designed to make or answer a call like a phone after mounted in a car. - I n case of using the unit as a portable device, we do not recommend to use the telephone function. - Do not put the speaker to the ear.
www.looket.com - Do not use and/ or leave the device in high or low temperature and potentially explosive environments to prevent permanent damage. Specially, do not leave the device in the vehicle on hot summer days or during cold winter nights. - I n case of not using the device for a long time, off the power switch to protect the unit. - The suction of the mount may be lost if left overnight, due to condensation and low temperature. - Wipe or dry the LCD screen of the device using a soft cloth.
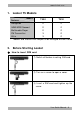
www.looket.com 1. Looket T5 Models Models T500 Features T530 Navigation O O GSM/ GPRS Support O O Multimedia Player O O FM Transmitter X O AV-in X O ※ Models and features are subject to be changed without notice. 2. Before Starting Looket ◈ How to insert SI M card 1) Switch off before inserting SI M card. 2) Turn on a screw to open a cover. 3) I nsert a SI M card and tighten up the screw.
www.looket.com ◈ How to insert micro SD card - Turn off before insert a microSD card. - I nsert the microSD card like a following picture. Be careful of the direction when inserting the card. Do not remove the card while the device is powered on, doing so may result in the device malfunction. We recommend to turn off the device before removing the card. ◈ How to install Windshield Mount 1. Push the suction base against the windshield. (A) 2. Flip the base lever down (B) to the locked position. 3.
www.looket.com 4. Connect the cradle (D) on the dual T-tabs (E) on the pedestal head. 5. Adjust the angle and rotation of the head by tightening the head adjustment knob (F). 6. Slide down the device on the cradle from top to bottom. 7. Connect them with a snap. ◈ How to install into Belt-clip 1. Connect the cradle on the dual T-tabs of the belt-clip. 2. Slide up the belt-clip with the cradle on the back side of the device from bottom to top. 3. Connect them with a snap.
www.looket.com ◈ Quick Guide of GSM/ GPRS function Precisely read following instructions before using GSM/ GPRS function. 1) After turned off the device, insert a SI M card. ※ I f the SI M card is inserted or taken out when the device is turned on, it could result in damage to the card. 2) The cover of the SI M card slot should be closed tightly by using a screwdriver. I f not f it into the slot, may be recognized as no SI M card.
www.looket.com Conf irm if SMSC value in the item ( service provider. I f incorrect, select Edit button to set exact value. Then, the messages can be sent. ) is same with the 5) Set APN to browse the web on Setting I nternet menu. To use I nternet, enter correct information from the service provider. 6) To use Tracking function, it should be enabled on Setting ) is Tracking menu. As soon as it is available, the icon ( indicated.
www.looket.com 3. Designation ① LED I ndicator - Red: An internal battery is charging. Blue: An internal battery is fully charged. Off: A power connector is disconnected. Blinking: GMS/ GPRS is connected. ② Touch Screen I n the battery mode without connecting any chargers, the touch screen is locked if not operating over 1 minute excepting running the navigation, multimedia player as well as AV-in.
www.looket.com ③ Microphone When the user makes or answers a call through GSM/ GPRS function, he can speak into a microphone. ※ I f talking on the microphone to the ear, the other cannot hear your conversation because the speaker is on the opposite. ④ Menu ( SOS) Button / Sleep & Wake-up Button A menu bar is come out when this button is pushed at the contents supporting the menu in the application program. So the application programs showing on the menu bar are able to be conducted or set.
www.looket.com ⑧ USB & Pow er Port The device is able to be charged by an AC Adapter or Car Charger provided or approved by SysOnChip, I nc. through the port. Also, the unit can be used as an external portable memory device by connecting with PC via the port. ⑨ Ear Set Jack An ear set provided or approved by SysOnChip, I nc. is able to be connected to the port for phone communication. ⑩ AV-in Port I f the rear camera of the vehicle or the external device supporting AV output such as iPOD Video etc.
www.looket.com 4. Main Menu After turning on the Looket T5 for the f irst time, a following screen is appeared in case of the Looket T530 model. 4.1. NAVI GATI ON Menu This User Guide Manual which is a quite simple manual to follow will take you to understand how it works. For more detail information, please download the manual on our website. Also, you can consult Quick Guides on the settings menu from the main menu of the navigation in the device.
www.looket.com 1. Tap NAVI GATI ON on the Main menu. After reading the important message, click I AGREE. 2. Select your language, voice, distance units, keyboard preference and map. 3. After choosing your map, the device is auto-searching for GPS signal, and then its COM port and baud rate which the device is supporting will be set automatically. 4. You would probably see your current valid GPS position on the map after successful launch. 5.
www.looket.com I f a 'Closed GPS connection' message is displayed, check if the GPS module is turned on. Settings 4.1.2. GPS hardware Turn GPS module off Designation of Navigation Screen Tap anywhere on the map area to open the Main menu Zoom Out Zoom I n Arrival time / Speed / Distance to f inish / GPS signal Next Turning Point* Distance to next turning point* Current position * These information are shown only if you have already computed a route.
www.looket.com 4.1.3. 4.1.3.1. Useful Function on Main Menu Navigation to I f you click 'Navigation to...' on the Main menu, there are various ways to set your destination and plan your route easily. They will give you great opportunity to choose just the perfect option for you.
www.looket.com a) Address - standard way of navigating. You can choose in steps Country, City, Street and number. b) Favorite - this function allows you to navigate to one of your favorite Points of I nterest. c) History - list of your memorized positions. Option to navigate to memorized history entries or delete these entries is available. d) Point of I nterest - navigate to Point of I nterest: restaurant, hotel, school, wine-room, etc.
www.looket.com I n this guide, we'll show you how to use the Navigation to function using the Address option. 1. Touch Address on the Main menu. 2. Select Country, City, Street and Number step by step. Or f ind them using the keyboard on the screen. 3. Select your departure screen appears. You can choose from three options - wait for valid signal, Last valid position or Select from map. (Wait for valid signal and Last valid position work properly when the GPS is turned on.) 4.
www.looket.com 4.1.3.2. Brow se map I t is available to browse the entire map and search for your destination or POI . By simple dragging, you will be able to scroll through the map and explore new areas. Browse map cursor informs you about targeted POI or street Zoom In/ Out using zoom bar Map scale Tap this button to open the Map options Tap this button to open the Context menu < Options > a) Find... - allows you to quickly look up the desired destination.
www.looket.com < Context Menu > a) Navigate there - Offers 3 possibilities; wait for valid signal, last valid position, select from map. b) Travel via - you can choose the destination through which you want to travel. This function is available only if you have already computed route. c) Continue - information about the route, possibility to modify the route. d) Avoid - allows you to def ine the area on the map that you want to avoid.
www.looket.com 4.1.3.4. Settings When you tap Settings from the Main menu, you can modify Sygic DRI VE and user's preferences. The Settings menu includes; Set to 2D (flat) view / Set 3D view Set night / daylight / automatic colors Disable / Enable sounds Volume settings GPS logs - you can record your GPS position and play back it.
www.looket.com 4.1.3.5. Traffic The Looket T5 models are not supporting this function because the devices do not have a TMC receiver. 4.1.3.6. Route You have to f irst plan your route to get access to route options. I f you haven't planned your route, the route button isn't available. Here you can f ind all the further information about your route, you can view the whole route in image slides or even watch the route preview by using the route demonstration option.
www.looket.com 4.1.3.8. Manage POI ( Point of I nterest) Various POI s are shown on the map such as airports, banks, bus stations, hotels, parking garages, shopping centers, etc. You can easily manage them and add your own POI s or there is also a function which warns you when you'll be crossing the nearby POI . a) Add POI - you can add POI and assign the icon. b) Edit POI name - you can rename the POI that you created. c) Delete POI - you can delete the POI that you created.
www.looket.com 4.1.3.10. Memorize position Save your current position into History. 4.1.3.11. Extras Some additional applications (World Clock, Calculator, Unit Convertor, Country I nformation) that might be useful on the road. a) World Clock - set up the current time in three world cities. Choose from more than 30 world cities. b) Calculator - simply to use calculator available directly.
www.looket.com 4.1.5. How to check or re-set GPS hardw are 1. Tap Settings on Main menu and then click GPS hardware. 2. Check Turn GPS module button for activation GPS module. (The icon should be same with the following picture.) 3. Tap 'Autodetect' to search COM port and baud rate automatically and then wait to f ix it. Or set following COM port and default baud rate by your self after tap COM port and Baud rate. COM port: COM3 / Baud rate: 9600 4.1.6.
www.looket.com 4.1.6.1. Volume & Backlight / FM Transmitter Setting The user is able to control the volume and backlight level. Also, when tapped the FM transmitter icon, the following screen is displayed to set the FM transmitter function. I n case of enabling the FM transmitter, the icon is bright and the current set frequency is indicated on the icon. I f the function is disabled, 'OFF' is displayed on the icon.
www.looket.com 4.1.6.2. Dial Button I f this button is clicked, you can make a call on this device. 4.1.6.3. BGM ( Back Ground Music) Player The user is able to listen to music with the navigation. The BGM program plays the music in the 'Music' folder of the inserted microSD card or internal memory in order of precedence. Music f iles which users would like to play in the BGM program can be added to the Music folder of the microSD card or internal memory.
www.looket.com 4.1.6.4. Camera Button When this button is selected, the video signal from the AV port is shown on the screen. I f the vehicle has the rear camera, the image from the rear camera is displayed on the screen. The program is ended when touched the screen, and then the Navigation screen comes up. I n case that the external AV is connected instead of the rear camera, the video is supported but the sound is not provided during the operation of the Navigation.
www.looket.com 4.2. DI AL Menu No Name 1 Status Indicator 2 Volume Controller 3 Dials (when clicked ‘0’ for over 1 second, ‘+ ’ is displayed.
www.looket.com 4.2.1. How to receive a call I f someone calls to your device, the following window comes up and a bell rings. To answer the call, the Call button should be clicked. But, if the user is under the situation that he can not answer it, the End/ Exit button is able to be selected, and then the window is closed after the call line is off. The call is connected and the screen is changed to the following screen.
www.looket.com 4.2.2. Call History When tapped the dial button without inserting phone numbers, the list of the last call history is appeared. I con Description Sorting button. List all history. Sort received call history. Sort dialed call history. Sort missed call history. Make a call. Send messages. Delete a selected one. Delete all history. Save a selected one into a phone book.
www.looket.com 4.3. MESSAGE Menu I n this menu, you can send and check as well as manage messages. I con Description Sorting button. List all messages. Sort received call history. Sort called history. Sort missed call history. Send new messages. Make a call. Delete a selected one. Delete all messages. Save a selected numbers into a phone book.
www.looket.com 4.3.1. Message View When double-clicked a message on the list, it is able to see the message in detail. I f the message is locked here, the message is protected. I con Description Lock a selected message. Unlock a selected message. Forwarder a selected message. Make a call. Delete a message. Save a numbers into a phone book.
www.looket.com 4.3.2. New Message When tapped a new message icon on Message menu, a following window is appeared to send a new message. I con Description Add a phone number. Delete a selected phone number. Send a written message. When clicked a Send icon, a following window is displaying until the message is transferred.
www.looket.com 4.4. PHONE BOOK Menu You can search, save and manage the phone number. Also, you can call or send SMS to a selected number. I con Description Sorting button. Name sorting. Phone number sorting. Sort by a speed dial number Make a call. Send a message. Delete a selected one. Delete all lists. Add a new one.
www.looket.com 4.4.1. Phone Book I nformation The detail information can be checked when double-clicked a selected one on the list. I con Description Make a call. Send a message. Delete a selected one. Delete a list. Save edited information.
www.looket.com 4.5. I NTERNET Menu The Looket T5 is a connected GPS device. So you are able to access web pages through GSM/ GPRS. You may incur additional charges for accessing the web and downloading media. The internet menu may be labeled differently depending on your service provider. I n case of setting I nternet at the f irst time, refer to Chapter 4.10.4. I nternet in Setting menu. I con Description Go to a previous page. Go to a next page. Go to URL. Refresh a page.
www.looket.com I f pushed a Menu button on I nternet menu, the menu bar is come up as follows; - Volume / Backlight Keyboard Favorite link pages Camera Emergency SMS When tapped a Keyboard icon, a following window is appeared. - write ‘.com’ - hide a keyboard.
www.looket.com 4.5.1. Favorites Page The LOOKET device provides Favorites function, so it is able to go to web pages quickly that have been visited frequently.
www.looket.com 4.6. MULTI MEDI A Menu The Looket T5 models have a Multimedia Player. Various video, audio, image f iles saved in a SD card will be able to be displayed. ※ Best resolution: 480 x 272 pixels ※ Supporting codec: mpeg, mpg, asf, wmv, avi, jpg ① ② ③ ④ ⑤ ⑥ ⑦ ⑧ ⑨ ⑩ ⑪ ⑫ Screen - I f the screen part is clicked, it is changed to the full screen. Status Bar - The playing part is able to be selected by moving the bar. Previous Button: Play the prior f ile.
www.looket.com * Edit Window of File List This is the edit window to make the f ile list which can be played such as music, video, images.
www.looket.com 4.7. AV-in Menu The AV menu is to play the video / sound from an external AV input. I f a device supporting AV output such as iPOD Video etc. is connected to the Looket T5 (excepting the Looket T500), the user can enjoy the video on the screen. I f a user's vehicle has the rear camera which is connected to an AV port on the Looket T5, the image from the rear camera is displayed on the screen.
www.looket.com 4.8. SPEED I ndicator The Speed I ndicator can be used to check current speed simply without using navigation function. While GPS signal has been f ixed, current speed is indicated. (I f the signal is weak, ‘- - -‘ is displayed.) I f tapping Km/ h button, the speed unit is changed to MPH. ※ This program is executed when ‘M’ button is pressed on Main menu. 4.9.
www.looket.com 4.10. SETTI NG Menu 4.10.1. System 1) 2) 2) 3) 4) 5) OS version I nformation of Looket T5 Capacity of Flash Disk (HDD) Capacity and I D I nformation of SD card Language Selection Recalibration of Screen: The touch pad can be recreated. Auto Rear Camera 4.10.2. Volume & Backlight The level of the volume and backlight can be set and controlled by moving the slide bar.
www.looket.com 4.10.3. Phone I con Name Description User’s Phone Number I ndicate a automatically. SMSC (SMS Center) I ndicate SMSC information from SI M card. I f it is not entered or incorrect, messages will not be sent. user’s phone number Set SMSC value. Ask exact value to the service provider. Editing SMSC SOS Message Set to enable / messages. disable sending SOS SMS Number Setting Editing the emergency SMS number.
www.looket.com 4.10.4. I nternet A service provider, APN, proxy I P, etc. should be set to use this function. The Looket device supports predef ined APN lists depending on each country and service provider basically. So the suitable service provider in your area can be selected by searching with / buttons. I f the predef ined information is not correct, the user can edit the APN list directly, and then the edited or new information is saved in the Customer Manual Setting.
www.looket.com 4.10.5. SI M Card I con Name Description SI M I nformation I ndicate saved information from SI M card. SI M Lock/ Unlock Lock / unlock SI M card with PI N code input. I f entered wrong PI N code over 3 times, need PUK code. I n case of over 10 times error for PUK code, it is impossible to use the SI M card anymore. PI N Code Customize PI N number.
www.looket.com 4.10.6. Tracking In case that the Tracking mode is on, the device goes to the LCD sleep mode to keep the tracking function in the Sleep mode. I con Name Description Tracking On/ Off Turn on/ off Tracking function. Tracking Log Save Save traveling route into flash memory per def inite period. I f tapped the button, the latest track log is saved additionally. Saved log messages can be checked by USB connection.
www.looket.com While the Tracking function is on, the device is working as a following table. Valid GPS signal means GPS status with good reception after booting. I n case of the place such as in a building where GPS signal can be reached, the device is not logging the tracking information. ※ I f the Tracking function is off, the tracking software is not working. Valid GPS signal I nvalid GPS signal Valid GSM signal ( registered) I nvalid GSM signal ( unregistered) 1. Logging current track date. 2.
www.looket.com ※ How to Preset 1) Click Set and select the frequency by using Up / Down icons. 2) Press the preset button between 1 to 6 ※ The Car Charger, AC Home Charger or mini-USB Cable of the Looket device is acted the part of the FM antenna. So it should be connected with the charger or cable to use the FM Transmitter function. 4.10.8. About You can check a model number, company information and URL.
www.looket.com 5. 5.1. Extra Function USB Connection When a mini-USB cable is connected to a device, a left screen is appeared. During the connection, the device is recognized as a portable storage device in a PC, but other functions are not working. As soon as being disconnected, the device is re-booting and reset to the Main screen.
www.looket.com Please contact authorized distributors in your country if the message has never disappeared. 5.3. Sleep Function To operate power eff iciently, the device is converted to the sleep (suspended or power saving) mode in case of following situation. When the Menu button is pushing over 2 seconds… When disconnected the external power… When the Smart Power-off mode is conducted… A minute later after the touch screen is unlocked in the battery mode without the external power connection.
www.looket.com ※ LCD Sleep mode While the Tracking function is enabled, the LCD sleep mode is conducted when clicking a Sleep button. During this mode, it disables using touch input and audio in/ out function with LCD off to save its power. ( refer to Chapter 4.10.6. Tracking.) I n the mode, the battery is spend much more than the basic sleep mode. 5.4. Smart Pow er-off Function A following screen is appeared when power is not supplying.
www.looket.com 5.6. Low er Battery Warning When the battery lever is low, a following warning message is shown. As soon as it is appeared, please connect the charger such as the car cigarette charger or the AC home charger to charge the device. Then, the device will be able to be working again. I n case of not supplying power, the device goes to the sleep mode a few second later from the warning message. To run the device normally, we recommend to use the AC home charger at all times.
www.looket.com 6. Trouble Shooting Trouble Solution The device is frozen or locked up. Please reset the device by a Power On/ Off switch on the bottom side of the device. Power does not turn on when using battery power. Something wrong in the LCD screen. The remaining battery power may be too low to run the device. Connect an AC adapter (or a car charger) to the device and external AC power. Check the Power On/ Off switch on the bottom side. I f it's dark, this can be from excessive temperature.
www.looket.com No SI M Card Ensured the SI M card is inserted or installed correctly. PI N Code Enter the PI N code supplied with the SI M card. PUK Code I f entering the PI N code incorrectly over 3 times, the SI M card is blocked. Then the PUK code supplied by the service provider must be entered GSM signal is not good. May lose reception in areas with weak signals or poor reception. Move to another area and try again.
www.looket.com 7. Warranty ※ Limited Warranty SysOnChip, I nc. warrants Looket T5 against defects in material and workmanship, under normal use and service, for one (1) year from the date of purchase only with the proof of purchase. And the warranty period might vary depending on the region, dealer, retailer or sales contract. The warranty period of a rechargeable battery and consumables are six (6) months from the date of purchase. I ncompatibility is not a defect covered by SysOnChip’s warranty.
www.looket.com ※ LCD Warranty Looket T5 is a portable device, therefore the free warranty cannot apply to LCD when it damaged from misusing or abuse. ※ Pow er supplies and cables Any damages from using power supplies or cables which are not provided or off icially approved by the manufacturer cannot be included in the warranty and are not responsible for SysOnChip.
www.looket.com 8. Package & Accessory ◈ Basic Unit Package Looket T5 Bracket Car Mount Car Charger USB Cable User Guide Manual Belt-clip ◈ Optional Accessory AV Cable AC Adapter External GPS Antenna Ear-set * Package contents might vary depending on countries without notice. * Specif ication and features are subjected to be changed without notice.
www.looket.com 4F., Singwan Bldg., KT Bukdaejeon Brach Off ice, 138 Gajeong-dong, Yuseong-gu, Daejeon, 305-350, The Rep. of Korea Tel: + 82.42.864.4665 Fax: + 82.42.864.4664 E-mail: sales@sysonchip.co.kr Web-site: www.looket.com www.sysonchip.co.kr/ eng Copyright ⓒ SysOnChip, I nc. 2009 All rights reserved. Reproduction, transfer, distribution or storage of parts or all of the contents in this document in any form without the prior written permission of SysOnChip, I nc. is prohibited.