
User Manual
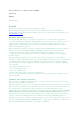


Installation of lap wings
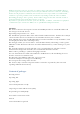
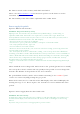
If you want to use the wheel without a table you can do so by using the optional lap
wings [picture with wheel on the lap of a gamer]
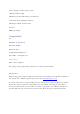
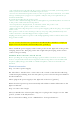
1. Open the table clamp fixation screw [picture]
2. Pull out the table clamp a little bit (5 cm)
3. Insert the lap wings as shown in the picture [picture]
4. Adjust the width of the lap wings
5. Push the table clamp into the base and tighten the table clamp fixation screw
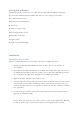
Table installation
To use the wheel
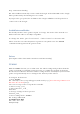
1. Open the table clamp fixation screw [picture]
2. Pull out the table clamp so it easily fits to the table
3. Mount the wheel to the table and then push in the table clamp as much as
possible. Please note that the quick release clamps must be unfastened
[picture of wheel on table with unfastened quick release]
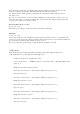
4. Tighten the table clamp screw
5. Fasten the quick release clamps [picture]
Please note that if the shape of the edge of your table does not allow the fixation
with the table clamp you could use some books to fix it.
Simulator installation
If you prefer a permanent installation on a table or simulator you can fix the wheel
with 4 screws to any flat surface. Please use the drilling template to drill the holes. The
length of the screws depend on your table so we did not include any screws but you
can use standard metric screws with a diameter of 6 mm [to be confirmed].
Installation of drivers (PC only)
For PC use, you need to install the driver before you plug in the RF dongle.
The driver requires XXXMB of space on your hard disk and is compatible to Windows
XP SP2 and Windows Vista.