Owner's Manual HMD-0702 Headrest Video Monitor with Built-in DVD
Safety Precaution Important Notice For safety reasons, when changing video disc it is recommended that the vehicle be not in motion, and that you do not allow children to unfasten seat belts to change disc or make any adjustments to the system. System adjustments can be accomplished using the remote control unit, while seatbelts remain fastened. Enjoy your entertainment system but remember safety of all passengers remains the number one priority.
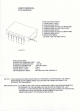
Product Features w 7-Inch Color TFT-LCD Panel with 16:9 aspect w 5 Control Buttons on the Front Panel---MENU, UP, DOWN, POWER and SOURCE w Built-in Top-loading Slot-in DVD loader.
Table of Contents Wiring and Installation-----------------------------------------------------------------4 Control Buttons on Front Panel------------------------------------------------------6 Remote Control Operations-----------------------------------------------------------9 General Operating Instructions--------------------------------------------------------------------13 Accessories------------------------------------------------------------------------------15 DVD Basics--------------
Wiring and Installation -4-
Control Buttons on Front Panel -5-
Function Descriptions MENU Enter and navigate the OSD menus (Main Menu and Hidden Menu). UP Increase the value or navigate the options upwards. DOWN Decrease the value or navigate the options downwards. SOURCE Select the AV source among AV1/AV2/AV3 POWER Soft-power on/off. IR Sensor Allow the remote controller to navigate the OSD(On Screen Display) on this unit and to control other accessories. Infrared Transmitters Be used to transmit audio to the wireless headphone.
Level Lock and Release Latch Allow the user to adjust the viewing angle of LCD panel or lock the panel into the secure position.
Remote Control Operations BATTERY INSTALLATION Before attempting to operate your remote control, install the batteries as described below. (1)Turn the remote control face down. Press down on the ridged area of the battery cover and slide it off. (2)Install two "AAA" batteries as shown. Make sure that proper polarity(+ or -) is observed. (3)Slide the cover back until it clicks. The remote control will operate the unit. It is not a universal remote control and will not control other equipments.
Function Descriptions MONITOR FUNCTION MONITOR POWER Press this button to turn the monitor ON. The current video source will be displayed on screen, and the picture will appear in a few seconds. Press the button again to turn the monitor OFF. SOURCE Any video equipment connected to the AV inputs can be used with the monitor by pressing this button. Each time thebutton is pressed, the AV source will change in the following sequence DVD Input Source. DOWN (1) Shift left or down OSD menu.
DVD FUNCTION DVD POWER Press this button to turn the DVD ON. The current video source will be displayed on screen, and the picture will appear in a few seconds. Press the button again to turn the DVD OFF. EJECT Eject disc from disc compartment or pull disc into the compaRtment. UP Shift up DVD SETUP menu. DOWN Shift down DVD SETUP menu. RIGHT Shift right DVD SETUP menu. LEFT Shift left DVD SETUP menu. ENTER Make a selection. RETURN Return to previous menu screen or playing point. SETUP Navigate SETUP MENU.
DISPLAY Show information on the left-up corner on the screen including Title, chapter/track, time elapsed, and time remained, or turn off the display. PLAYMODE For mp3 use. MUTE Press this button to shut off the sound at the headphone station. The screen will display that the sound has been turned off. Pressing the button again restores sound to the reviously set Level. ZOOM (1) Enlarge the picture in the movie by 2x, 3x and 4x. (2) Shrink the picture in the movie by 1/2x,1/3x, and 1/4x.
OSD FUNCTION CONTROL Turning the unit ON or OFF OSD MAIN MENU SCREEN AUTO(AUTO/ON/OFF) Press MENU key to enter OSD main menu, then select Item in the menu by continuously hitting MENU key. Set the unit condition when power connected the system AUTO: When power connected the machine, the machine will soft-power on or off, It based on the machine was soft-power on or off last time. ON: When power connected the machine, the machine will soft-power on.
OSD HIDDEN MENU MIRROR(OFF/ON) Press MENU key for 5 seconds to enter or leave OSD hidden menu then select item in the menu by continuously hitting MENU key. Set display screen mirror. IR PHONE(OFF/A/B) Select Infrared Transmitters channel. FM CHANNEL(OFF/CH1/CH2/CH3/CH4/CH5/CH6) Select Frequency Modulator channel.
Remote Sensor The unit incorporates an infrared sensor which relays signals from the remote control to be controlled simply by pointing its remote control at the remote sensor eye. This provides control of auxiliary equipment such as an Video Cassette Player. The infrared sensor can relay signals from any manufacturer 's remote control to its respective component connected to the AUX input, such as a DVD player. In this case you must use the remote control supplied with the DVD player.
Accessories Wireless Headphone This unit includes a built-in dual channel infrared transmitter for use with a wireless headphone. The volume can then be adjusted with the controls on each headset . The wireless headphone must be used within a line of sight from the transmitter, as infrared transmission, like visible light travels only in a straight line.
DVD Basics Loading and Playing a Disc To get the optimum use out of DVD, make sure you read this section completely. When you press the POWER button the unit is on and in DVD mode. Put the disc printed-side up into the disc compartment about halfway into the slot .The disc will load automatically and begin to play momentarily. Regional Coding Both the DVD player and disc are coded by region. These regional codes must match in order for the disc to play. If the codes don't match, the disc won't play.
Settings and Adjustments This chapter describes how to set and adjust using the on-screen setup pages included in the SETUP MENU. Using the Setup Menu Using the setup display , you can do the initial setup ,adjust the picture quality , and set the various output. You can also set a language for the on-screen display and the setup display, and limit playback by children. (1) Press the SETUP button to display the icons and pages on the display screen.
Settings for Display Press the SETUP button, use buttons navigating to General Setup Page, and then the button to select TV Display sub-menu.The setup allows you to adjust screen setting(aspect ratio). Press and then use the buttons to select the appropriate setting. The options are as follows: Normal/PS(Pan and Scan) This displays the wide picture on the screen with a portion of the left & right sides removed.
Default Settings Press the SETUP button, and use buttons and going to the Default sub-menu under preference Page. The default setup allow you to reset all options to factory defaults. Press and then press ENTER to carryout the reset. Note : This function will not effect the parental setting.
Settings for Parental (Parental Control) This section of the SETUP MENU allows users to control the content of movie playback from G to ADULT. The parental control function allows you to limit viewing to your preference. 1. After navigating to the Parental sub-menu under Preference Page, use the buttons to select from: KID SAF (Children) G PG PG 13 PGR R NC-17 ADULT Note : The lower the value , the more strict the limitation. 2. Press the ENTER button to confirm the selection. 3.
Settings for Password(Parental Control Password) Press the SETUP button and navigate to Password submemu under Password Setup Page. The menu appears and allows you to change the parental control password. Press and then press ENTER. OLD PASSWORD Input the old password or the default password ( 4digits). NEW PASSWORD Input a new password (4 digits) using numeric buttons. CONFIRM PWD Confirm the new password by entering the same new password again.
Playing Audio CD Using the REPEAT Feature When playing an audio CD, the DISPLAY banner appears automatically. It displays the current track and the amount of the time for that track playing, the total amount of time on the disc and the current time running on the disc. Press the DISPLAY button on the remote to display the DISPLAY banner. The options below show you what happens when you press the DISPLAY button. The default mode for the REPEAT feature is OFF.
Playing MP3 CD MP3 is the format for storing digital audio. An audio CD -quality song can be compressed into the MP3 format with very little loss of quality, while taking up much less space. CD-R/RW discs that have been encoded in MP3 format can be played on your DVD player. 3. Press the UP or DOWN arrow button going through the song list and highlight the song you want. Press ENTER to begin the playback of the highlighted song.
Skipping Songs Using the REPEAT Feature Use NEXT( ) button on the remote control to move to the next song. Use the PREV ( ) button to move to The beginning of the currently playing song. Press the button 2 times to move to the previous song. The default mode for the repeat feature is OFF. Pressing REPEAT consecutively changes the repeat option: • Repeat One - repeat the songs that is playing. • Repeat Folder - repeat the folder that is playing.
Warnings Trouble Shooting v Do not use any solvents or cleaning materials when cleaning the video system. v Do not use any abrasive cleaners, they may scratch the screen. Use only a lightly dampened lint free cloth to wipe the screen if it is dirty. v Lock the LCD screen in the fully closed position when not in use. v Before putting on headphones always adjust the volu- me setting to the lowest position.
Specifications LCD Backlighting CCFL Resolution Pixels 1440(W)X234(H) Operation Temperature Storage Temperature Expected Backlight life Sensitivity Video Display System Audio Output Operating Voltage 0-60 oC -20-80 oC 10,000hours 35db NTSC 0.